Kit's Crafts
  • Home
  • About
    • Selling Handmade Goods
  • Knitting
  • Crochet
  • Sewing
  • Crafting
    • Just for Fun
    • Wall Decor
    • Christmas Fun
    • Party On
  • From the Kitchen
    • Chocolate
    • Sweet
    • Savory
  • Quiet Book
  • The Shop

White Chocolate Salted Caramel Butter Bars

12/19/2013

0 Comments

 
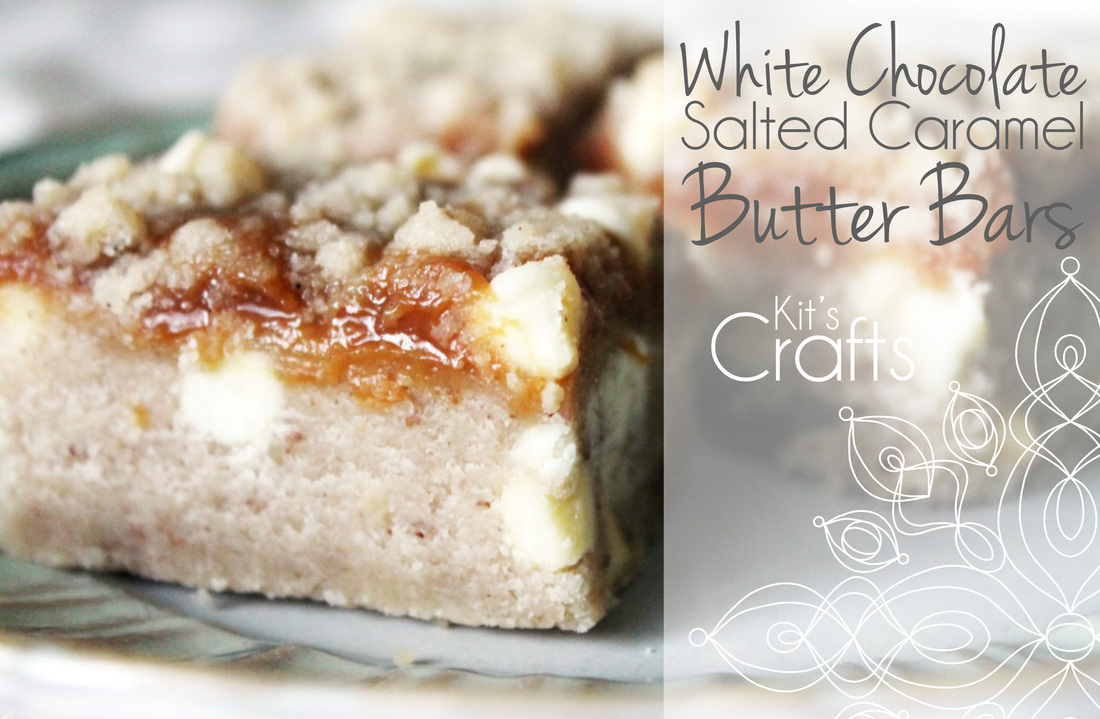
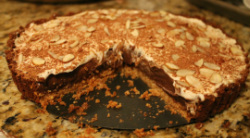
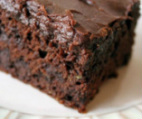
So, apparently, my favorite sweet combination this year is caramel and white chocolate... I just can't help myself! These two flavors compliment each other so nicely!  Anyway, today, I bring you a heavenly recipe that includes both white chocolate and caramel, as well as butter and pecans. While perusing Pinterest, I stumbled upon Salted Caramel Butter Bars by the Recipe Critic (which is a delightful recipe), however, I had some white chocolate chips and crushed pecans left over from another recipe and thought, "why not throw them into the mix?" Seriously, if you want to wow your Christmas guests or perhaps your neighbors at a cookie exchange, bring these AMAZING bars!
Kit's Crafts - White Chocolate Salted Caramel Butter Bars
Ingredients:
2 cups Flour
1 teaspoon Cinnamon
1/8 teaspoon Nutmeg
1/4 cup Pecan Halves
1 cup (2 sticks) Unsalted Butter, Softened
3/4 cup Powdered Sugar
1/2 cup Sugar
1 1/2 teaspoons Vanilla
1 cup White Chocolate Chips
1 cup Caramel Bits or unwrapped Caramels (about 20)
1/4 cup Whole Milk
1/4 teaspoon Vanilla
1 teaspoon Coarse Sea Salt

Directions:
Preheat oven to 325 degrees. Line an 8" x 8" pan with parchment paper or greased tin foil.

In a small bowl, combine flour, cinnamon and nutmeg. Set aside.

Place pecans in a ziplock bag and pound with a mallet or a rolling pin until all nuts are crushed. You want tiny bits, but nothing to really chew. In a large mixing bowl, beat butter and crushed pecans for about 3 minutes on medium. Add in both sugars and combine until fluffy. Stir in vanilla and mix until just combined. Use a rubber spatula to fold in the flour mixture until there are only streaks of flour. Your dough will be crumbly, but will stick together when pinched. Mix in the white chocolate chips. Put about 1/2 cup of the dough in a small air tight container and place in the fridge. Press the remaining dough into the pan. Bake in the preheated oven for 20 minutes.

Melt the caramels, milk, and 1/4 teaspoon vanilla in the microwave for 1 minute, then stir until smooth. Pour caramel over the crust, spreading it out in an even layer. Sprinkle salt over caramel. Pull the dough from the fridge and crumble the dough over the top of the caramel layer.

Return to the oven for 25 - 30 minutes. The filling should be bubbly and the top firm and slightly golden. Cool the bars completely in the pan before cutting into 16 equal bars.

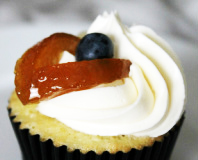
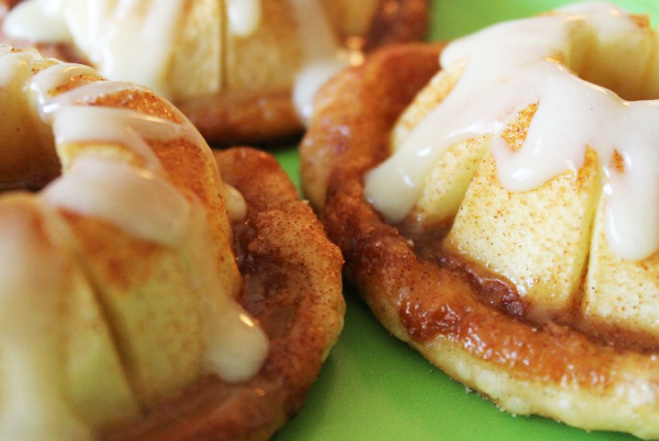
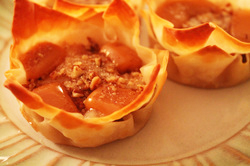
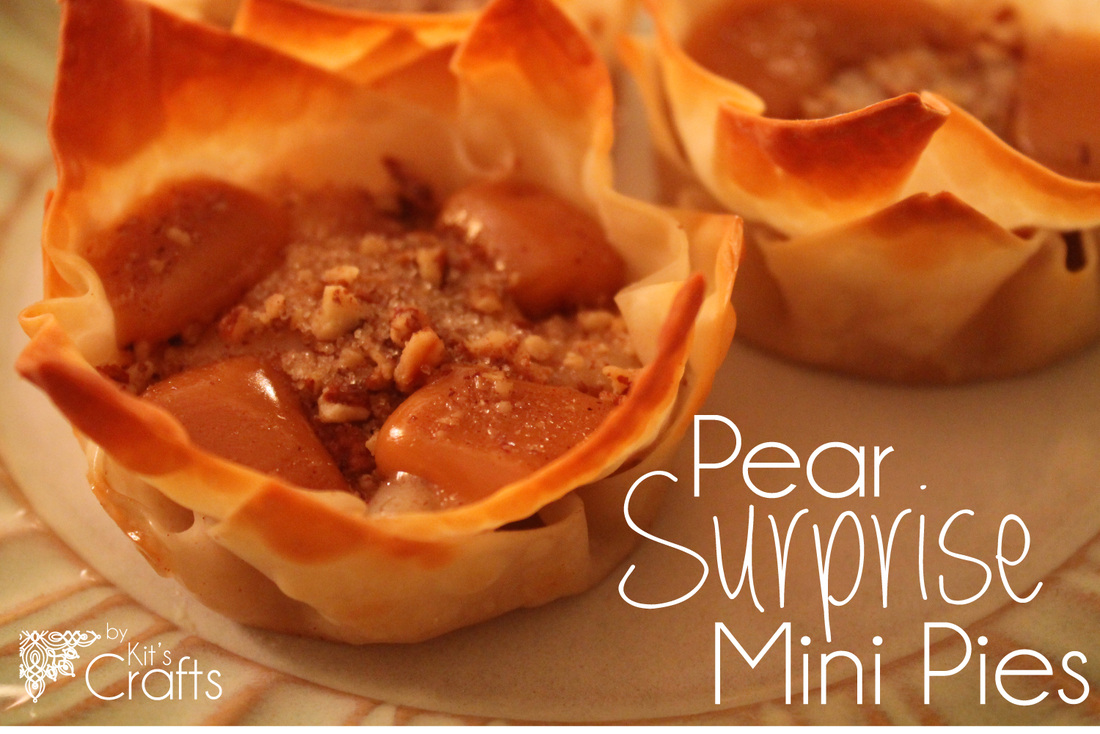
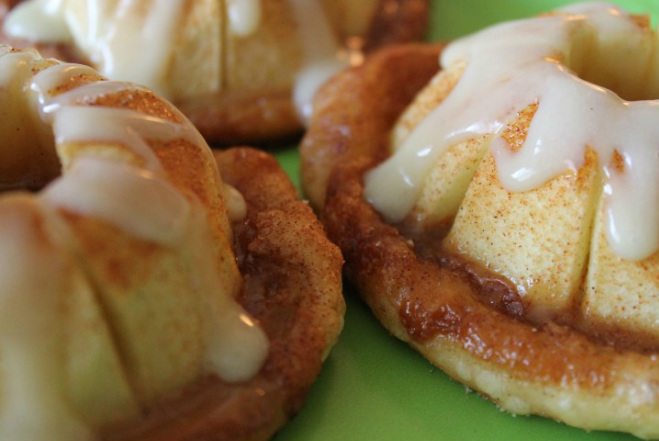
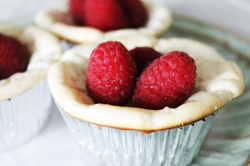
With some of the left over ingredients, you could make my Pear Surprise Mini Pies or Caramel Apple Tartlets.

You might also like:

Picture
Picture
Picture
Picture
0 Comments

Pear Surprise Mini Pies

11/12/2013

2 Comments

 
Last week, I made some really yummy veggie potstickers I found over at the Food Network, which used wonton wrappers (as most pot sticker recipes do). The problem with any recipe that involves wonton wrappers is that you rarely use all of the wrappers that come in the package. I hate to waste anything, so I went in search for a recipe to use up these little squares of dough. There are TONS of ideas out there; everything from lasagna cupcakes (very good) to deep fried pillows (sounds amazing!) to just simply buttering and sprinkling with cinnamon and sugar then baking. While many of the ideas sounded enticing, I kept thinking about a pear I didn't want to go bad as well as some leftover white chocolate (from the cake pops a few weeks ago) and some crushed pecans (also a left over). This brought to mind my Caramel Apple Tartlets from a year ago and with all of that in mind, I came up with the following recipe. Let me just tell you, I ate about 3/4 of them without even thinking they are so good!
Kit's Crafts - Pear Surprise #MiniPies
Ingredients:
24 Wonton Wrappers
1 Pear, diced (I didn't peel it, but you can)
1/2 cup White Chocolate Chips
3 tablespoons sugar
1 teaspoon Cinnamon
dash of Ginger
1/4 cup crushed Pecans
12 Caramels, unwrapped and cut into 4 pieces each (48 pieces)
Spray Oil
Coarse Sea Salt

Directions:
Preheat oven to 350 degrees. Grease a 12 cup muffin tin with spray oil.
Press 1 wrapper into each cup. Divide pear and white chocolate chips into each cup evenly. Combine sugar, cinnamon and ginger in a small bowl. Sprinkle half of the sugar mixture over the pears and chocolate. Press another wrapper into each cup. Put 4 pieces of caramel in each cup. Sprinkle with the pecans and remaining sugar mixture. Spray with oil. Sprinkle VERY LIGHTLY with salt (between 3-5 crystals per cup)
Bake for 10 minutes or until edges are browned and crispy. 

The only change I might make the next time I make these is to leave the caramel out and melt it instead, then, once baked, top each cup with a scoop of ice cream and drizzle with the caramel. Mmmmmmmm.....

So, do share, what have you made with wonton wrappers?

You might also like

Picture
Picture
Picture
Picture

Where I partied:

Picture
2 Comments

Cake Pop Save

10/28/2013

0 Comments

 
Do you ever go to make something that seems really straightforward and everyone you know who has tried it talks up the simplicity of the project? So you go at it with a head full of confidence thinking, "I'm crafty, I make stuff, I got this" only to find that what you are trying to do is much more difficult then you thought. Enter the cake pop.

Pretty much everyone I know has made cake pops and I have seen them all over the web. So, when my husband's family decided to do a Halloween Party, I thought, "Perfect, I will make cute little ghosts!" I gathered my supplies, baked up a box cake, watched a tutorial online and went fearlessly to work. 

Apparently, I overestimated my abilities. When it came to dunking, my ghosts kept falling off into the chocolate. I ended up drizzling them instead (what a mess!), which "saved" them, however, I made the little guys too big and they kept falling off the sticks throughout the little soiree.

Here is the lesson: Cake pops are tricky! You need to have the perfect ratio of frosting to cake, DO NOT over heat your chocolate, and (perhaps the biggest failure) DO NOT make them too big. I am sure there are other things I did horribly wrong, and, since my husband lovingly told me to try them different the next time (as if there would be one) I would love to hear your suggestions!
Kit's Crafts - Cake Pop Save

You might also like

Picture
Picture
Picture
Picture
0 Comments

Stenciled Sprinkles Cake

10/15/2013

2 Comments

 
Here is a sweet cake I made for my daughter. I have seen stenciling all over Pinterest and thought I would give it a try. Turns out, it is immensely easy. So, here are the few steps.
Kit's Crafts - Stenciled Sprinkles
Materials:
Wax Paper
Paper/Printer
Craft Knife/Self Healing Mat (preferable) or Scissors
Frosted Cake
Sprinkles of your choice
Kitchen Brush
Tooth Pick

Ok, to start out with, determine what you want to stencil and print it out at the size you want it to be. I did a 2 in Poor Richard font, which came with my computer. 

You have two options for the next step:

For scissors, trace the picture onto the wax paper and cut it out.

For a craft knife, tape the image to the mat, then tape the wax paper on top. Carefully cut the image out.

Now, gently place the wax paper onto the frosted cake and carefully push down and corners that roll up.

Cover the cut out in sprinkles, brush away the excess sprinkles and carefully lift off the wax paper.

Use a tooth pick to remove any stray sprinkles and smooth out areas of the cake that were tampered by the wax paper.

Too easy, right?
Kit's Crafts - Stenciled Sprinkles

You might also like:

Picture
Picture
Picture
Picture

Where I partied:

Photobucket
Picture
KitchenFun
2 Comments

Cake Mix Cookies with Bananas

9/5/2013

0 Comments

 
I don't know about you, but it seems like every time I buy bananas, the majority of them go bad before my family gets a chance to eat them. All growing up, when our bananas went bad, the go to recipe was banana bread. I like banana bread as much as the next kid, but a few weeks ago, I had some aging bananas and was looking for something a little more sweet. That is when I came across marvelous blog Inside BrewCrew Life where a recipe for Banana Caramel Cookies was featured. I made them that night and was completely delighted! It occurred to me that this could be the base for any type of cookie. So, I modified the recipe slightly and now I am sharing it with you.
Kit's Crafts - Cake Mix Cookies with Bananas
The great thing about this recipe is that it is very adaptable for whatever you flavor tickles your fancy and the banana flavor isn't overpowering, which also makes it a delightful recipe!

Ingredients:
1/2 cup Butter, softened
2 Bananas, smashed
1 teaspoon Vanilla
1/4 cup Flour
1 Cake Mix, flavor of your choice
Any add-ins of your choice (chocolate chips, nuts, craisens, toffee bits etc.)

Directions:
Preheat oven to 350F and line a baking sheet with parchment paper.

Combine the butter and bananas with a hand mixer or in the bowl of a stand mixer until well blended. Stir in the vanilla. Add in the flour and cake mix, until just combined. Then add any extras you would like. Drop dough onto prepared baking sheet from a spoon to form 1" to 1.5" dollops with about 2" in between. Bake for 10-12 minutes or until the edges of the cookies look slightly browned. Let cool for a few minutes on the baking sheet before transferring to a cooling rack to reach room temperature.

Makes about 25-30 cookies.

You might also like:

Picture
Picture
Picture
Picture

Where I partied:

Foodies and Crafties Soiree
0 Comments

Fancy Pants Cupcakes

8/27/2013

3 Comments

 
These cupcakes have been quite the labor of love. The inspiration came from Dorie Greenspan's White Chocolate Brownies, which is perhaps my favorite recipe of all time. They are comprised of subtle flavors that compliment each other so perfectly and the texture is fabulous! Anyway, so I set out to create a cupcake with these fabulous brownies in mind. I owe many thanks to my good friends Devin and Stephanie Davis who continually offered suggestions and "suffered" through taste tests. Anyway, the picture below features the cupcake, of course, which Devin frosted, and I added the candied orange peel (that Devin made, which takes a month!) and blueberry.
Kit's Crafts - Fancy Pants Cupcakes
To give you a sum up of this delightful cupcake, it contains almonds, orange zest and blueberries and then is covered with a decadent white chocolate butter frosting. Make them tonight, you will NOT regret it!

Makes 30 cupcakes

Cupcake Ingredients:
2 1/2 cups All Purpose Flour
1/2 teaspoon Baking Powder
1/2 teaspoon Salt
1/3 cup Toasted Sliced Almonds (or toasted almond flour)
1 cup butter at room temperature
1 cup Sugar
zest from 1 Orange
4 Egg Yolks at room temperature
1 tablespoon Vanilla
1 cup buttermilk at room temperature
4 Egg Whites at room temperature
1 cup Sugar
1 cup Blueberries or Raspberries (it may be tempting to put more in, but refrain, it will overpower the other flavors)

White Chocolate Frosting Ingredients:
2 cups White Chocolate Chips
2 cups Unsalted Butter slightly softened

Directions:
Center rack in oven. Preheat oven to 350F. Line two 12 cup muffin tins with cupcake liners. (Although you will probably need three) 

Sift together flour, baking powder and salt. Reserve about 1 tablespoon of the dry mixture and place in a small bowl. Set both dry mixtures aside.

Pour almonds into a Ziplock bag and zip shut, squeezing the air out as you go. Pound the almonds with a mallet or a rolling pin to crush them. You want tiny bits, nothing to really chew. Add almonds to a large bowl or the bowl of a stand mixer, along with the butter. Cream together for about 3 minutes on medium. Zest the orange over the first cup of sugar, then remove the zest and set aside to add later. Add the sugar to the butter mixture, blending until light and fluffy. Mix in the egg yolks one at a time, blending after each addition. Turn the mixer to low and add about 1/3 of the dry ingredients and mix until there are just streaks, then add about 1/3 of the buttermilk and mix until just blended. Continue alternating the dry ingredients and the buttermilk in this fashion, only mixing until streaks remain, being careful not to over blend. With the last addition of the buttermilk, also add the vanilla and zest still only mixing until streaks are left.

In a separate bowl, with clean a mixer, whip the egg whites with the remaining cup of sugar until they reach a medium stiff peak. Gently fold the whipped whites into the rest of the batter until just a few white streaks remain.

Rinse the berries and coat with the reserved dry mixture. Fold berries into batter.

Ladle batter into muffin cups, filling each cup 2/3 full. Bake for 18 - 20 minutes or until the edges are golden and a toothpick entered into the center comes out clean. Let cupcakes cool to room temperature.

For frosting, melt chocolate in a double boiler with 1/4 cup of the butter until smooth, stirring occasionally. Set aside and Let cool a bit while you whip the butter.

Place the remaining 1 3/4 cups butter in the bowl of a stand mixer or in a large mixing bowl. Whip the butter on medium high for about 1-2 minutes or until light and fluffy. In a slow stream, blend in the melted white chocolate. Keep mixing until well blended. Once the cupcakes are room temperature, either pipe or spatula frosting on top.

You can make the cupcakes at least 2-3 days ahead of time; keep at room temperature in an airtight container. The frosting should only be made the night before and kept in the fridge in an airtight container. Wait to frost cupcakes until, at most, an hour ahead of serving.

Okay people, now it's your turn. Do share, what is your most favorite recipe of all time?
Kit's Crafts - Fancy Pants Cupcakes

Picture
3 Comments

Semi-Healthy Chocolate Cake

8/22/2013

11 Comments

 
I LOVE the harvest season! I don't have a garden, but my in-laws always grow way more veggies then they need, so I lovingly reap the rewards. Last week, I got a few zucchinis, so of course I had to make zucchini brownies. However, I thought I would try something new and replace the sugar with honey and the oil with yogurt. The yogurt makes the brownies more cakey and the honey makes them more moist, hence why this is a recipe for a cake. This recipe is loaded with chocolate (which makes it not so healthy) but I figured the zucchini, honey and yogurt make it somewhat healthy, hence the name. Anyway, share links to recipes you make every year during the harvest season in the comments!
Kit's Crafts - Semi-Healthy Chocolate Cake
Cake Ingredients:
2 cups All-Purpose Flour
1/2 cup Unsweetened Cocoa Powder
1 1/2 teaspoons Baking Soda
1 teaspoon Salt
1/3 cup Plain Yogurt or Greek Yogurt
1 1/3 cups Honey (preferably local)
2 teaspoons Vanilla Extract
2 cups Shredded Zucchini
2 cups Milk Chocolate Chips

Icing Ingredients:
1/4 cup Butter
6 tablespoons Unsweetened Cocoa Powder
2 cups Confectioners' Sugar
1/4 cup Milk
1/2 teaspoon Vanilla Extract

Directions:
Preheat oven to 325 F. Grease and flour a 9" x 13" baking pan.

In a medium bowl, combine flour, 1/2 cup cocoa powder, baking soda and salt. Set aside.

In a large bowl, mix together yogurt, honey and vanilla until well blended. Stir in the flour mixture. Fold in the zucchini and chocolate chips, then spread evenly into prepared pan.

Bake for 30 to 35 minutes or until the cake springs back when gently touched. Place on a cooling rake until room temperature.

While the cake is cooling, prepare the icing by first melting the butter in a small saucepan. Whisk in the remaining cocoa powder, then set aside. In a medium bowl, combine the confectioners' sugar, milk and vanilla until well blended. Stir in the butter mixture then spread over the cooled cake.

P.S. as a little tip, I usually get WAY more zucchini then our little family needs, so I send it through the grater on my food processor then freeze it in 2 cup increments so I can make stuff throughout the year!
Content in the Meantime
Picture
11 Comments

Strawberry Bars

8/6/2013

0 Comments

 
I found the recipe for these phenomenal Strawberry Bars through Yummly and let me tell you, this recipe deserves a serious shout out. It is so good, I made it twice in one week and I didn't even share it with my neighbors! It is one of those desserts that you think, "oh, I will just have a small piece", but don't kid yourself, you will definitely be going back for seconds and thirds. It is a perfect combination of pie and bar cookie with a light and decadent strawberry layer on top of a crust that is reminiscent of a buttery short bread. Seriously, make this tonight. Your will not regret it!  
Strawberry Bars
0 Comments

Garlic Spirals

7/30/2013

0 Comments

 
Lately, on Pinterest, I have seen a lot of different ways to make monkey bread that depart from the typical gooey sugar and cinnamon syrup. One such recipe was Mini Garlic Monkey Bread over at Crumbs and Chaos. This recipe is simple enough and tastes pretty good, but, as usual, I took it up a notch and made spirals so that the flavoring spreads more evenly.
Kit's Crafts - Garlic Spirals
Ingredients:
2 cans (8 oz) Pillsbury® refrigerated crescent dinner roll (or you could just make your favorite baking powder biscuit dough from scratch)
6 Tablespoons Butter
4 Cloves Garlic (pressed, finely chopped, or grated)
1 Tablespoon Dried Parsley, Basil, Oregano, OR Italian Seasoning
1/4 cup Parmesan cheese


Preheat oven to 400F. Grease a 12 cup muffin tin.

In a small saucepan, melt the butter. Add the garlic and cook for 30 - 60 seconds. Remove from heat and stir in the parsley and Parmesan cheese. Set aside.

Open the cans of crescent rolls and unroll the dough into a flat rectangle (or roll dough from scratch into a rectangle). Brush the dough with the butter mixture. Starting on one of the long sides, begin tightly rolling the dough. When you reach the end, pinch the seam shut. Using dental floss, cut slices about 1/2" to 1" thick. Place up to 3 slices in each of the muffin cups. If needed, brush the tops with more of the butter mixture.

Bake for 12 - 14 minutes or until the edges are browned.

Another great twist on this classic is Maple Bacon Monkey Bread. Just switch out the butter mixture here and replace it with the maple bacon mixture. Oh, and add about a 1/2 cup diced apples to the mix. SO GOOD!

You might also like:

Picture
Picture
Picture
Picture
0 Comments

Jacob's Pizza

7/25/2013

0 Comments

 
About a year ago, at a family get together, my nephew introduced me to the delightful taste of combining apple slices with cheese and crackers. It was so good, I have done it several times since. More recently, while enjoying a lovely cheese plate his mother put together, Jacob added pepperoni to the mix. I must say I don't really care for pepperoni, but in this combination I loved it! About a week later, when I was planning out my meals, I was inspired by that little combo to create this pizza. The dough is a cross between a baking powder biscuit and focaccia bread. The sweetness of the apples really calms the spicy of the pepperoni creating a wonderfully balanced mix of flavor. Try it out and tell me what you think!
Kit's Crafts - Jacob's Pizza (Apple Pepperoni) #pizza
Pizza Dough Ingredients:
2 1/2 cups Flour
2 3/4 teaspoons baking powder
1/2 teaspoon sugar
1/4 teaspoon chili powder
1 teaspoon each salt, rosemary, basil, garlic powder, ground pepper
1 Tablespoon oil
3/4 to 1 cup water

Pizza Toppings:
olive oil brushed on top
1/4 cup shredded Parmesan Cheese
1 cup thinly sliced Sweet Apples (fuji, golden delicious, gala, etc.)
1 (8 ounce) package sliced Pepperoni Sausage
1/2 cup Cheddar Cheese

Directions:
Preheat oven to 400F. Line a cookie sheet with parchment paper.
Mix together the dry ingredients for the pizza dough. Make a well in the center and fill it with the oil and the water, then begin stirring with a wooden spoon until a ball forms. Add more water if the dough is dry or stiff. You should have a soft, not sticky dough. Place the dough on a floured surface and roll to about 1/2" thick. Place dough on cookie sheet.
Brush dough with oil, then sprinkle with the parmesan cheese. Place the apples on the dough then layer them with the pepperoni. Sprinkle the pepperoni with the cheddar cheese.
Bake for 15 - 25 minutes or until cheese is bubbling and the crust is browned.

If you want to take your pizza to a new level, check out the Stuffed Pizza over at I Want Crazy.

You might also like:

Picture
Picture
Picture
Picture

Where I partied:

Foodies and Crafties Soiree
0 Comments
<<Previous
Forward>>
    Kit's Crafts
    Hey there! I'm Kristin, aka Kit. Here is just a peek into my crafting mind. I hope you find something to spur your creativity!
    Instagram

    Kit's Crafts Shop

    Popular Posts

    Picture
    Picture
    Picture
    Picture
    Picture
    Picture

    RSS Feed

    Picture
    Kit's Crafts
    Picture
    The Yarn Box

    Featured Here

    Picture
    Moogly
    Picture

    Categories

    All
    About
    Baby
    Baking
    Bio
    Caramel
    Child
    Chocolate
    Christmas
    Cooking
    Crochet
    Decor
    Dessert
    Dress
    Free Knit/crochet Pattern
    Free Sewing Pattern
    Interior Design
    Knitting
    Link Party
    Materials
    Pattern
    Quiet Book
    Quiet Book
    Recipe
    Selling Handmade Goods
    Sewing
    Spats
    T Shirt
    Tutorial

    Archives

    January 2020
    July 2019
    November 2018
    September 2018
    August 2018
    July 2018
    May 2018
    April 2018
    February 2018
    January 2018
    April 2016
    September 2015
    March 2015
    February 2015
    November 2014
    October 2014
    September 2014
    August 2014
    July 2014
    June 2014
    May 2014
    April 2014
    March 2014
    February 2014
    January 2014
    December 2013
    November 2013
    October 2013
    September 2013
    August 2013
    July 2013
    June 2013
    May 2013
    April 2013
    March 2013
    February 2013
    January 2013
    December 2012
    November 2012
    October 2012

Powered by Create your own unique website with customizable templates.