|
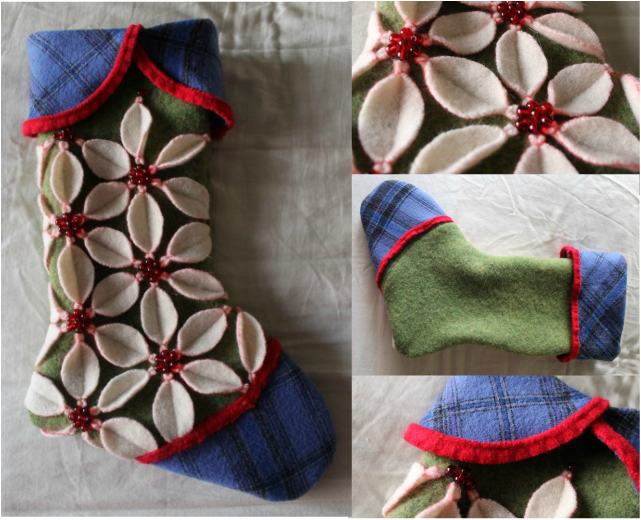
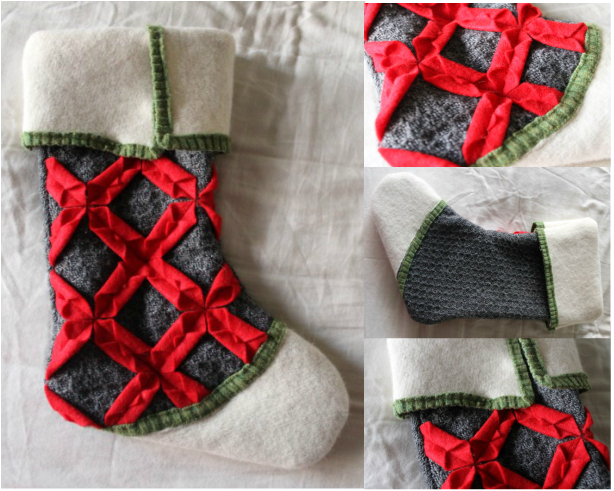
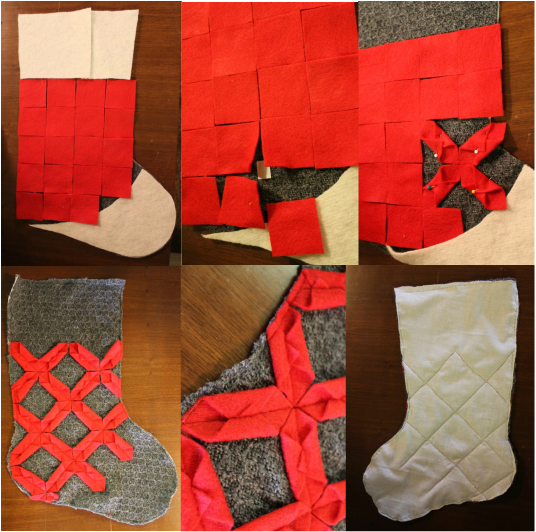
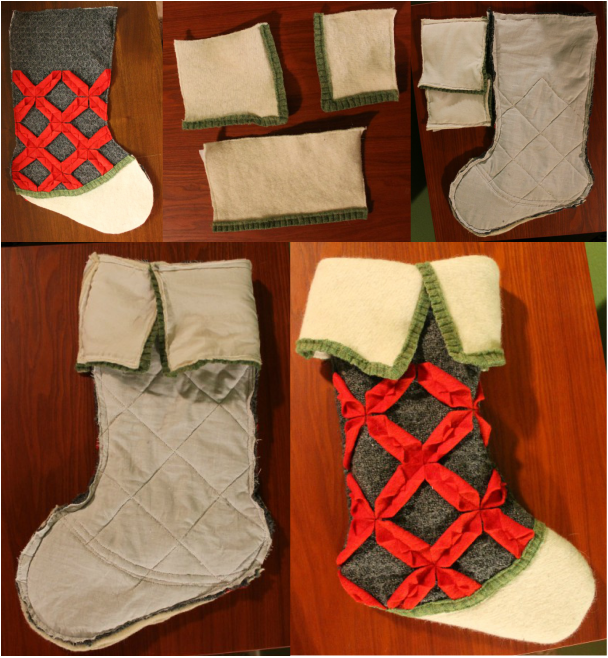
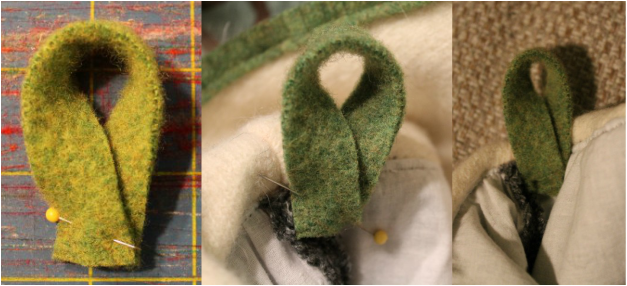
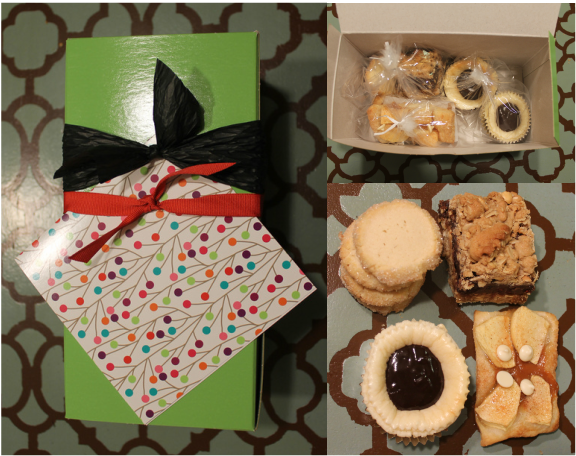
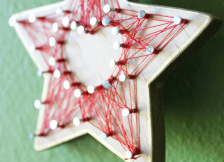
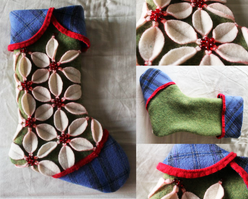
Talk about last minute... here is my stocking and I am currently working on a stocking for my daughter, which I am guessing won't be done until Christmas Eve, if that. It may end up being just the front of the stocking with stuffers around it. Anyway, I would have waited until next year to post these for those of you who want to replicate the idea, but I wanted to get it posted before I forgot the details. Plus, I figured the techniques I employed could be used for other applications. Materials: * Felt * Thin fabric like muslin if your felt/background fabric is especially stretchy * Clear thread * Pattern UNCHECK the fit to page box (The actual stocking needs to be pieced together) (Also, both cuffs are included in this pattern) * Shiny Red Beads (I found mine at Walmart in a dollar bin) Start by cutting all but the poinsettia petals from your fabric Poinsettias: * Cut 37 poinsettia petals (I outlined mine with a red ball point pen then cut them out purposely leaving the outline) * Arrange petals as shown, then using a ruler, line them up and pin to the sock * Sew straight lines * By hand, pull a needle and thread up through the back near an end of one petal, in the center as shown * Go from front to back near where the curve meets the straight part of the petal * Go from back to front on the other side of the petal in the same place and pull your needle all the way through the other side of the petal * Pull needle down from topside to underside of sock where you firs came up * Do this on all petal ends and when traveling to petals ends that are further away, go through the top layer of the fabric so the thread doesn't get caught when you stuff the stocking * Sew the beads to the ends of the petals, putting one at each end and one in the center For the remainder of the stocking, follow the directions for the Origami Stocking Every year, right before Christmas I think, "Next year I am going to finally knit stockings for Christmas", then I usually spend some time online looking for a pattern I like enough to make, but eventually Christmas comes and goes without any stockings being hung with care. So, last week this thought came, but instead of looking for patterns I could knit, I remembered a felt origami pillow I saw not long ago and loved. Some of you may remember the felt flowers I made a couple weeks ago from thrift store sweaters I felted. Well, I bought a couple more thrift store finds and went to town replicating that pillow in stocking form. I'm quite pleased with the end result. Materials: * Felt * Thin fabric like muslin if your felt/background fabric is especially stretchy * Clear thread * Pattern UNCHECK the fit to page box (The actual stocking needs to be pieced together) * Peel n Stick Fabric Fuse Start by cutting all pieces from felt. I also cut a lining from muslin for the background because the sweater I used was cotton (which doesn't felt) and stretchy. Front Pattern: * Cut 19 2"x2" squares * Assemble squares as shown * Lift the corners where 4 squares meet and attach a small piece of fabric fuse to background fabric * Remove wax paper from fabric fuse and attach the corners, pushing them together before pressing down * Working in a diagonal line and only doing 2 corners of each square, repeat this method until all of the squares are attched * Pull up the two unattached corners of one of the squares and pin, overlapping the corners * Repeat until all squares are elongated 6-sided shapes * Straight stitch from corner to corner through all applique pieces * Cut the appliques where they spill over the edge of the sock * Stitch around the edge of the stocking if you are using muslin Cuffs and Toe: * Cut a 1/2" strip of felt (I used the ribbed bottom of one of the sweaters) * Pin the toe to the front, then place the strip along the edge of the toe and pin * Sew strip to front going through all layers * Repeat for back side * With right sides together, sew around edge of sock leaving the top open * Place and pin strip along edge of cuffs then sew strip to cuffs * Sew 3 cuff pieces together to make one long strip * While sock is inside out and with right side of cuff facing wrong side of sock, match the seams of the sock to the seams of the cuff and pin, then pin the rest of the cuff to the sock * Sew along the top * Turn sock right side out and flip cuff down * Iron flat if needed Loop: * Cut a 5"x3/4" rectangle of felt * Fold and pin to stocking as shown near the seam on the left side of the stocking * Pull the cuff up and zig zag stitch the loop to the body of the stocking Christmas is my favorite time of year and one of my most favorite things about Christmas is baking!. Yesterday, I spent the whole day baking for my neighbors. I made Dorie Greenspan's Chocolate Oatmeal Almost-Candy Bars and her Sadies (which are probably my favorite Christmas treat) as well as my cheesecake cupcakes and the caramel apple tartlets I made a while ago. All in all, those who recieved are quite lucky!
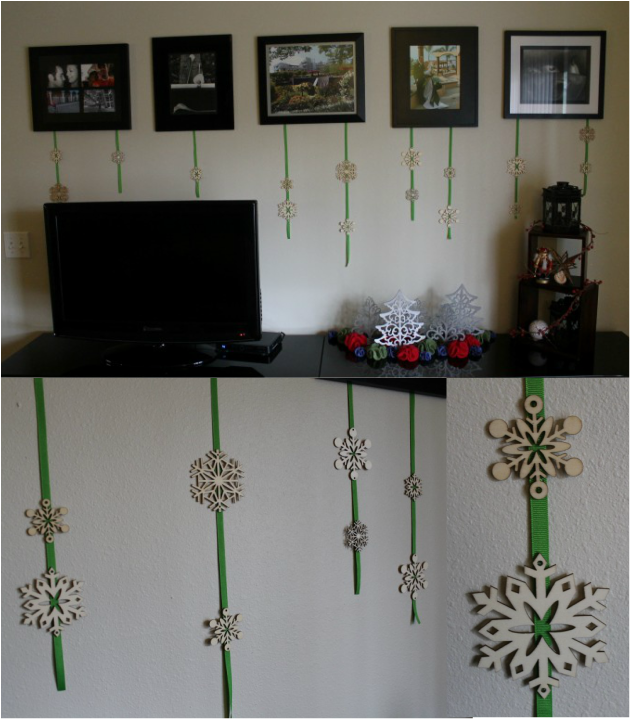
I bought these wooden snowflakes last year at Michaels. I have seen them this year at Anthropologie (which of course are much more expensive and beautiful). I pulled them out this year and since we aren't getting a tree I began thinking of other places to spread the holiday cheer. I wanted to somehow incorporate the decor I have up all year into the fun and my mind went to this wall. I got out the glue gun and some ribbon and the picture below is the product of my imagination.
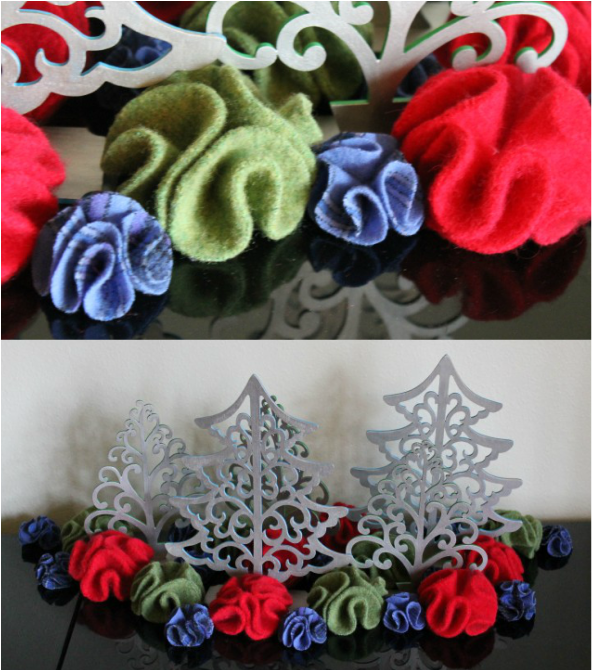
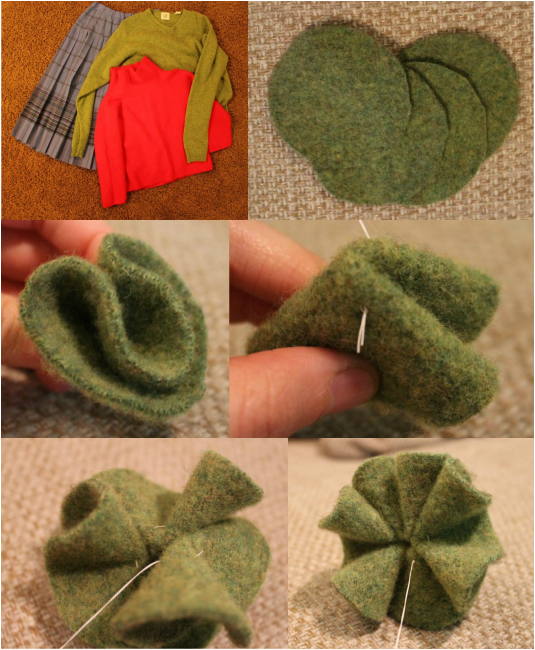
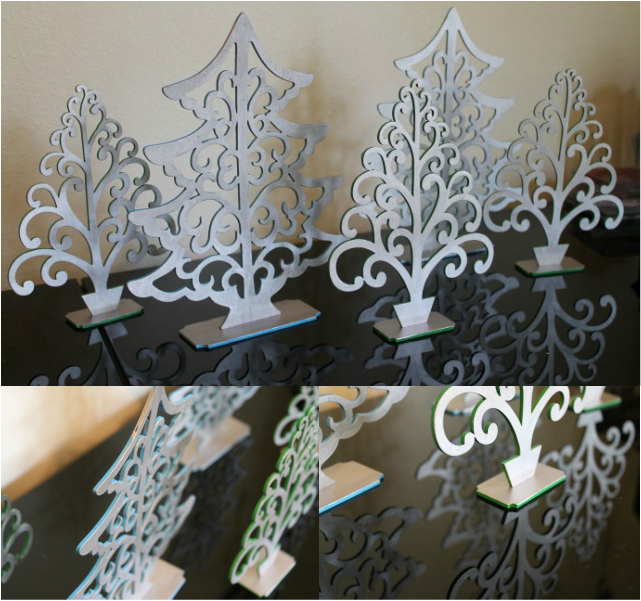
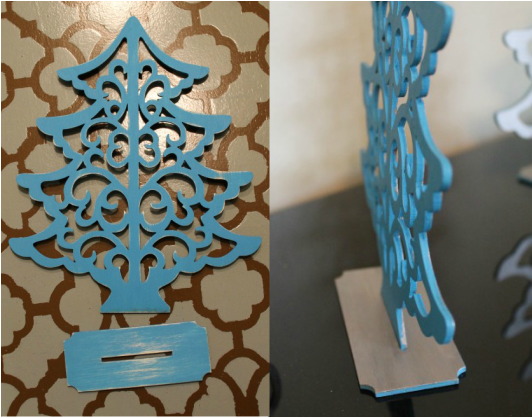
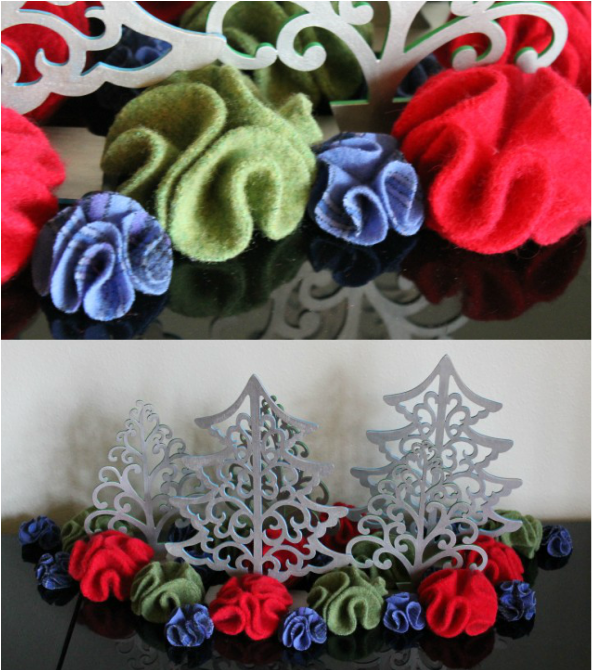
I decided that my Christmas forest needed vegetation. I settled on felt flowers, but I wanted real felt, not just the thin stuff at the craft store. I headed to the local thrift store and looked for sweaters made from animal hair, specifically wool. I came across a bright red one that was partially angora, (which is perhaps the softest of all the animal fibers) a green wool men's sweater and a blue plaid skirt. I immediately put them in the washer, turned it to hot and my felt was made. Below is the outcome. Materials: * 4 Felt Circles * Needle and Thread Fold 1 circle in half, then in half again. Then, pull thread through the corner created by the folds. Repeat the same process for the remaining circles. Finally, go back through the original circle, tie a knot and break the thread. As a side note, I'm thinking that at some point I will turn these into a garland. You might also like:This year for Christmas, we decided not to get a tree. I am low on Christmas decorations, so I decided to head over to Michaels and see what I could find to fill the void. I came across these little wooden laser cut trees on sale and the Christmas forest was born. Originally, I wanted to silver leaf these little guys, but the $9 price tag plus the cost of adhesive was a little much (I'm cheap). Then I came across silver leaf liquid and decided to give it a try. So, here is my process: 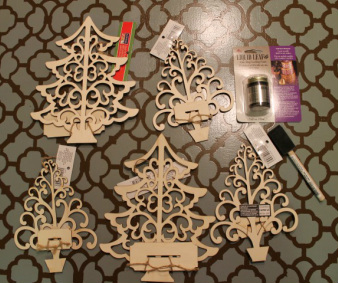 Materials: * Wooden Trees * Liquid Leaf * Small Foam Brush * Acrylic Paint * 1/4" Paint Brush On the directions for the liquid leaf, it says you need to prime the object before liquid leafing it. So I busted out my acrylic paints and did two coats, but sanded the trees after the first coat because they were a little rough. Once the paint dried, I opened up the liquid leaf. It really stinks so you need to be in a well ventilated area. I got a bit of a head ache from it. Anyway, I used the 1/4" paint brush to paint the front of the trees. I let that dry overnight, which isn't necessary, but I did. Then I set them up on my TV stand. I'm thinking I will add something made from felt around the bases to help it stand out a bit. As an update, I later added felt flowers to little forest.
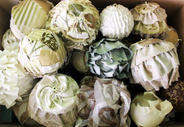
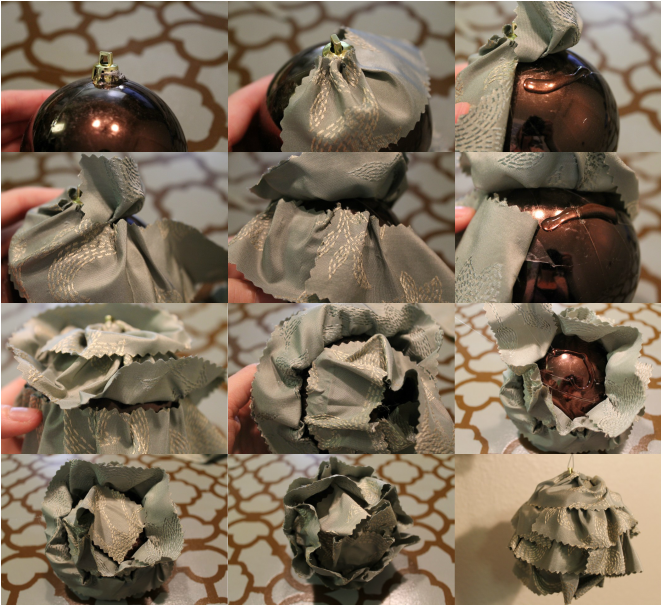
6 years ago, Jeff and I were married 2 days before Christmas. Our colors were black, brown, green and cream. For the decorations on the tables, we used black and brown Christmas balls of various sizes. As a result, I have a ton of ornaments. Last year, we bought a real Christmas tree for the first time and I couldn't stomach putting these basic ornaments on, so I rummaged through my stash of fabric samples and busted out the glue gun and came up with the ornaments below. I did a few different things with these. Once I got started my imagination ran wild. For one, I just wrapped strips of fabric virtically around the ball. For another one, I took small squares of fabric and just started gluing. With a fabric that I particularly liked, I just cut a large square and folded it up putting dots of glue to hold it in place. For the bottom left, I cut almond shaped pieces and glued them on. Below are picture instructions for the ruffley ones.
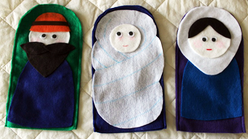
Every year for our church Christmas party the children dress up and act out the nativity. To streamline the process, we decided to do a puppet show. Using some finger puppets as inspiration, I came up with patterns for hand puppets. I got together with the rest of the Primary Presidency and we spent the better half of the day creating these super cute little puppets. Below the pictures is a list of materials and a link for the patterns. Materials: * Patterns (the donkey's mane and the cow's spots are not included) * Felt * Googily Eyes * Various Buttons and Ribbon * Pink Ink Pad and Q-tip (for rosy cheeks) * Markers * Glue Gun * Sewing Machine/Clear Thread (Optional) We sewed the glove part of the puppets together because we figured that would be easier than gluing it, but you could glue it. Also, the pattern does not allow for a seam allowance for the glove part because we did not turn them inside out after sewing. Everything else is glued onto the glove. Oh, and we are starting our Nativity with Samuel the Lamanite prophesying of Christ's coming. |
Hey there! I'm Kristin, aka Kit. Here is just a peek into my crafting mind. I hope you find something to spur your creativity!
Kit's Crafts ShopPopular Posts Featured HereCategories
All
Archives
July 2020
|







 RSS Feed


