Canary Dress
I love to shop the remnant bins at fabric stores. I generally get inspiration of what I could make by rifling through the neatly wrapped bundles. Such is the case for the Canary Dress. About a month ago I found the gray polka dot and the yellow flowered fabric and immediately decided it needed to be a skirt for my daughter. About a week later, my niece showed me her Easter dress and I thought, "Hmm. Perhaps that yellow and gray skirt I was thinking of should really be a dress." So, when I got home, I went through the remnants I had been collecting and found a plain yellow cotton and a yellow lining fabric. I threw them all in the washer and began drawing up a dress for Easter.
So. Here is the deal with this dress. I really wanted to post a tutorial on it, but, quite frankly, I had to make A TON of adjustments as I went a long. However, if you are interested in making a similar dress, I will tell you where I looked for tutorials as well as the basic construction. I do have a few progress pics, but it is somewhat limited as I realized pretty early on that this would not be a good project to post as a tutorial.
Materials:
* At least 1/2 yard of each of the fabrics (more if you plan on making a diaper cover with ruffles)
* About 12" of the fabric for the ruffles on the skirt
* 1/2" double fold bias tape
* 3 buttons
Ok, to begin with you need to make a pattern. Hands down, the best website to go to for instruction on this is Shwin & Shwin. Essentially, you will draft a pattern from an existing dress or top that fits well. For the smoking, I added 3" to the middle of the front. For the button flap, I added 2 1/2" to the back. I did a lining for the bodice, but not the skirt. For the sleeves, I did a longer version of the sleeve that the Shwins used on the Yellow Dress. For the skirt, I used the width of the bodice and added 4" to each side for the front and the back, then I drew the petal front. Below are pictures of the cut fabric, first the lining, then the bodice, then the skirt (I really should have ironed better...):
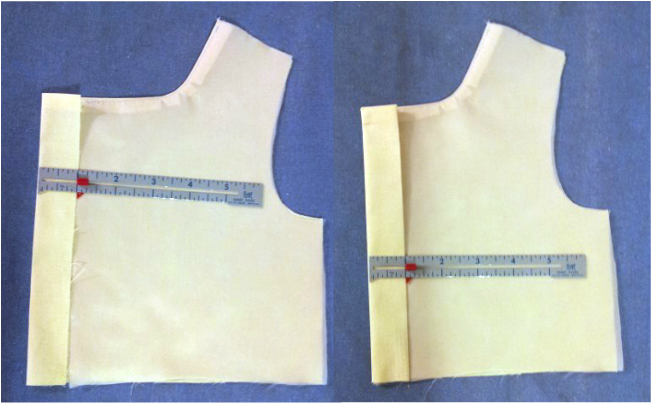
I began with the bodice. For the smocking, I refered to Tumbling Blocks for the Honecomb Smocking tutorial. There are a lot of steps, but overall, it is pretty easy. I cut two strips to iron my pleats, one 1/2" wide and the other 1" wide, which I cut from an empty cracker box. I started by lining up one side of my 1/2" strip with the center of the bodice and worked one direction, then pleated the other side.
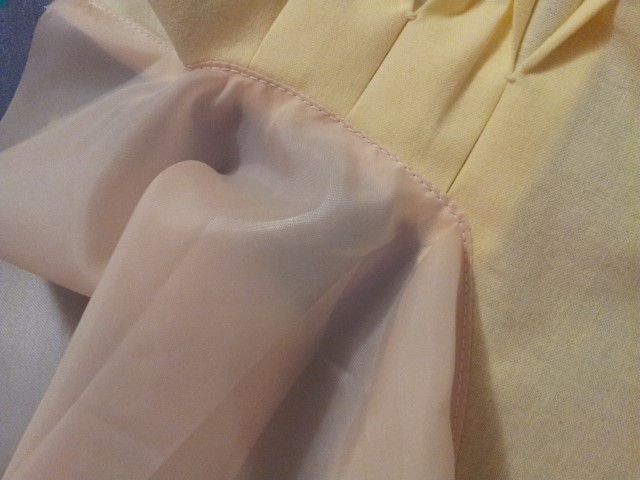
Ok, now that the decorative part is taken care of for the bodice, assemble it. Iron the smocking a bit to make it more manageable. Sew the front lining to the front bodice piece only at the neck line, then make small slits along the curves, being careful not to snip through the seam. Finally, top stitch on the lining side only, to create a rolled edge, making sure to catch the excess fabric from both the bodice and the lining. Do the same for the back pieces. Fold over and iron all. Attach the front to the back only at the shoulders.
I apologize, I don't have a pictures for the sleeve steps.
With right sides together, sew the sleeve to the lining along the bottom of the sleeve, then make snips at the curves and top stitch as you did around the neckline. Fold over and iron. Once right side out, make a basting stitch around the shoulder of each sleeve and ruffle to make it a puff.
I found in multiple places a nifty little trick that takes the headache out of attaching sleeves to the bodice. The best pictoral representation is by Especially Creative Broad. Most patterns have you attach the front and back bodice at the sides then "fit" the sleeve into the opening and you are left with the incredibly annoying task of trying to sew that with your sewing machine, thus the headache. So, how you will do it is you will pin the sleeve in place leaving the bottom of the sleeve and the sides of the bodice unpinned. Sew in the sleeve around the shoulder. Zigzag stitch the excess fabric to reinforce the seam and prevent fraying.
Next, I ripped 3 strips of my gray fabric at 3" wide, then I cut 3 lengths for the front and two backs of the bodice. I folded these strips in half and ironed them, then pinned them to the bottom of the appropriated bodice piece. Then, pinned and sewed the bottoms of the sleeve and the sides together.
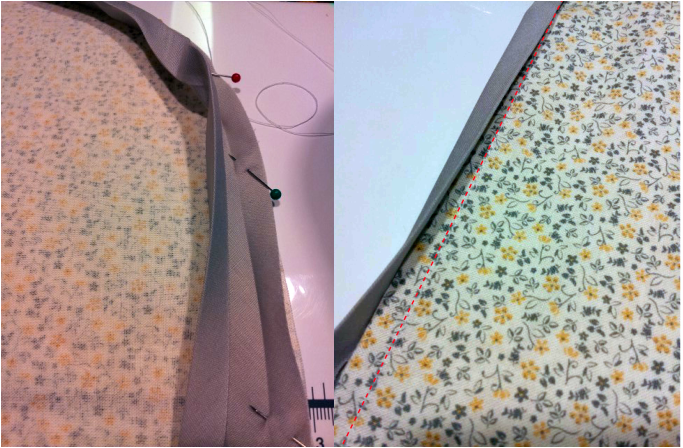
Now to the skirt. I attached a bias tape along the bottom in an effort to use less fabric. To do this, unfold one side of the bias tape and line it up the edge with the edge on the wrong side of your skirt piece, then pin. Sew this to the skirt along the fold. Then fold the bias tape over to the right side of the skirt piece and line it up with the seam just made (red dotted line in the picture) and you can either do a straight stitch, zigzag or decorative stitch to attach this side of the bias tape to the skirt. Do this for all of the skirt pieces, including the petal overlay.
Again, I apologize, I do not having progress pictures for the next couple of steps. I guess I got caught up in the project and forgot to take some... sorry.
I attached the remaining strips of gray fabric together (I would suggest doing a 45 degree seam here, I didn't and regret it), then I did a quick rolled hem, which I learned from Grainline. Fold this long strip into thirds lengthwise (it doesn't have to be exact since you will ruffle them anyway) and cut along folds. Place a pin in the top center of each strip, then do a basting stitch along the top and pull one of the threads to create a ruffle from each strip. Line up the center pin of one of the strips with the top center of the front skirt piece and pin the ruffle along the top then sew together.
Next line up the center pin with of one of the remaining ruffled strips with the top middle of the bias tape and pin along the top of the ruffle, periodically lining up the bottom of the ruffle with the top of the bias tape. Again, because this is a ruffle, it doesn't have to be perfect. Then sew along the top of the ruffle.
At this point, you should have two ruffles sewn to the front skirt piece, one at the top and one almost at the bottom. Now, to attach the remaining strip, center it vertically and horizontally as best you can then pin and sew along the top.
Position the petals on top of the ruffled front piece, then with right sides together, place the back piece on top of that and sew the sides. Place a pin in the top center of the front and back skirt pieces. Ruffle the top of the skirt for the front and the back separately and using the same method as the gray strips.
The next step is to create the flap for the button. Fold and iron 1" of the flap side of one of the back pieces, then fold over 1" again and iron. Place a pin in the top and bottom to hold in place. Repeat for the remaining back piece. Mark and sew button holes. Overlap the flaps and pin.
With right sides together, fit the skirt to the bodice, adjusting the ruffle as you go and pinning. Sew bodice to skirt with a straight stitch, then zigzag over the excess fabric to prevent fraying.
Place and hand sew buttons.
You could be done here, but I took it a step further and made a ruffle butt diaper cover. I followed a tutorial by Made for the diaper cover, then looked to Daydream Believers for the ruffle part.
Place and hand sew buttons.
You could be done here, but I took it a step further and made a ruffle butt diaper cover. I followed a tutorial by Made for the diaper cover, then looked to Daydream Believers for the ruffle part.


