
DIY Jewelry Hooks
It wasn't long after we moved into our "quaint" condo that I bought this little vanity to make a space for me to get ready. It has been almost two years since and the tiny corner of our bedroom has sat looking pretty bland the entire time. A while back, I decided I was sick of trying to find my jewelry amidst the tangled pile in my jewelry box, which sparked a make over of the entire corner. I have to say, I am pretty happy with the results.
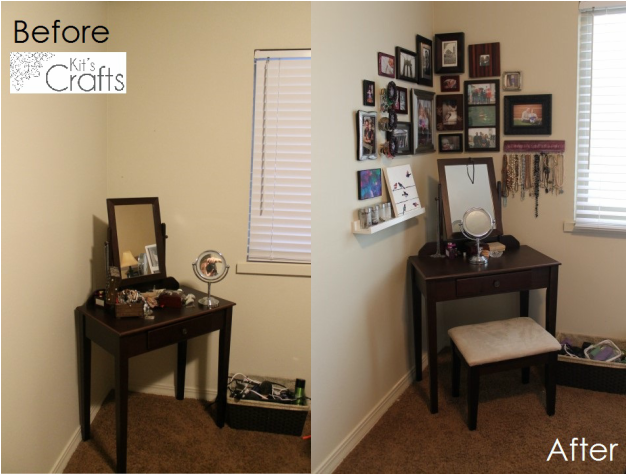
As usual, I started my quest by looking to the internet (specifically, Pinterest), and found some great ideas to pull from. Below are the inspiration photos:
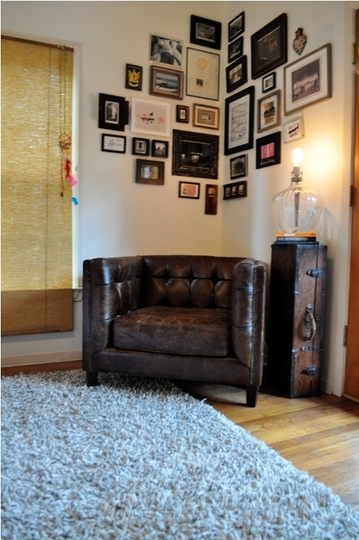
Photo from Apartment Therapy
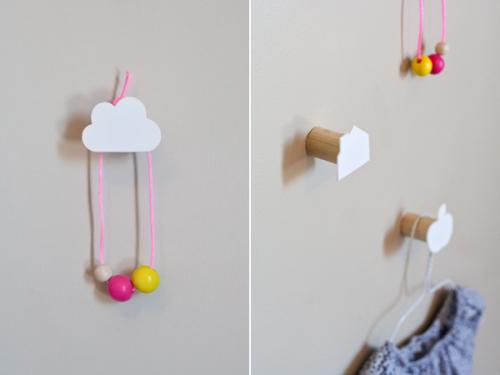
Photo from Dot Coms For Moms

Photo from Homeroad
So, today, I will post the tutorial from my Jewelry Hooks and on Thursday I will post the tutorial for the Bracelet Pegs. As for the wall itself, I found a tutorial with tips for picture groupings at Tipnut that you can check out.

Jewelry Hooks Materials:
* 13" of decorative moulding, preferably chair rail (you can buy this by the foot at Home Depot)
* Fine grit sand paper
* Acrylic paint
* Liquid silver leaf
* At least 2 foam brushes
* Lint free rag
* Nail and hammer
* 16-18 teacup hooks
* (2) 2" clamps (really cheap at Home Depot)
* Scraps of felt or thick fabric
* 2 Saw tooth picture hanger

Method:
* Start by sanding the edges of your moulding, then paint one coat of acrylic paint as a base, then let it dry and paint a coat of the liquid silver leaf and let that dry. Blotch on another coat of the acrylic paint and rub it off with the rag as you go.
* Divide the length of your moulding by the number of hooks you have and mark with a pencil Mark the center of the moulding on each line, then set up the moulding on the table with a clamp on each side to steady it and felt protecting the moulding from the clamps (as in the picture). Nail a hole at each of your marks.
* I found that it was easiest to take the clamps off and hold the moulding between my knees to screw in the hooks. Also, I used one of the pieces of felt to protect my fingers as I turned the hook.
* Turn the moulding so the backside is facing up. Divide the length into thirds and mark, then mark about 1/4" from the top. Center 2 saw tooth picture hangers on these marks and attach.
Attach it to the wall and you are ready to untangle your necklaces!
