Dress Up
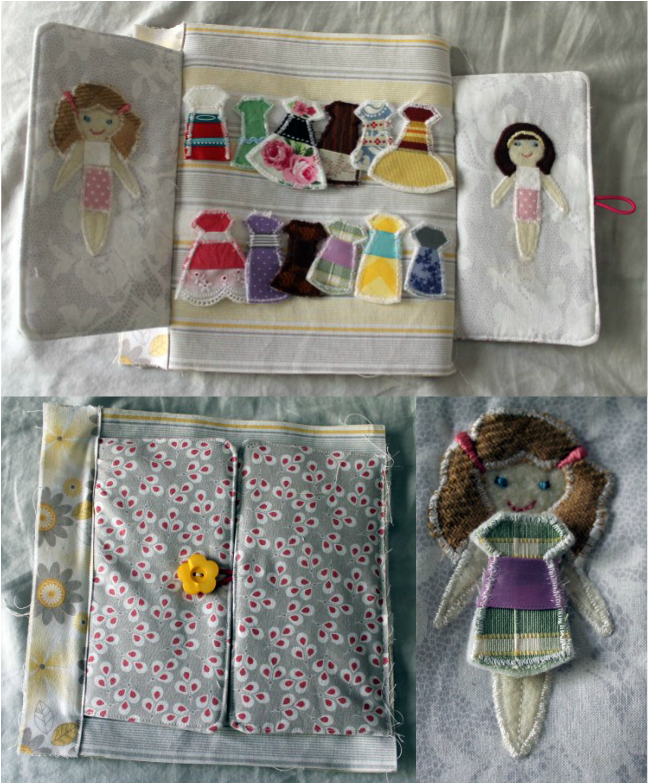
The inspiration for this adorable little page came from my favorite site for quiet book inspiration, Orange Crafts. The blog author, Katarinka, created a quiet book based on Thumbelina that features a little closet with dresses for Thumbelina. I loved the idea and found a way to make it mine. Honestly, I think I had the most fun making this page!
Materials Needed:
* Fabric (remember to prewash all fabrics)
* Ribbon and/or lace for embellishment
* Felt for the back of the dresses and inside the doors
* Velcro
* Embroidery floss and needle
* Button for clasp
* Hair tie for clasp
* Duct Tape
* Steam a Seam
* 9"x9" square of reinforcement for the back of the page
* Pattern (UNCHECK the fit to page box when printing)
Page Background:
* Cut 2 strips of velcro 9" long
* Place the soft side of one strip about 2" from the top of the page and sew along the top and bottom going through the reinforcement
* Place the second strip 3" from the bottom and sew in the same fashion as the previous strip
Dolls:
* Cut the back side of each door from fabric
* Cut each doll from felt and steam a seam
* Cut hair and under dress from fabric and steam a seam
* Using template, position doors on page and place each doll in the center of each door, then iron
* Position and iron hair and under dress
* Using a satin stitch, sew all layers to the fabric; switching thread colors as necessary
* Cut 2 strips of velcro about 1" long to sew to each doll
* Position and pin soft side of 1" strip of velcro, then sew along all edges and make an "X" in center
* Embroider face
* Straight stitch down the middle of the legs to separate them being careful not to go too far
Doors:
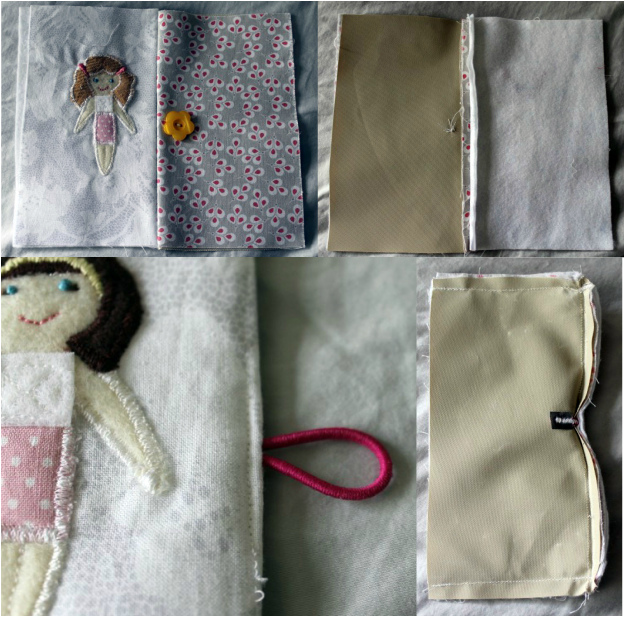
* Cut each door from fabric, felt and reinforcement
* Use the template to figure the inside edge of the right hand door
* Position hair tie in the middle of the reinforcement door and, using a small piece of duct tape, tape hair tie to reinforcement
* Satin stitch the hair tie to the reinforcement making sure that the needle goes through each side of the hair tie
* For each door, place felt on table, then stack back side door (with doll on it) face up, front door face down and reinforcement on top, then sew along inside edge (make sure that the doll is right side up)
* Open the left hand door and place the right hand door where the tie would meet the left hand door then position the button in the middle of the tie and sew the button to the outside fabric and reinforcement
* Sew along the top and bottom of each door
* Iron doors flat and sew close to the edge of the top, inside edge and bottom
* Again using the template, position and pin the doors to the page and sew along the outside edge
Dresses:
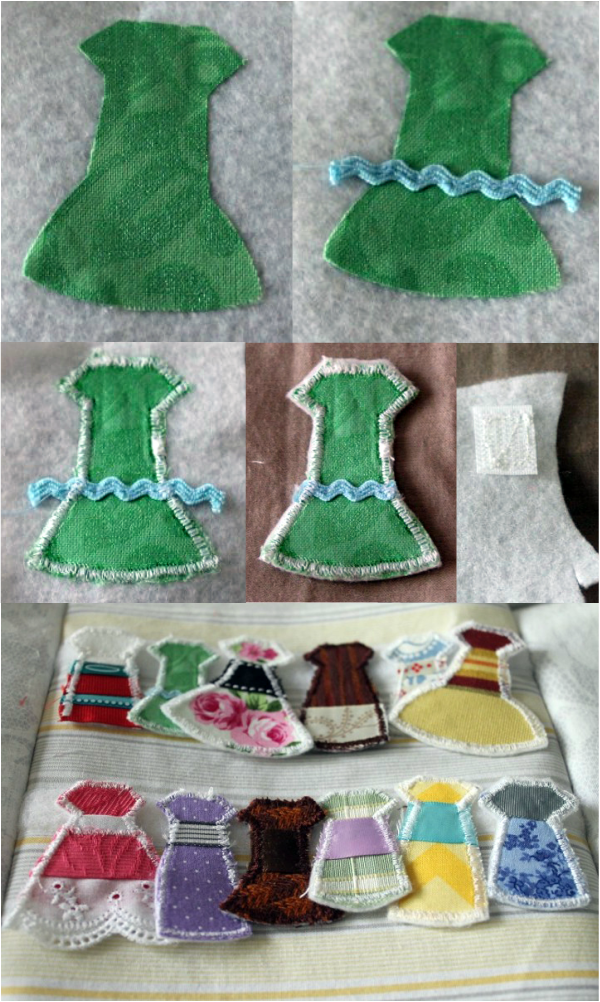
* Cut dress from fabric and steam a seam
* Position dress on felt and iron on
* Sew any embellishments to dress
* Using a satin stitch, sew dress to felt
* Cut dress from felt
* Cut a 1" piece of the rough side of the velcro
* Sew velcro to another piece of felt
* Position dress over back side of felt with the velcro toward the top of the dress
* Straight stitch around dress
* Cut dress from second piece of felt
Add 1 1/2" border to binding side.


