Tractor Hat
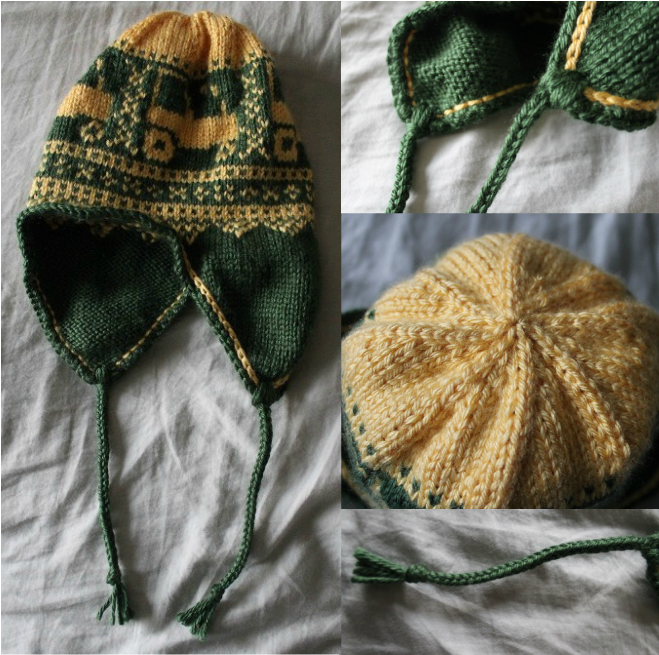
This hat came about for the son of a friend who lives on a ranch. As usual, I began by looking online for inspiration and I found the most amazing knitted dress with a tractor motif from Moods of Norway that you must check out. I also found a pretty good tractor chart on Tricksy Knitter, that I ended up adapting into my design.
This hat is knitted from the bottom up, starting with the ear flaps. For the body of the hat, I start out knitting in the round then switch to the intarsia in the round method for the Tractor Chart (it could be stranded if the intarsia method is too confusing) and I finish off the hat by knitting in the round. Also, the braid attached to the ear flaps is an 8-stranded square braid.
This hat is for a child 3-10 years old (19"-20 1/2" circumference; 8.5" high). If you would like a different size, change your needle size.
Print the pattern.
Gauge:
7 rows is 1", 5.5 STS is 1"
Materials:
Size 4 (US) Double Point Needles (DPNs) and Circular Needles
1 skein of Caron Simply Soft in Dark Sage and Sunshine
Size E Crochet Hook
Yarn Needle
Tractor Chart
Abbreviations:
MC = Main Color
CC = Contrast Color
CO = Cast On
K = Knit
M1A = Make 1 Away
STS = Stitches
PM = Place Marker
K2Tog = Knit 2 Together
SC = Single Crochet
SL = Slip Stitch
Ear Flaps:
Using the circular needles, with MC, CO 3 STS
Row 1: K1, P to 1 before end, K1
Row 2: K1, M1A, K to 1 before end, M1A, K1
Repeat Rows 1 and 2 until there are 33 STS (30 rows total). Repeat Row 1 once more. Cut yarn. Push the ear flap out of the way of the needles and hold on the circular part.
For the second ear flap, repeat the same process as for the first, but don't cut the yarn.
Hat Body:
Turn and K across the 2nd ear flap. Using a Cable CO, loosely CO 23 STS, K across the 1st ear flap. Again, using the Cable CO, loosely CO 7 STS, PM. (96 STS)
Being careful not to twist, connect for knitting in the round. Knit 2 rows in MC then start Tractor Chart.
Switch to DPNs in the last row of the Tractor Chart.
The rest of the hat will be knitted in the CC.
Decreases:
Round 1: *K10, K2Tog, repeat from * around (88 STS)
Round 2, 4, 6, 8, 10: K around
Round 3: *K9, K2Tog, repeat from * around (80 STS)
Round 5: *K8, K2Tog, repeat from * around (72 STS)
Round 7: *K7, K2Tog, repeat from * around (64 STS)
Round 9: *K6, K2Tog, repeat from * around (56 STS)
Round 11: *K5, K2Tog, repeat from * around (48 STS)
Round 12: *K2, K2Tog, K2 repeat from * around (40 STS)
Round 13: *K3, K2Tog, repeat from * around (32 STS)
Round 14: *K1, K2Tog, K1 repeat from * around (24 STS)
Round 15: *K1, K2Tog, repeat from * around (16 STS)
Round 16: K2Tog around (8 STS)
Cut a 6" tail and using the yarn needle, thread through the remaining STS and pull tight to close up the hole then go through the top of the hat and tie a knot inside of the hat. Weave in loose ends.
Finishing:
SC around the edge of the hat with MC. Weave in ends.
SL around the base of the SCs just made using the CC. Weave in ends.
Using MC, make 4 long strands for the braids (I usually just do the length between my hands outstretched). Fold in half and using the crochet hook, pull about an inch of the middle of the strands through the middle of the ear flap, then pull the ends through the loop just made. Cut the ends to about 3" past how long you want the braid to go, then do the square braid and tie a knot at the end. Trim up the ends if necessary.
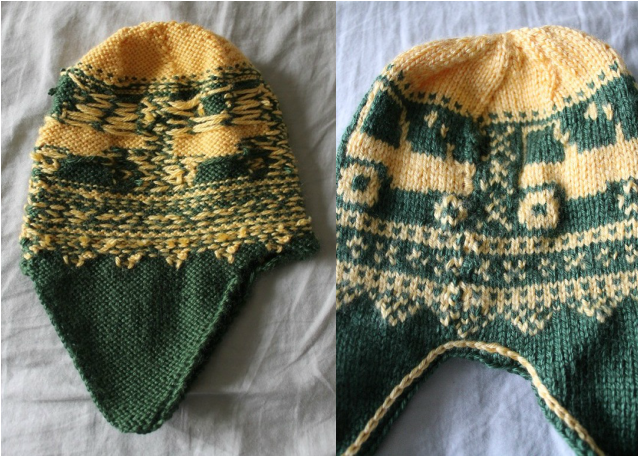
Below is a picture of the inside of the hat. You can see where I stranded and where I used bobbins for intarsia. There is also a picture of the seam; it is along the front of the tractor on the left.


