2 rectangles at 5" x 6" of fabric (Inside panels)
1 rectangle at 9" x 6" of fabric (Outside)2 rectangles at 4.5" x 6" of a reinforcement material, such as a sturdy outdoor fabric or canvas
Velcro
Sewing machine/thread/pins/scissors
Pattern (UNCHECK the fit to page box)
Felt for the girl and back of the dresses (you can get felt sheets for $0.37 at JoAnn's)Steam a Seam
Embroidery floss and needle (face and crown)
1/4" double fold bias tape or fabric to make your ownScraps of fabric for the dresses and castle
Ribbon and/or lace for embellishment
Inside Directions:
1. Pre-wash all fabrics before cutting.
2. Place the 2 inside panels face down on the table. Place and pin a rectangle of reinforcement material on top of each panel, lining up the top and sides. Baste stitch around the edges.
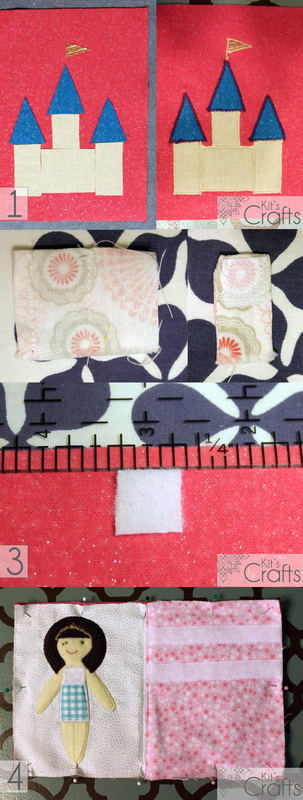
3. Cut two 5" strips of the soft side of the Velcro. Place an pin one strip about 1" from the top of one of your inside panels. Place and pin the second strip about 3/4" below the first. Straight stitch along the top and bottom of each strip.
4. Pin the two inside panels right sides together and sew along the inside at a 1/2" seam. Iron open the seam , then top stitch on each panel.
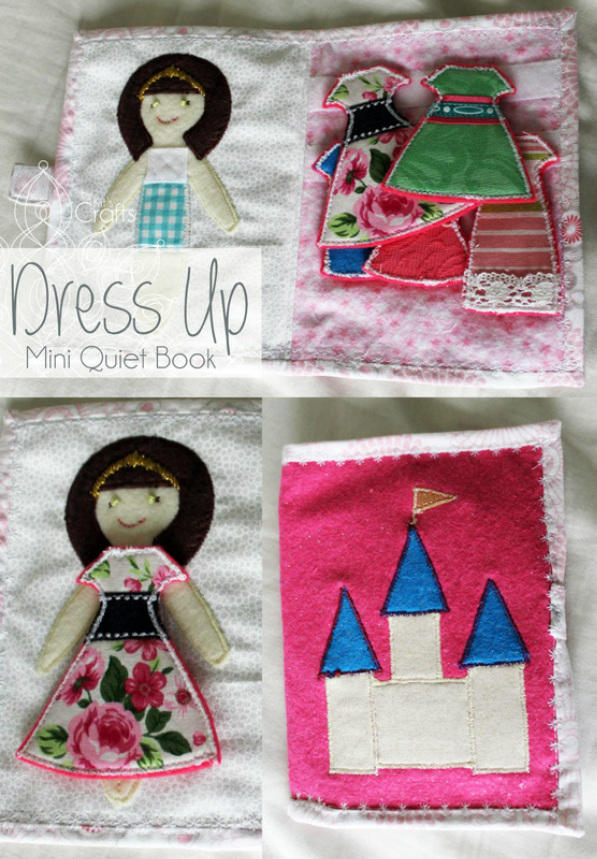
5. Cut the girl from the felt as well as from the steam a seam, then center and iron in place. With a straight stitch and starting at the bottom of the legs in the middle, sew straight about 3" or so to create the legs. Satin stitch around the body, except for the head. Cut the under dress and hair from both the fabric and the steam a seam. Iron in place, then satin stitch around the edges with a matching thread. Cut a piece of the soft side of the Velcro to fit on the chest of the girl, then pin and sew in place.
6. Trace the face and crown onto tissue paper and use that as a guide to embroider the face and crown.
1. Cut your castle, roofs and flag from the fabric and steam a seam, then iron in place on the front of the book. Satin stitch around the edges, extending the back side of the flag down to the roof to create a flag pole.
2. If you are attaching this book to the Ruffle Stocking from Tuesday, cut a 1" square piece of the reinforcement fabric and place it on the wrong side of the exterior fabric where you would like the eye to go (I just held mine in place instead of pinning) then sew the eye portion of the large eye and hook in place.
3. Cut a rectangle of fabric at 3" x 2". Fold in half so that the 2" sides meet. Sew along one side with a 1/4" seam allowance, then sew again from the same side with a 1 1/2" seam allowance. Clip the remaining fabric and turn right side out. Connect your Velcro and cut a piece to fit the tab just made. Attach the prickly side to the tab and the soft side to the back side of the book in the middle about 1/4" from the edge. Then, place and pin the tab with the Velcro facing up on the front of the book and baste in place.
4. Place the outside of the book face down on the table, place the inside face up on top, pin and baste around the edges. For the binding, please refer to the detailed instructions of how I bound the pages in my quiet book.




 RSS Feed


