Kit's Crafts
  • Home
  • About
    • Selling Handmade Goods
  • Knitting
  • Crochet
  • Sewing
  • Crafting
    • Just for Fun
    • Wall Decor
    • Christmas Fun
    • Party On
  • From the Kitchen
    • Chocolate
    • Sweet
    • Savory
  • Quiet Book
  • The Shop

Owl Costume

10/31/2013

0 Comments

 
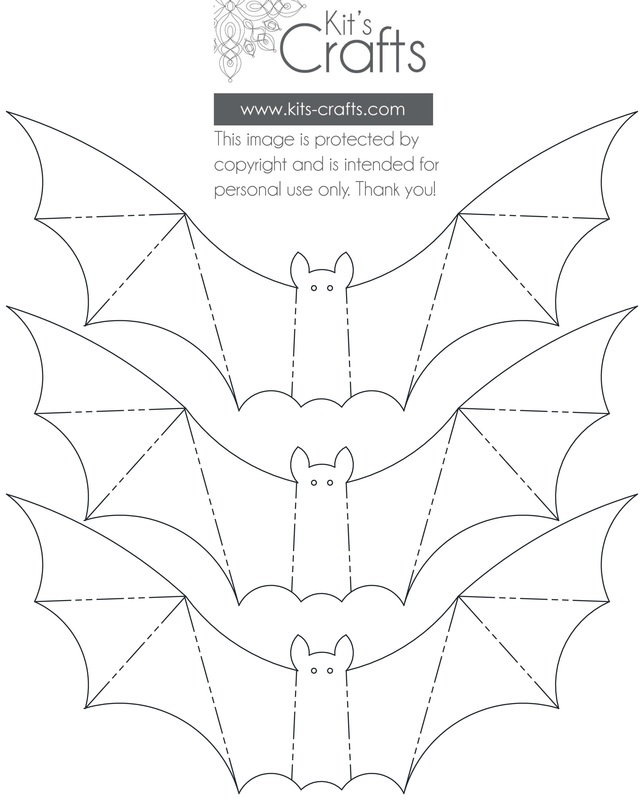
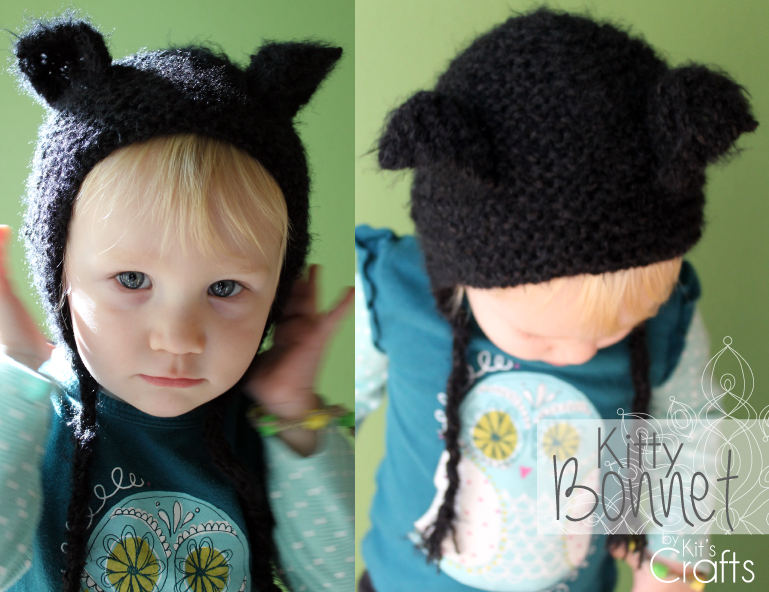
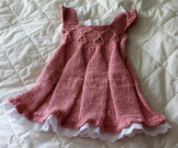
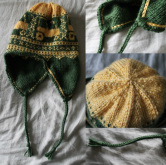
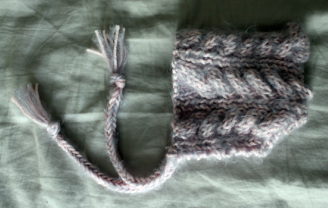
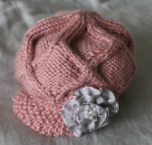
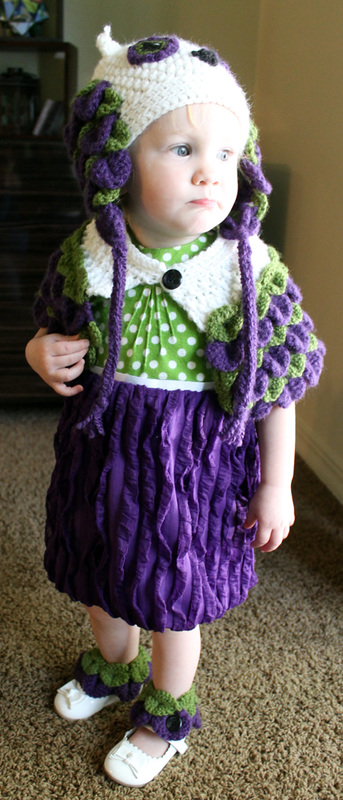
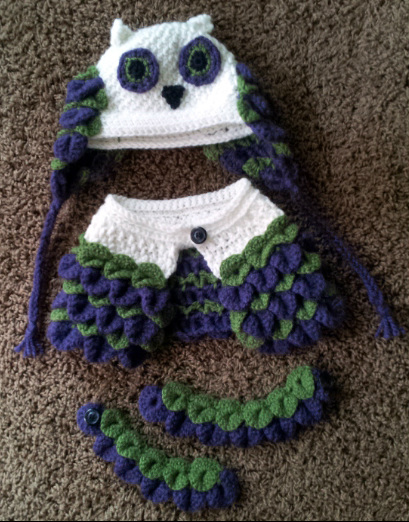
About a year or two ago, I happened upon the #CrocodileStitch and fell in love. My immediate thought was that it looked an awful lot like feathers. I knew that I needed to make an owl hat at some point. Well, last month, when I was thinking about what Halloween costume to make for my daughter, I thought back to the croc stitch and decided to use that as a base for the costume. I wish I could have brought the pattern to all of you sooner, but I wanted to make sure and get it tested first. I considered waiting until next year, but, well, I got too excited! So, here you go, a lovely little crochet costume!
Kit's Crafts - Owl Costume #CrochetPattern
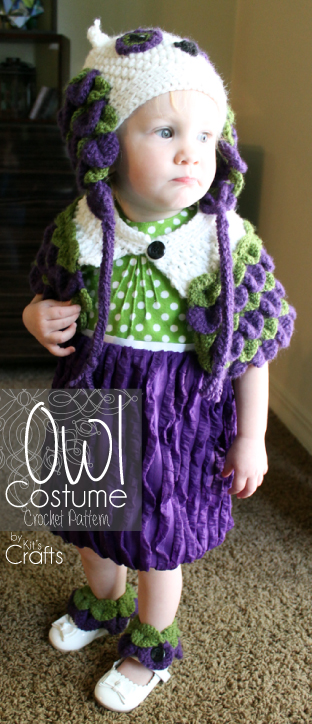
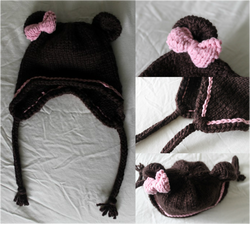
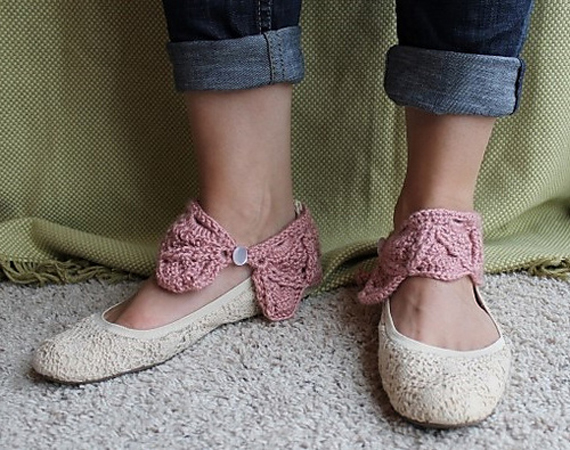
This pattern includes a hat, capelet and spats. I would consider this pattern intermediate as there are front and back post stitches as well as the use of the crocodile stitch. The hat is worked from the top down with the wings, eyes, beak and ears sewn on after. The capelet and spats are worked from the bottom up.

Gauge:

2” = 7 stitches x 7 rows (in pattern stitch, FPDC, SC portion)

Sizes:
Baby (12 – 18 months), Toddler (2 – 3 years), Child (4 – 10 years)

Materials:
500 - 550 yards (80 – 90 meters) Worsted Weight Yarn
I (5.5 mm) Hook

Yarn Needle
3 half inch (1.3 cm) buttons

Only $5.50 for a .pdf download
Kit's Crafts - Owl Costume #CrochetPattern

You might also like

Picture
Picture
Picture
Picture
0 Comments

Cake Pop Save

10/28/2013

0 Comments

 
Do you ever go to make something that seems really straightforward and everyone you know who has tried it talks up the simplicity of the project? So you go at it with a head full of confidence thinking, "I'm crafty, I make stuff, I got this" only to find that what you are trying to do is much more difficult then you thought. Enter the cake pop.

Pretty much everyone I know has made cake pops and I have seen them all over the web. So, when my husband's family decided to do a Halloween Party, I thought, "Perfect, I will make cute little ghosts!" I gathered my supplies, baked up a box cake, watched a tutorial online and went fearlessly to work. 

Apparently, I overestimated my abilities. When it came to dunking, my ghosts kept falling off into the chocolate. I ended up drizzling them instead (what a mess!), which "saved" them, however, I made the little guys too big and they kept falling off the sticks throughout the little soiree.

Here is the lesson: Cake pops are tricky! You need to have the perfect ratio of frosting to cake, DO NOT over heat your chocolate, and (perhaps the biggest failure) DO NOT make them too big. I am sure there are other things I did horribly wrong, and, since my husband lovingly told me to try them different the next time (as if there would be one) I would love to hear your suggestions!
Kit's Crafts - Cake Pop Save

You might also like

Picture
Picture
Picture
Picture
0 Comments

Bats!

10/24/2013

1 Comment

 
Halloween is next week. Can you believe it?! While you are getting all of your decor and costumes ready for the ghoulish event, don't forget to take a few moments and sign up for the Crafty Christmas Swap. It's a really simple, fun thing to do and will only take as much time as you would like it to. Basically, you will exchange ornaments with 3-4 other people from around the country or the globe. In light of the holiday next week, I made some simple paper bats to put up on the wall. I saw this done on as part of a decorated mantle and loved the idea, but thought I would bring some more color to the scheme.
Kit's Crafts - Bats! #Halloween
Materials:
Bat Template
Scrapbook/Construction paper
Scissors
A bone folder or some other scoring tool
Small hole punch
Picture
Directions:
Print the bat template onto the back of your paper and cut the bats out. Use your scoring tool to score along the dotted lines. Place a ruler along one of the score lines and fold along the score. Repeat the previous step for the remaining score lines. Make two little eyes with your small hole punch, then just tape them to the wall!
Kit's Crafts - Bats! #Halloween

You might also like

Picture
Picture
Picture
Picture
1 Comment

It's a Giveaway!

10/23/2013

0 Comments

 
Hey all! Great news, I am part of another giveaway! This time, you could win a $100 giftcard to Amazon! Click on the photo below to enter!
It's a Giveaway!
0 Comments

Kitty Bonnet

10/22/2013

0 Comments

 
A few years back, a friend gave me her small stash of yarn as sh didn't figure she would use it. Within the skeins was this fuzzy black yarn that I didn't really care for. It has been kicking around the bottom of my large plastic tote this whole time without an evident purpose. Well, at the beginning of this month I saw it and thought, "What the heck, I will make a quick bonnet from this and hope for the best." When I finish it, I actually really liked the little hat, so I thought I would add it to my list of free knit patterns. Enjoy!
Kit's Crafts - Kitty Bonnet #FreePattern
I only did one size for this bonnet, however, it is REALLY stretchy and could probably fit anywhere from a 1-year-old up to a small 3-year-old. It is knit flat from the front to the back then folded in half and sewn together on one side. It is a VERY easy pattern and I would recommend it for beginners.

Gauge: 2" = 14 rows x 8 stitches in Garter Stitch

Materials:
Size 10 knitting needles
100 yards fuzzy worsted weight yarn
2 stitch markers
Yarn needle

Abbreviations:
CO = Cast On
K = Knit
STS = Stitches
PM = Place Marker
SSK = Slip, Slip, Knit
K2Tog = Knit 2 Together

Pattern:
CO 60 using long tail cast on method
Knit every row until piece measures 3.5"
K30, PM, K30
K1, SSK, K to 2sts before marker, SSK, SL marker, K2tog, K to 3sts before end, K2tog, K1
K across
repeat previous 2 rows 8X
Bind off leaving a long enough tail to sew the two sides together. Your piece should measure approximately 14" x 5 1/2"

Ears (make 2):
CO 20 using long tail cast on method

Row 1: K1, SSK, K14, K2tog, PM, K1 (18 STS) 
Rows 2, 4, & 6: K across
Rows 3, 5 & 7: K1, SSK, K to 2 before the marker, K2tog, slip the marker, K1 (16 STS) (14 STS) (12 STS)
Row 8: K7, PM, K7
Row 9: K to 2 before the marker, SSK, slip the marker, K2tog, K to end (10 STS)
Row 10: K across
Repeat Rows 9 and 10 until there are only 4 STS left. For the next row, SSK, K2tog, turn K2tog
Bind off, leaving a long enough tail to sew the ear to the hat. 

Finishing:
Fold your hat in half so that the shorter ends are together and sew along the bind off side. 

Position and attach each ear. 

Cut 6 pieces of yarn twice the length you would like the braids to be. Fold three of the pieces in half. Pull the loop at the half of these three strands through one corner of the hat, then pull the loose ends of these same three pieces through the loop and pull tight. Braid the three (now six) strands and tie a knot at the bottom. Repeat on the other corner with the remaining three lengths of yarn.

Weave in any loose ends.

You might also like

Picture
Picture
Picture
Picture
0 Comments

Etsy Update

10/17/2013

0 Comments

 
I thought I would let you all know that I have made some changes in the shop recently. I have started taking custom orders for my Fancy Spats. I have also added some new baby items. Just so ya know, all of the items in my Etsy Shop are completed pieces and not patterns. Ravelry is where you will find all of my knit and crochet patterns. Click on the photo below to check out the changes on Etsy!
Kit's Crafts - Etsy Update
Here is a bit of a preview:
Kit's Crafts - Lacy Flower Clips Set
Kit's Crafts - Fancy Spats - Liana
Kit's Crafts - Cozy Cables Bonnet
Kit's Crafts - T-Shirt Bracelet

You might also like:

Kit's Crafts - Cable Star Hat
Kit's Crafts - T-Shirt Cross Over Bracelet
Kit's Crafts - DIY Beach Bag
Kit's Crafts - Felt Flowers
0 Comments

Stenciled Sprinkles Cake

10/15/2013

2 Comments

 
Here is a sweet cake I made for my daughter. I have seen stenciling all over Pinterest and thought I would give it a try. Turns out, it is immensely easy. So, here are the few steps.
Kit's Crafts - Stenciled Sprinkles
Materials:
Wax Paper
Paper/Printer
Craft Knife/Self Healing Mat (preferable) or Scissors
Frosted Cake
Sprinkles of your choice
Kitchen Brush
Tooth Pick

Ok, to start out with, determine what you want to stencil and print it out at the size you want it to be. I did a 2 in Poor Richard font, which came with my computer. 

You have two options for the next step:

For scissors, trace the picture onto the wax paper and cut it out.

For a craft knife, tape the image to the mat, then tape the wax paper on top. Carefully cut the image out.

Now, gently place the wax paper onto the frosted cake and carefully push down and corners that roll up.

Cover the cut out in sprinkles, brush away the excess sprinkles and carefully lift off the wax paper.

Use a tooth pick to remove any stray sprinkles and smooth out areas of the cake that were tampered by the wax paper.

Too easy, right?
Kit's Crafts - Stenciled Sprinkles

You might also like:

Picture
Picture
Picture
Picture

Where I partied:

Photobucket
Picture
KitchenFun
2 Comments

Crafty Christmas Swap

10/10/2013

11 Comments

 
Over the summer, I participated in the August Package Pals hosted by C.R.A.F.T. and Stars and Sunshine. You may remember the Ollieblocks I made as a result of that event. Getting the package in the mail was so much fun, I thought I might extend the joy and, last night, I had the bright idea of a Christmas Ornament Exchange. I LOVE Christmas time! All the wonderful smells, the snow, the lights, the warm fuzzy feelings, and (I really should have mentioned it first) the BAKING!!!!! Anyway, back to the point. So, basically, all you do to participate is fill out the form below before October 30, 2013. Then I will split everyone into groups of 4 - 5 people and, by November 4, 2013 I will email you with contact emails/websites of the other people in your group. At that point, exchange some greetings, get to know each other, then send a lovely Christmas ornament to everyone in your group. Then, on December 10, 2013 I will host a link party so everyone can share the sweet crafty goodness they got.

You can do whatever you like for this ornament, you can make it personal or general, whatever you wish. Heck, if you really feel like going outside of the box, do it! There is no ceiling on creativity here! Mostly, just have fun, get to know fellow crafty people and show off your amazing talents. To get the artsy juices flowing, I posted some great ideas below.
Picture
From Martha Stewart, she really has a great team of crafters.
Picture
Love these from Country Living
Picture
Ok, so it's not an ornament, but still, how clever! Also from Country Living.
Picture
For those of you over-the-top people, from Lady Fiddler
Picture
From House Revivals, its book pages people!
Picture
Found these on The 36th Avenue, precious!
Picture
Great tutorial from Compulsive Craftiness
Picture
From Michele Made Me, these were created using frozen juice containers!
Kit's Crafts
  
A blog is not necessary to participate, however, you will need either a shop or social media profile (Facebook, Google+, Twitter, etc) and an email address. I will try to match up people from the same country, but that may not work out. So, please let me know on the form if you don't want to send your ornaments outside of your country. Please let your friends know about the fun and share this event! Lets make this a rockin party!

Here is the break down:
1. Sign up before October 30, 2013
2. Share the link for the swap with your friends
3. Check your email November 4, 2013
4. Exchange greetings and get to know the other members of your group
5. Create a crafty little ornament for each of the other members in your group
6. Mail off your ornaments
7. Come back to Kit's Crafts on December 10, 2013 for a link party to see all of the other creations and share what you got!

P.S. If you sign up and you are the only person from your country, I will send you an email and you can decide what you would like to do.

Sign ups are closed. Sorry! Check back on Dec. 10 for the show off party!

Picture
KitchenFun
Photobucket
Picture
 photo TGIF_zps40a588c0.png

You might also like:

Picture
Picture
Picture
Picture
11 Comments

Upcoming Fun

10/8/2013

0 Comments

 
For the past month at least, I have been working on an owl costume for my little girl. I know that it will not be ready in time for Halloween, however, I have just posted it in the Free Pattern Testers group over at Ravelry. If any of you want to get in on the action and test the pattern so you can have it by Halloween, I would be happy to have your input!
Kit's Crafts - Owl Costume

You might also like:

Picture
Picture
Picture
Picture
0 Comments

Pallet Growth Chart

10/3/2013

10 Comments

 
A couple weeks ago, while driving to my sister-in-law's house, I noticed piles of "trash" on the curb in front of many of the houses. Most of the mounds were branches from trimmed trees and bushes, but as I kept driving, I passed one heap with two pallets on top of it. I didn't get too far before turning the car around and loading up the pallets into my trunk. I had a few ideas in mind of what I could use these treasures for, but what I eventually landed on was a growth chart. For the last six months or so, I have had this project in the back of my mind. I have seen so many darling versions all over Etsy and Pinterest, but I really didn't want to go out an buy any supplies as my budget is basically nothing. So, that weekend, my loving husband helped me pull the pallets apart and cut them in to pieces so I could make the sweet creation in the picture below.
Kit's Crafts - #DIY Pallet Growth Chart
Kit's Crafts - DIY Pallet Growth Chart
Materials:
1 Pallet, although we did use one board from the second pallet, but you could make your chart shorter or narrower
Saw/Hammer/Nails
Medium Grit Sandpaper (ideally along with a rotary sander)
2 Boards at 1" x 1 1/2" and the length of your chart
Paper/printer
Pencil
Foam Brushes
Acrylic Paint
Polycrylic Sealant
Fine Grit Sandpaper
Picture Hanging Kit

Directions:
Begin by breaking apart the pallets using your hammer to pry up the boards. It may be helpful to take a second hammer and pound the first to get it wedged under the board better. Remove the nails. I used the marks created by weathering to figure out the width and cut one board, then used that board to mark the rest. Sand down the front and sides of your cut boards.
Kit's Crafts - DIY Pallet Growth Chart
Line up your pallet boards in the order you would like them to be, right side up, then flip the boards over and place each 1 x 1 1/2" board about 2" - 3" from the side and nail them to each board (I used 2 nails on each side for each pallet board). Wipe down your chart so that there is no sawdust left behind and let it dry.
Kit's Crafts - DIY Pallet Growth Chart
Now comes the fun part; deciding what image to paint on your chart. I wanted mine to be gender neutral and I didn't want anything too juvenile so that it could hang in a more visible place then the bedroom some day. I modified an image I found online, then, to transfer the image to my chart, I remembered a technique I learned in 4th grade. The chart is basically broken down into 16 segments vertically (as in there are 16 pallet boards), so I segmented my image into 16 slices and used that to redraw the picture. For the ruler part, print this template on card stock to use as a stencil (the rectangle on the bottom left is to help place the letters). Periodically check the measurements as you are tracing the tick marks to make sure they are in the right place.

Here are the numbers: 23 45 6. Cut each number, making a straight edge along the left side of the digit. Then, using a pencil, color the back of the page. Position the number on the chart, using the rectangle from the stencil. Trace the number with the pencil and when you remove the page, there should be a number transferred onto the wood. 

Paint your image and your ruler marks with the acrylic paint. Once the paint has dried, go over the surface with your fine grit sandpaper, being careful not to remove too much paint, and follow the directions on the can to apply the polycrylic. Use the picture hanging kit to hang the chart on the wall.
Kit's Crafts - DIY Pallet Growth Chart

You might also like:

Picture
Picture
Picture
Picture

Where I partied:

Content in the Meantime
KitchenFun
 photo TGIF_zps40a588c0.png
Picture
Picture
10 Comments
<<Previous
    Kit's Crafts
    Hey there! I'm Kristin, aka Kit. Here is just a peek into my crafting mind. I hope you find something to spur your creativity!
    Instagram

    Kit's Crafts Shop

    Popular Posts

    Picture
    Picture
    Picture
    Picture
    Picture
    Picture

    RSS Feed

    Picture
    Kit's Crafts
    Picture
    The Yarn Box

    Featured Here

    Picture
    Moogly
    Picture

    Categories

    All
    About
    Baby
    Baking
    Bio
    Caramel
    Child
    Chocolate
    Christmas
    Cooking
    Crochet
    Decor
    Dessert
    Dress
    Free Knit/crochet Pattern
    Free Sewing Pattern
    Interior Design
    Knitting
    Link Party
    Materials
    Pattern
    Quiet Book
    Quiet Book
    Recipe
    Selling Handmade Goods
    Sewing
    Spats
    T Shirt
    Tutorial

    Archives

    July 2020
    January 2020
    July 2019
    November 2018
    September 2018
    August 2018
    July 2018
    May 2018
    April 2018
    February 2018
    January 2018
    April 2016
    September 2015
    March 2015
    February 2015
    November 2014
    October 2014
    September 2014
    August 2014
    July 2014
    June 2014
    May 2014
    April 2014
    March 2014
    February 2014
    January 2014
    December 2013
    November 2013
    October 2013
    September 2013
    August 2013
    July 2013
    June 2013
    May 2013
    April 2013
    March 2013
    February 2013
    January 2013
    December 2012
    November 2012
    October 2012

Powered by Create your own unique website with customizable templates.