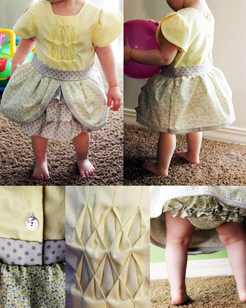
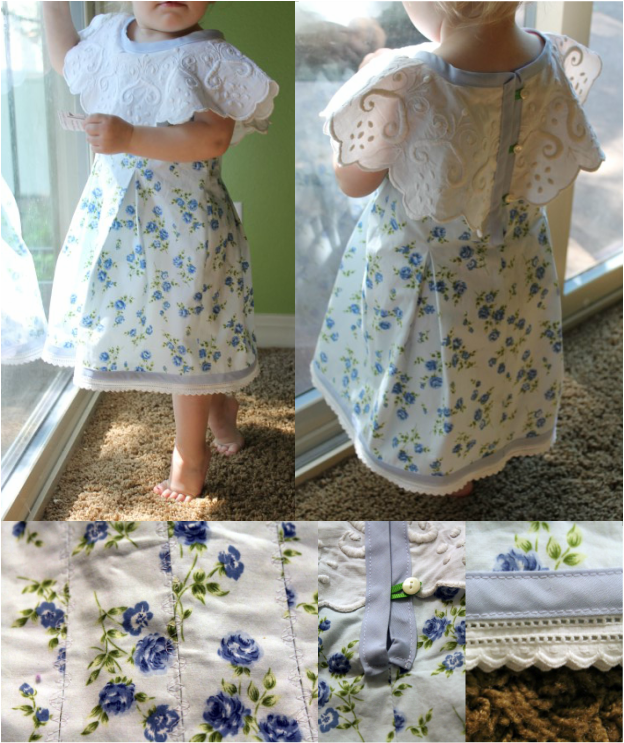
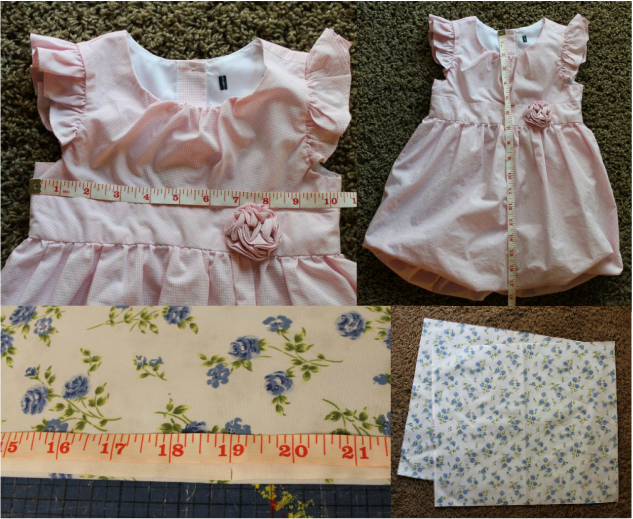
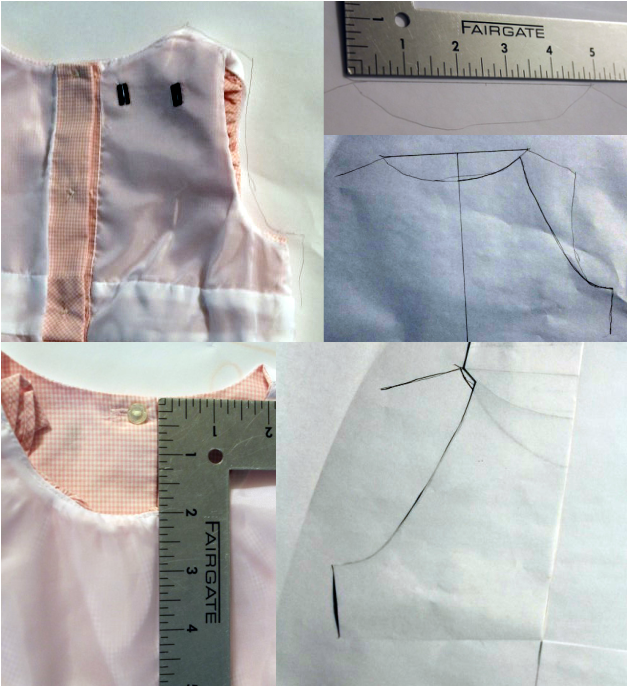
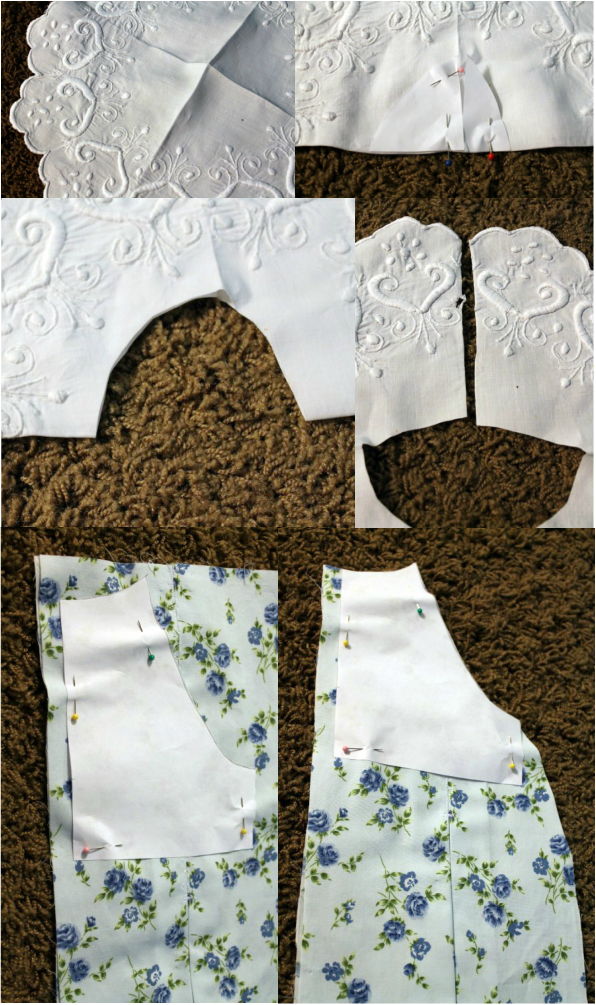
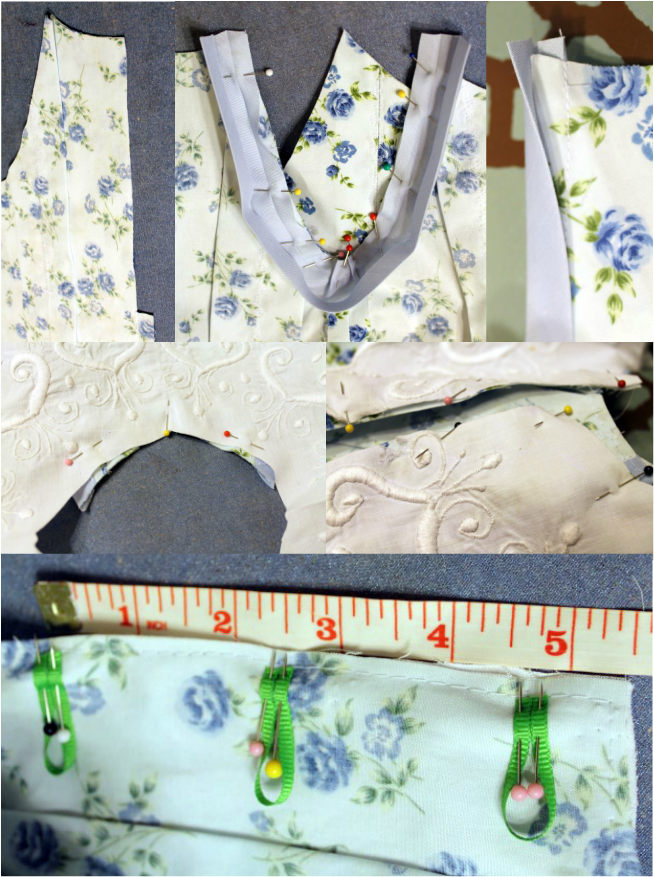
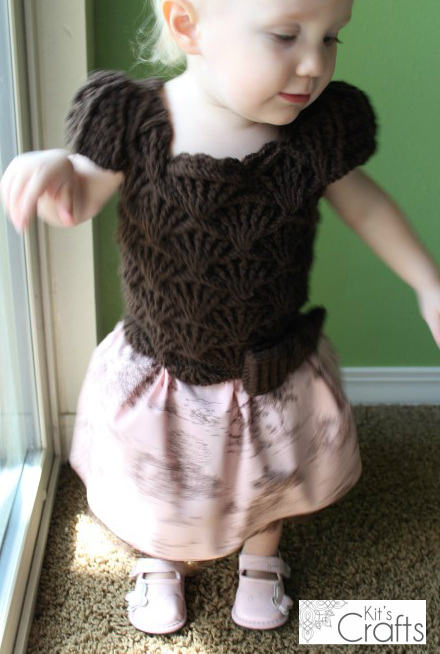
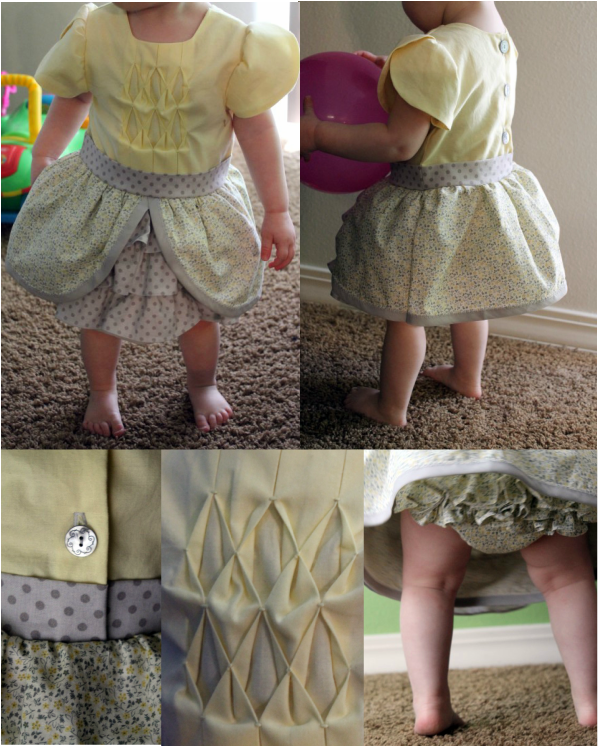
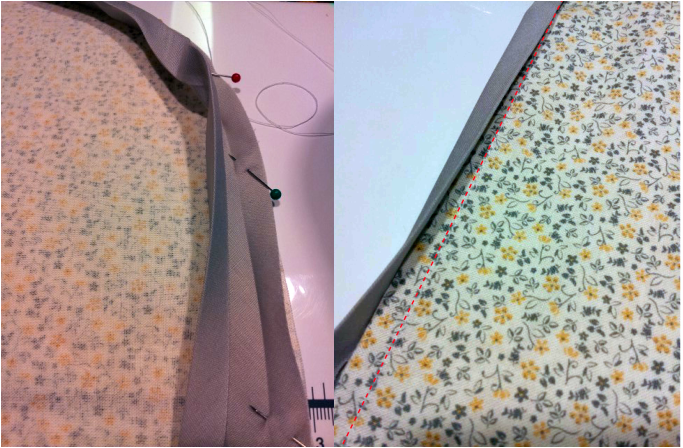
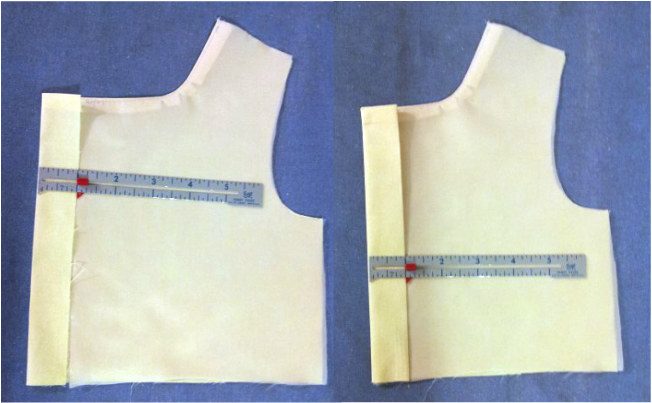
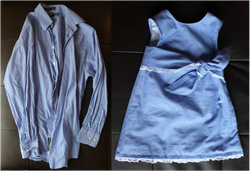
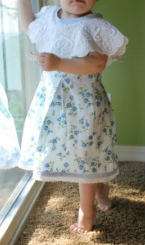
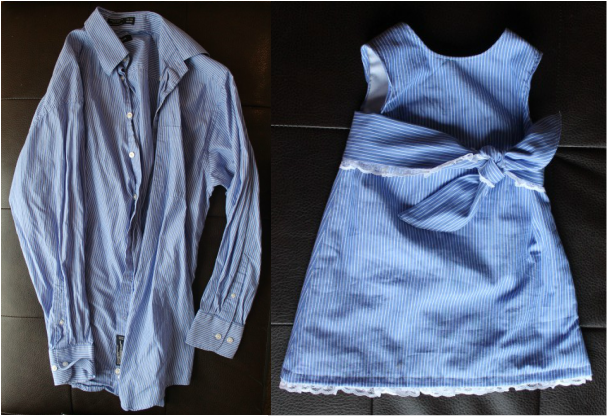
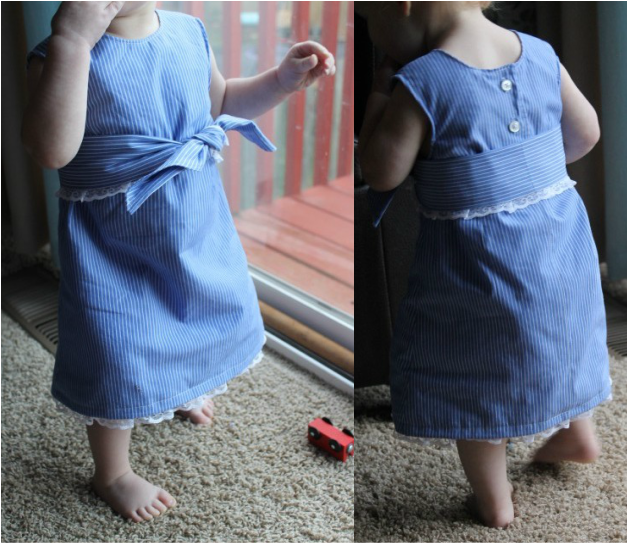
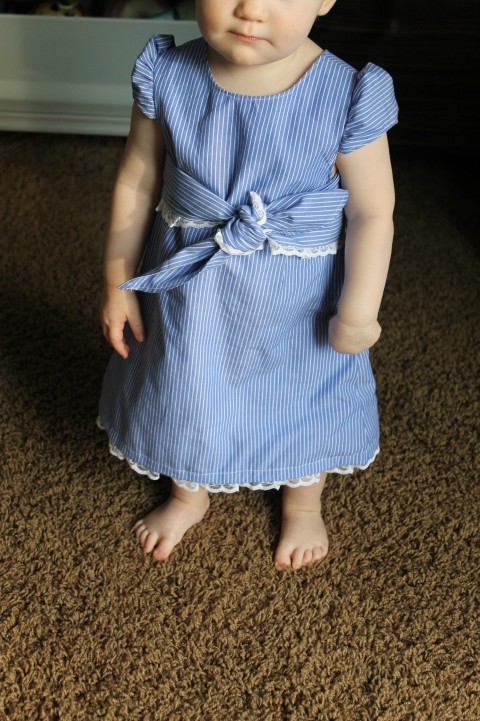
The idea of drafting a pattern used to terrify me. I always thought of pattern making as something that only professionals could do. Then, a little over a year and a half ago, I was looking to turn a men's dress shirt into a baby dress and stumbled upon The Metro Dress by Shwin & Shwin. Their website is chock full of wonderful patterns as well as instructions on various sewing techniques and even how to draft your own sewing patterns. I thought back to The Metro Dress last month when I saved one of my husband's dress shirts from the good will pile. Below is the upcycled version of said shirt.
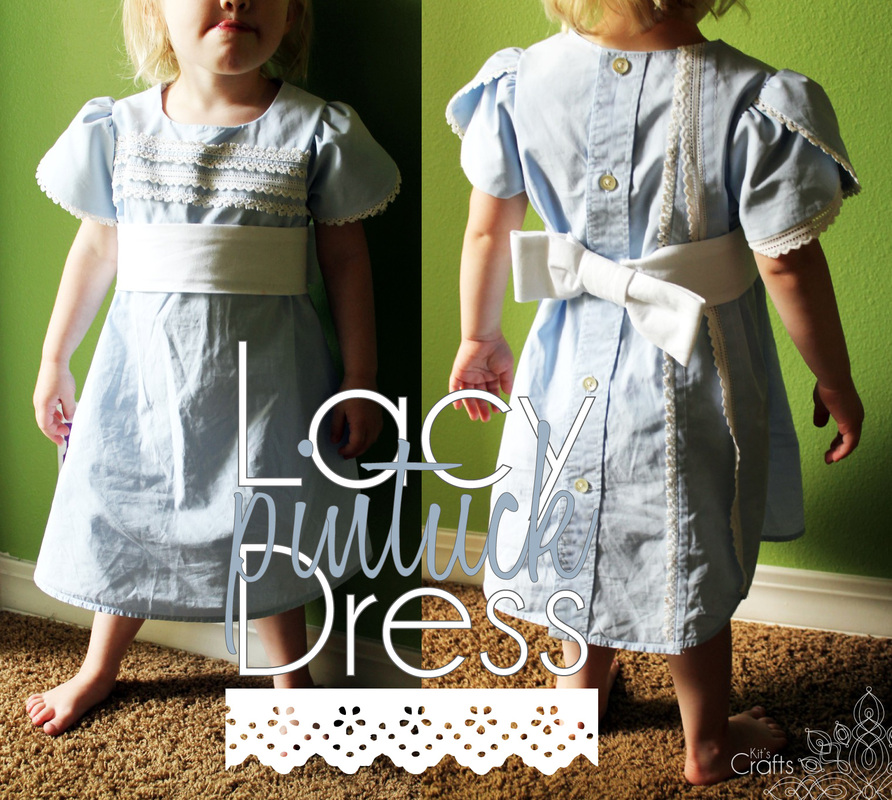
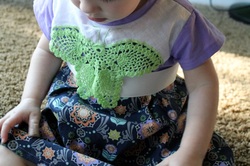
0 Comments
Today's post is a shout out to a wonderful pattern and tutorial by Sewing in No Mans Land. I found this lovely little dress on Pinterest a few months ago and knew it had to happen. Below is my version in which I used fabric remnants. You might also like:There are so many crafting mediums I enjoy, but I tend to always go back to a few trusty standbys; namely, knitting, crochet and sewing. Generally, I tend to rotate through the different techniques about every month and a half. However, when I found out last February that I was going to do the Beehive Bazaar, I went into production mode with knit and crochet, so my sewing machine did not leave its' case for quite a while. Apparently, my crafting addiction needed to make up for lost time because in the last two weeks, I sewed this skirt, a dress, a canvas container, a frilly apron and a large tote. Not to mention the 3 projects I have in mind that I still want to sew up. Don't, worry, I will blog about them all and share links to tutorials. This large doily was part of a stack of doilies and lace trims my grandmother gave me about a year ago. To make the pattern for this skirt I primarily followed a tutorial over at Made, which was so great, I didn't feel that it was worth re-doing. The only deviation from the tutorial is to add the doily on top. Materials: Large piece of paper (or a few letter sized taped together) Pencil Ruler About 1 yard of fabric (depending on how large the skirt will be) Sewing machine/thread/pins/scissors Large Doily Wide Elastic Directions: To make the pattern, go to this tutorial over at Made. Keep in mind how long the doily is and whether you want the skirt to extend past the bottom, just reach it or not hit the hem at all (like I did). Once you have the pattern drawn up, cut it from your fabric as described in the tutorial, then create a rolled hem along the bottom edge of your fabric. Fold your doily in half and iron the fold, then fold it in half again and iron the fold. Now, line up your pattern to the folded edge of the doily and cut the hole for the waist. Unfold the doily and lay it right side up on the table, then place your fabric skirt on top of the doily, right side up as well. Pin around the waist, then sew at your determined seam allowance. Then bring the doily through the waist hole and on top of the fabric skirt and iron along the seam. Lastly, go back to the tutorial to add in the waist band. You might also like: A few weeks back, I visited my grandma with my sister. My grandma is an AVID garage saler. Most weekends are planned around at least a few sales, which means that she has some really great stuff. Luckily for me, she decided it was time to go through some of the doilies and lace trims that she has been hanging onto for years and give them away. She had a large stack of beautiful doilies that she parted with, half went to my sister, half to me. I knew that at least a couple of them needed to become clothing for my daughter. Well, last week, I used a lovely fabric remnant I had in my stash to create a dress using the #doily as a collar. Below are the results. Just as a heads up, this tutorial is not intended for a beginner. I am assuming that you have some knowledge of making clothes and using your sewing machine. However, I am happy to answer any questions you may have about my process. I don't claim to be a trained seamstress and there are most likely ways of doing things that I haven't thought of, I am just outlining what I did. As always, constructive suggestions are welcome. Materials: Large fabric doily At least 20" of fabric (for an 18 month old) Thin cardboard or cardstock 3 yards double fold 1/2" bias tape 3 yards lace trim 3 buttons 1/4" ribbon to make button loops A dress that already fits well Sewing machine/thread/pins Iron/Ironing board Rotary cutter/Mat/Straight edge Prepping the fabric: Pre-wash and iron all of your fabrics. If you have never made your own pattern before, you may want to get a brush up from the Shwin Sisters. They have some really great sewing tutorials in general, however, I will show you some basics in this tutorial. I started by taking a dress that fits my daughter well and measured the waist and the length. I added 10" to the waist (to account for the pleats and seam allowance) and an inch for the length because I had originally planned to do a rolled hem. Then I straightened out the edges of my fabric (Seven Alive has a good tutorial on this) and ironed my folds to make sure they stayed put. From there, I measured 19" (my length) from the edge I just straightened and used my rotary cutter and a straight edge to make this cut. Then I cut my waist width to create two squares of fabric, one for the front and one for the back. Pleats: To make the bodice portion, I did three pleats in the front and 2 pleats on the back. (If my outline isn't enough, Tumbling Blocks has a more detailed tutorial for Honeycomb Smocking that uses this same method). For my pleats, I cut two strips of thin cardboard (a cereal box works great), one at 3/4" wide and the other at 1 1/2" wide. With my fabric face up, I found the center of my front rectangle and lined up the smaller strip with the center, then I folded my fabric over the strip and ironed it. Then I lined up the same strip with the edge of the fold and folded the fabric back over the strip and ironed again. I took the same strip and lined it up to the left of the center line, then folded my fabric over the strip and ironed it. Then, once again, I lined up the strip with the fold I just created, folded my fabric back over the strip and ironed it. That created my first box pleat. I pinned these folds, then flipped my fabric over and removed the pins. For the remaining pleats, I first placed the 1 1/2" strip under the pleat and folded the fabric over the strip and ironed it. Then I lined up the smaller strip with the edge of the fold, folded the fabric back over and ironed it. Then I pinned all of the pleats, and flipped the fabric back to being face up and repeated the same process to create the other side of the pleat. I repeated these steps again for the final pleat. Then I pinned all of the pleats at the top and about 10" down to hold them in place. To make the pleats on the back side, I folded the back rectangle in half and cut along this fold, making 2 back panels. Then I followed the process outlined in the first paragraph to create one box pleat in the middle of each back panel. Next, I took my doily and folded it in half and ironed it. I lined this fold up with the top edge of my pleats and measured to about 1" below the pleat. I then sewed the pleats shut with a decorative stitch. Creating the pattern: Once again, I referred back to the dress I had that fits well. I used this to create a base for the pattern I wanted for the doily dress. I really only need to see how the neck line and the arms worked because I already had my dress length, so I started by tracing the neck and one of the arms. Then I measured the neck to find the middle and drew a line from this point as a center reference. I then drew how I wanted the arms of the doily dress to go. I cut the arm portion of this, keeping the neck line in tact. Then, I measured the distance in height between the front and back neckline on the dress I already had. I transferred this measurement to the pattern and drew in a neckline on the other half. Then, I folded the arm hole I had already drawn and traced it for the front piece. I cut all of my pieces out and kept the neck line pieces for the doily and to position the arm holes. As a side-note, I am planning on using bias tape to finish the edges, which is why I didn't account for a hem. Also, I used the edge of the armhole, but did not cut the side of the dress as I didn't account for the seam allowance in the pattern. You will see what I did there later. Cutting the fabric/doily: I started with the doily, by first scouting out any imperfections. Mine had a small hold in the decoration on one side. I knew I could hide this with the bias tape, so I strategically decided that it would be in the back. Then, I ironed the doily in half along this hole and flipped it 90 degrees and ironed the doily in half again. Then, I folded my doily so that the arm sides were unfolded. I then took my neckline pieces and lined them up and pinned them in place. I cut the neck line, then I cut along the fold for the back side (where the hole was) to account for the buttoned edge. Then I grabbed my pleated fabric and, starting with the back side, I placed my armholes 1/2" from the inside edge for the seam allowance. Then I used the neckline pattern piece to determine how far from the top the arms needed to sit. Once in place, I cut the arms and neck out. For the front, I folded my pleated fabric in half to find the center and lined up my armhole with the center fold, again using the neckline piece to determine how far from the top it needed to be and cut the armholes for this. I cut a diagonal out from the armhole edge along the side so that the sides would taper out once they were sewn together. Sewing the pieces together: Now comes the fun part! I sewed the two back panels together first, leaving about 8" of the top open for the buttons. Then I cut from the top down to where I had stopped sewing. From here, I pinned the back to the front (right sides together, of course) and sewed the sides using a 1/2" seam allowance. Then I pressed the seams open. With the dress basically sewn together, its time to finish the edges, which is a bit tricky. You will notice that with store bought double fold bias tape, one side is a little bit shorter than the other. This goes on the inside. Begin with the armholes first. Open up the bias tape and line up the edge of the shorter side with the edge of the wrong side of the fabric while pinning the tape in place. Sew along the fold closest to the edge. Next, fold the tape back and it will automatically go over the unfinished edge. The fold on the longer side should fall just below the seam you just sewed. Now, sew the other fold to the dress to finish up the edge. Repeat this for the remaining armhole. Line up the doily neckline with the dress neckline and baste them together using about 1/4" seam allowance. For the button loops, line up the edge of your ribbon with the inside of the dress, then place the bias tape on top, fold the ribbon over that and go to where you want your button to be. This should be half of the length you need, so fold the ribbon at this point and cut to match the end. Cut as many of these lengths of ribbon as you want buttons. Next, fold these lengths of ribbon in half and line them up with the inside edge of one back panel on the wrong side of the fabric and pin (as shown in the picture). Then, follow the same procedure for attaching the bias tape as you did for the arm holes, taking care when going over the button loops. Before sewing the front side of the bias tape, flip and pin the button loops so they are facing the right direction. All that remains is the bottom. Again, follow the same process for attaching the bias tape as the armholes, but before sewing the front, pin in a lace trim. A couple months ago I was at Hancock Fabrics and came across the cutest toile fabric in the remnant bin. I couldn't resist despite there only being 1/4 of a yard, but that lovely fabric sat for at least a month before I was able to designate a cute enough project for it. So, here you go. It is a crochet dress with a fabric skirt. Essentially, I treated this pattern like I would treat a fabric dress, so I don't have an exact pattern, but rather a method. I'm not going to lie, there is a lot of measuring and math involved, but nothing too complicated. Materials: 1 Skein Loops & Threads Impeccable yarn in Chocolate G Hook 1/4 Yard desired fabric (pre wash and iron) 3/8 Yard matching lace (pre wash and iron) Fray Check Sewing machine, thread, pins Needle for hand sewing Method: To start with, I found a crochet chart for the pretty shell stitch at My Picot and I crocheted up the whole chart to determine how wide a repeat would be. Then I measured my daughter at her waist, chest and hips and used the largest measurement as a gauge for the circumference of the bodice. Ok, at this point I have the measurement/gauge of the chart (6.5") and I have the circumference/length that I need to make the bodice so it fits (19.5"). So, to determine how many repeats to make, I divided the bodice by the stitch (19.5"/6.5"=3). I was lucky that it came out to a whole number. If yours doesn't, round up. So, the chart requires 25 chains per repeat of the whole chart and I need 3 repeats of that chart to get my desired width, which means I need 25x3=75. And there you go, that is the base, 75 chains. I know this sounds like a lot of work, but it really is easy, just take your time. (P.S. this is crocheted from the bottom up) Now it is time to consider armholes. I went back to my daughter and measured from where I wanted the bodice to end to where I wanted the armhole to start (7") and just continued in the chart pattern until I reached that point. Then, I put the two sides together to form a circle and centered them and marked where I wanted the arm holes to start and end based on the chart repeats. I continued the chart until I reached a marker and turned back. After a full vertical repeat, I continued only half of the width to create the neck hole. Then, I picked up at the next marker and continued in this fashion to create the shape in the picture. To connect the shoulders, overlap the front and back shoulder of each side then slip stitch with your hook through both layers. Weave in all loose ends. I did go back and exaggerate the shells along the bottom by basically doing the shell pattern in the chart along the bottom. To make the sleeves, I kind of winged it, but here is what I wrote down, let me know if you need clarification: SC = Single Crochet DC = Double Crochet SK = Skip STS = Stitches FPDC = Front Post Double Crochet Starting with the left sleeve, pull up a loop 4 stitches to the right of the seam, SC, 5 DC around 2 stitches to the left of the seam, SK 2 stitches to the left of the seam, SC in next 2 STS, CH 1 turn Row 1: (FPDC, DC in the same DC)4X, FPDC, SK SC, SC in next 2 on the bodice, CH1, turn Row 2: (FPDC, DC in the same DC, DC in next ST) 4X, FPDC, SK 2 SC, SC in next 2 on the bodice, CH1, turn Row 3: (FPDC, DC in next 2 STS) 4X, FPDC, SK 2 SC, SC in next 2 on the bodice, CH1, turn Row 4: (FPDC, DC in the same DC, DC in next 2 ST) 4X, FPDC, SK 2 SC, SC in next 2 on the bodice, CH1, turn Row 5 &6: (FPDC, DC in next 3 STS) 4X, FPDC, SK 2 SC, SC in next 2 on the bodice, CH1, turn Row 7: (FPDC, DC in the same DC, DC in next 3 ST) 4X, FPDC, SK 2 SC, SC in next 2 on the bodice, CH1, turn Row 8: (FPDC, DC in next 4 STS) 4X, FPDC, SK 2 SC, SC in next 2 on the bodice, CH1, turn Row 9: SC, (SK 2 STS, 5 DC in next STS, SK 2 STS, SC in next ST) across Bind Off. Repeat for the right sleeve switching the right and left directions. Weave in ends For the buttons, SC along the side you would like to overlap. Then, determine how many you would like (I did 5) then divide the length of the side by that number. Place markers on the overlapping side at the length you just got. SC until 1 ST before each marker, CH 3, SK 3 STS, then SC until 1 before the next marker and repeat. When you reach the end, CH 1 and turn. (SC, SK 2 STS, 5 DC in the next ST, SK 2 STS) across, you may need to fudge the last shell. Bind off and weave in ends. Sew buttons to the appropriate side, matching them up with the button holes. Now for the skirt. Start by hemming both top and bottom of your fabric. Then, measure the width of your bodice (mine is 19.5") and minus this number from the width of your fabric (45" - 19.5" = 25.5") then minus 1" for the seam allowance. This is the amount of fabric that needs to be gathered. Now, divide the number you just got (24.5) by the number of places you want to gather your fabric or each of the valleys in between the shells (24.5/7 = 3.5). With right sides together, sew the two sides of your fabric together using a 1/2" seam allowance. Measure and mark, along the top of the skirt, the width of a shell (2.5")then the last number you calculated (3.5"). Baste the gathering widths about 1/4" from the edge, leaving long tails. Gather each of the basted areas. For the lace, cut 2 strips, perpendicular to the salvage edge, 8" wide and one that is 9". Go along one long edge with your fray check and let dry. Sew the 2 8" strips together along one of the short ends. baste along the side that is not fray checked and gather it until it is the same width as the 9" strip. Pin the gathered strip to the 9" strip, 1/2" down from the side that is not fray checked and sew. With right sides together, pin the side short sides of the 9" strip and the 8" strip together and sew with a 1/2" seam allowance. Find the middle of the 9" strip and mark with a pin. Baste along the top of the 9" strip from the seam to the pin, then cut the thread leaving a long tail then baste from the pin back to the seam. With the 8" lace layer facing the inside of the fabric skirt, gather the lace and fit it into the fabric skirt, matching up the pin with the center of the fabric skirt, and pin in place. Sew the lace to the skirt about 1/4" from the top. Button up the bodice, then fit the skirt into the bodice. You may need to adjust your gathers so they match up with the valleys in between the shells. Pin in place, then hand sew the skirt to the bodice being careful not to go all the way through the bodice. I entered this project in the All Free Crochet Stitch and Share. I love to shop the remnant bins at fabric stores. I generally get inspiration of what I could make by rifling through the neatly wrapped bundles. Such is the case for the Canary Dress. About a month ago I found the gray polka dot and the yellow flowered fabric and immediately decided it needed to be a skirt for my daughter. About a week later, my niece showed me her Easter dress and I thought, "Hmm. Perhaps that yellow and gray skirt I was thinking of should really be a dress." So, when I got home, I went through the fabric remnants I had been collecting and found a plain yellow cotton and a yellow lining fabric. I threw them all in the washer and began drawing up a dress for Easter. So. Here is the deal with this dress. I really wanted to post a tutorial on it, but, quite frankly, I had to make A TON of adjustments as I went a long. However, if you are interested in making a similar dress, I will tell you where I looked for tutorials as well as the basic construction. I do have a few progress pics, but it is somewhat limited as I realized pretty early on that this would not be a good project to post as a tutorial. Materials: * At least 1/2 yard of each of the fabrics (more if you plan on making a diaper cover with ruffles) * About 12" of the fabric for the ruffles on the skirt * 1/2" double fold bias tape * 3 buttons Ok, to begin with you need to make a pattern. Hands down, the best website to go to for instruction on this is Shwin & Shwin. Essentially, you will draft a pattern from an existing dress or top that fits well. For the smocking, I added 3" to the middle of the front. For the button flap, I added 2 1/2" to the back. I did a lining for the bodice, but not the skirt. For the sleeves, I did a longer version of the sleeve that the Shwins used on the Yellow Dress. For the skirt, I used the width of the bodice and added 4" to each side for the front and the back, then I drew the petal front. Below are pictures of the cut fabric, first the lining, then the bodice, then the skirt (I really should have ironed better...): I began with the bodice. For the smocking, I refered to Tumbling Blocks for the Honecomb Smocking tutorial. There are a lot of steps, but overall, it is pretty easy. I cut two strips to iron my pleats, one 1/2" wide and the other 1" wide, which I cut from an empty cracker box. I started by lining up one side of my 1/2" strip with the center of the bodice and worked one direction, then pleated the other side. Ok, now that the decorative part is taken care of for the bodice, assemble it. Iron the smocking a bit to make it more manageable. Sew the front lining to the front bodice piece only at the neck line, then make small slits along the curves, being careful not to snip through the seam. Finally, top stitch on the lining side only, to create a rolled edge, making sure to catch the excess fabric from both the bodice and the lining. Do the same for the back pieces. Fold over and iron all. Attach the front to the back only at the shoulders. I apologize, I don't have a pictures for the sleeve steps. With right sides together, sew the sleeve to the lining along the bottom of the sleeve, then make snips at the curves and top stitch as you did around the neckline. Fold over and iron. Once right side out, make a basting stitch around the shoulder of each sleeve and ruffle to make it a puff. I found in multiple places a nifty little trick that takes the headache out of attaching sleeves to the bodice. The best pictoral representation is by Especially Creative Broad. Most patterns have you attach the front and back bodice at the sides then "fit" the sleeve into the opening and you are left with the incredibly annoying task of trying to sew that with your sewing machine, thus the headache. So, how you will do it is you will pin the sleeve in place leaving the bottom of the sleeve and the sides of the bodice unpinned. Sew in the sleeve around the shoulder. Zigzag stitch the excess fabric to reinforce the seam and prevent fraying. Next, I ripped 3 strips of my gray fabric at 3" wide, then I cut 3 lengths for the front and two backs of the bodice. I folded these strips in half and ironed them, then pinned them to the bottom of the appropriated bodice piece. Then, pinned and sewed the bottoms of the sleeve and the sides together. Now to the skirt. I attached a bias tape along the bottom in an effort to use less fabric. To do this, unfold one side of the bias tape and line it up the edge with the edge on the wrong side of your skirt piece, then pin. Sew this to the skirt along the fold. Then fold the bias tape over to the right side of the skirt piece and line it up with the seam just made (red dotted line in the picture) and you can either do a straight stitch, zigzag or decorative stitch to attach this side of the bias tape to the skirt. Do this for all of the skirt pieces, including the petal overlay. Again, I apologize, I do not having progress pictures for the next couple of steps. I guess I got caught up in the project and forgot to take some... sorry. I attached the remaining strips of gray fabric together (I would suggest doing a 45 degree seam here, I didn't and regret it), then I did a quick rolled hem, which I learned from Grainline. Fold this long strip into thirds lengthwise (it doesn't have to be exact since you will ruffle them anyway) and cut along folds. Place a pin in the top center of each strip, then do a basting stitch along the top and pull one of the threads to create a ruffle from each strip. Line up the center pin of one of the strips with the top center of the front skirt piece and pin the ruffle along the top then sew together. Next line up the center pin with of one of the remaining ruffled strips with the top middle of the bias tape and pin along the top of the ruffle, periodically lining up the bottom of the ruffle with the top of the bias tape. Again, because this is a ruffle, it doesn't have to be perfect. Then sew along the top of the ruffle. At this point, you should have two ruffles sewn to the front skirt piece, one at the top and one almost at the bottom. Now, to attach the remaining strip, center it vertically and horizontally as best you can then pin and sew along the top. Position the petals on top of the ruffled front piece, then with right sides together, place the back piece on top of that and sew the sides. Place a pin in the top center of the front and back skirt pieces. Ruffle the top of the skirt for the front and the back separately and using the same method as the gray strips. The next step is to create the flap for the button. Fold and iron 1" of the flap side of one of the back pieces, then fold over 1" again and iron. Place a pin in the top and bottom to hold in place. Repeat for the remaining back piece. Mark and sew button holes. Overlap the flaps and pin. With right sides together, fit the skirt to the bodice, adjusting the ruffle as you go and pinning. Sew bodice to skirt with a straight stitch, then zigzag over the excess fabric to prevent fraying. Place and hand sew buttons. You could be done here, but I took it a step further and made a ruffle butt diaper cover. I followed a tutorial by Made for the diaper cover, then looked to Daydream Believers for the ruffle part. You might also like: I love the idea of taking something unwanted and making something very much wanted. Such is the case with my latest creation. My sister's husband was getting rid of some dress shirts and instead of donating them, I took two to make the Metro Dress from the blog Shwin & Shwin. It is easily one of the cutest upcycles on the web and stems from a darling dress by J Crew. I only made a few changes. I added lace to the bottom and to the tie to play down the masculinity of the pattern. Also, I made the sleeves a little less capped because I want to get a onesie with puff sleeves to put underneath. A change that, in hindsight, I wish I made is to have the buttons extend into the skirt so that the dress would fit her longer, but overall, I am quite pleased with the results. So, after looking through the racks at a few different stores I came to the conclusion that finding a puff sleeved onesie would be more challenging than just adding puff sleeves to the dress. I found a great tutorial for puff sleeves and went to town. However, I did depart from the tutorial in that I made my sleeves more of a cap then an actual sleeve. In an effort to use up some soft pink bamboo yarn and make a cute little outfit for my daughter, I searched Ravelry for baby dresses and came across the Glockenblume. I basically followed the pattern, but since my daughter is on the small side, I eliminated a "blossom" from the front and the back. The other modifcation I made was to the top. Instead of doing a reverse stockinette stitch on the straps and then joining with a kitchener stitch, I knitted every row and then started to decrease every other row on the inside after 12 rows. Then I overlapped the straps and sewed on the frill. I also added some cute eyelet trim I found at Joanns, which makes the bottom flare out a bit. |
Hey there! I'm Kristin, aka Kit. Here is just a peek into my crafting mind. I hope you find something to spur your creativity!
Kit's Crafts ShopPopular Posts![]() Featured HereCategories
All
Archives
July 2020
|