
There are so many crafting mediums I enjoy, but I tend to always go back to a few trusty standbys; namely, knitting, crochet and sewing. Generally, I tend to rotate through the different techniques about every month and a half. However, when I found out last February that I was going to do the Beehive Bazaar, I went into production mode with knit and crochet, so my sewing machine did not leave its' case for quite a while. Apparently, my crafting addiction needed to make up for lost time because in the last two weeks, I sewed this skirt, a dress, a canvas container, a frilly apron and a large tote. Not to mention the 3 projects I have in mind that I still want to sew up. Don't, worry, I will blog about them all and share links to tutorials.
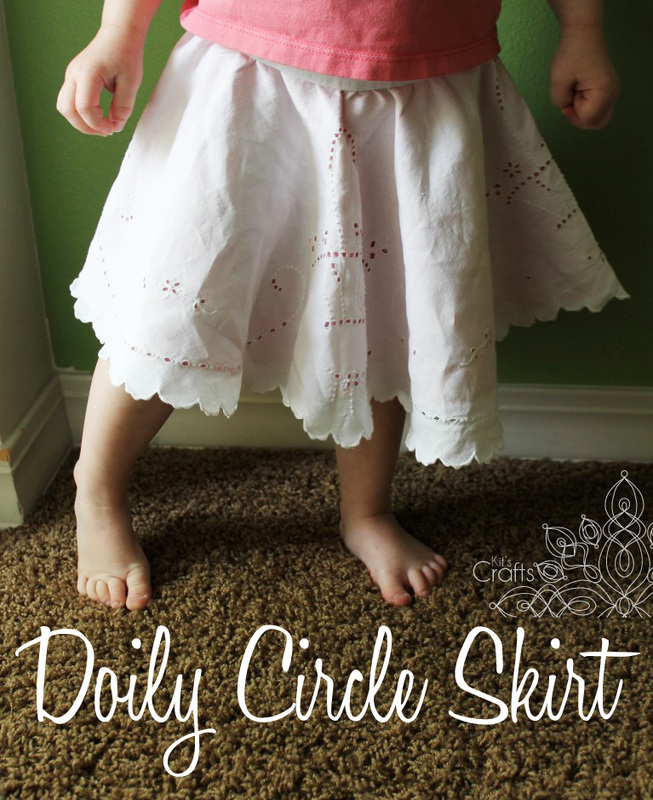
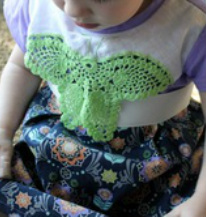
This large doily was part of a stack of doilies and lace trims my grandmother gave me about a year ago. To make the pattern for this skirt I primarily followed a tutorial over at Made, which was so great, I didn't feel that it was worth re-doing. The only deviation from the tutorial is to add the doily on top.
Materials:
Large piece of paper (or a few letter sized taped together)
Pencil
Ruler
About 1 yard of fabric (depending on how large the skirt will be)
Sewing machine/thread/pins/scissors
Large Doily
Wide Elastic
Directions:
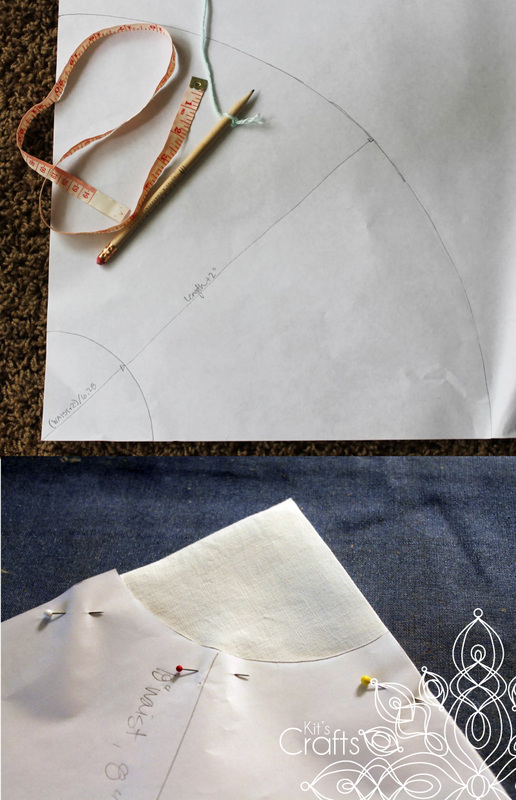
To make the pattern, go to this tutorial over at Made. Keep in mind how long the doily is and whether you want the skirt to extend past the bottom, just reach it or not hit the hem at all (like I did). Once you have the pattern drawn up, cut it from your fabric as described in the tutorial, then create a rolled hem along the bottom edge of your fabric.
Materials:
Large piece of paper (or a few letter sized taped together)
Pencil
Ruler
About 1 yard of fabric (depending on how large the skirt will be)
Sewing machine/thread/pins/scissors
Large Doily
Wide Elastic
Directions:
To make the pattern, go to this tutorial over at Made. Keep in mind how long the doily is and whether you want the skirt to extend past the bottom, just reach it or not hit the hem at all (like I did). Once you have the pattern drawn up, cut it from your fabric as described in the tutorial, then create a rolled hem along the bottom edge of your fabric.
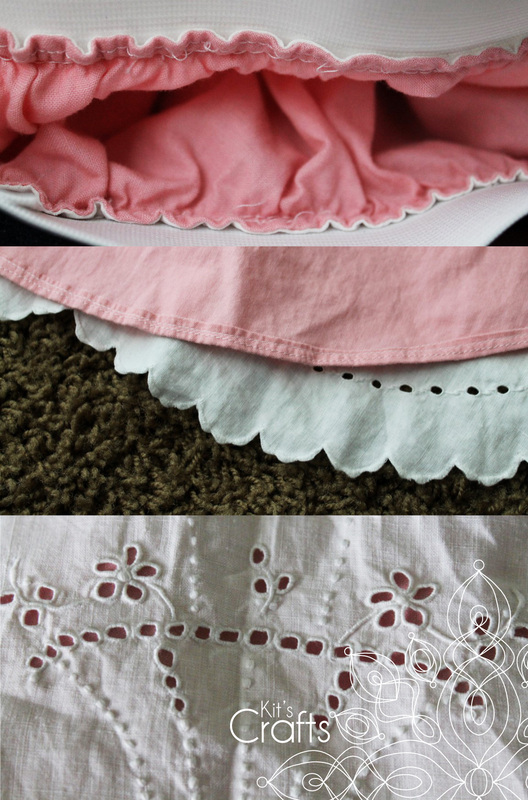
Fold your doily in half and iron the fold, then fold it in half again and iron the fold. Now, line up your pattern to the folded edge of the doily and cut the hole for the waist. Unfold the doily and lay it right side up on the table, then place your fabric skirt on top of the doily, right side up as well. Pin around the waist, then sew at your determined seam allowance. Then bring the doily through the waist hole and on top of the fabric skirt and iron along the seam. Lastly, go back to the tutorial to add in the waist band.
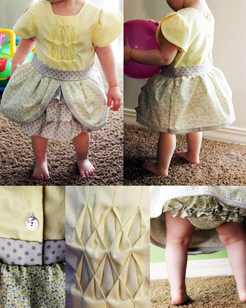
I forgot to take progress pictures as I was sewing, so here are some close ups of the skirt.
You might also like:
 |  |  |  |


 RSS Feed


