Kit's Crafts
  • Home
  • About
    • Selling Handmade Goods
  • Knitting
  • Crochet
  • Sewing
  • Crafting
    • Just for Fun
    • Wall Decor
    • Christmas Fun
    • Party On
  • From the Kitchen
    • Chocolate
    • Sweet
    • Savory
  • Quiet Book
  • The Shop

Broomstick Bag

8/29/2013

6 Comments

 
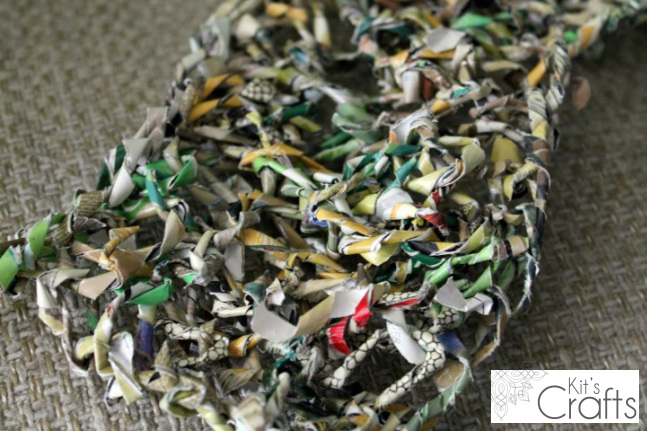
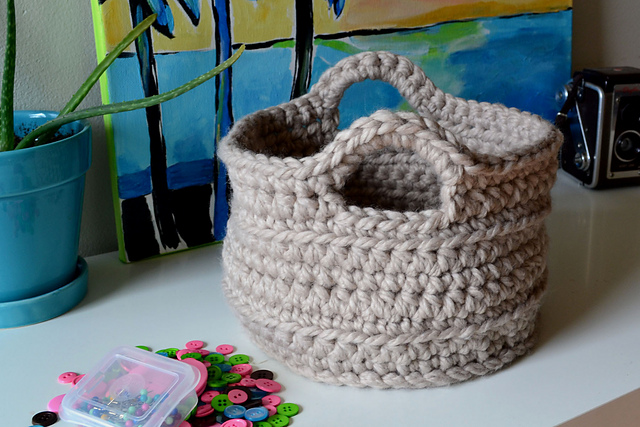
Over the summer, I have gone swimming quite a bit with my little one. Once I am at the pool, I always think, "Shoot, I should have brought some toys!" A few weeks back I thought, "I should really get a mesh bag to take those toys in..." Then I thought, "Why buy one when I can make one?!" And thus, the broomstick bag was created!
Kit's Crafts - Broomstick Bag, #FreeCrochetPattern
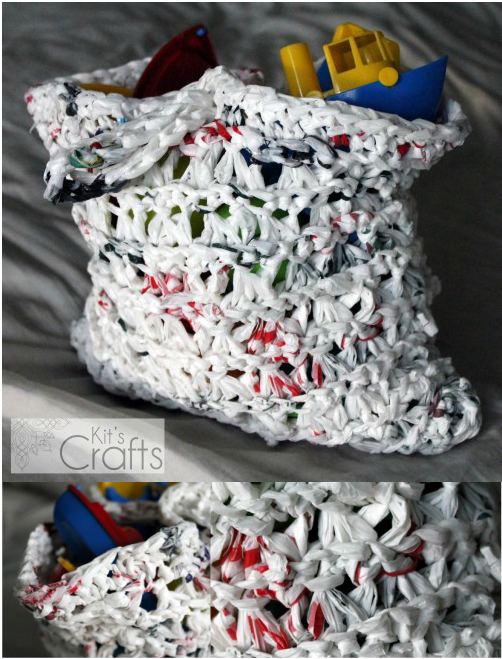
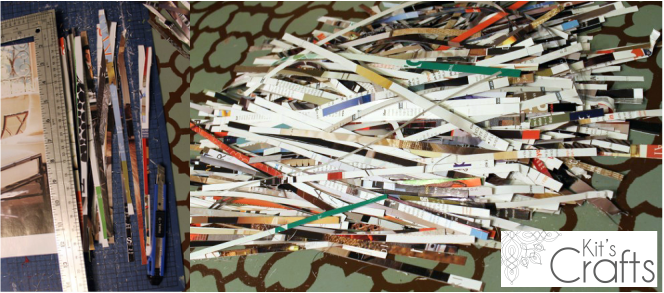
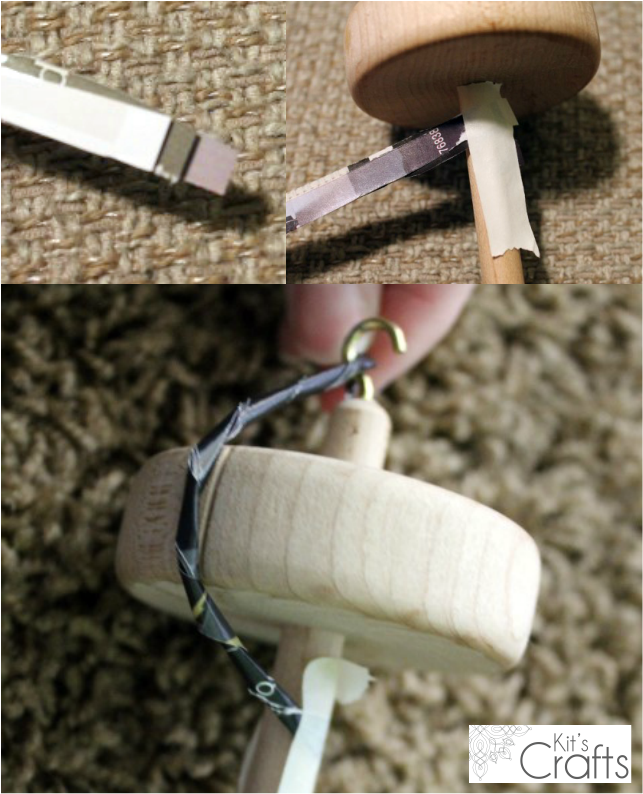
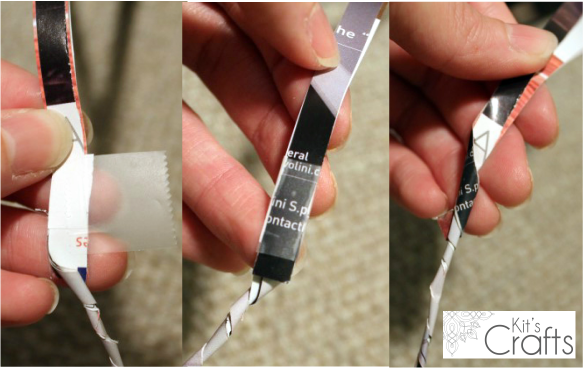
I made my bag with plarn (yarn from plastic bags), but you could just use a chunky yarn. Here is a great tutorial on how to make plarn from Plastic Bag Crafts. The handle is based on the handle used for the Cluster Stitch Recycled Gift Bag.

Materials:

15 - 20 Plastic Grocery Bags made into plarn
N (10 mm) Hook
Size 13 (9.0 mm) Knitting Needles

Abbreviations:
CH = Chain
SC = Single Crochet
SL = Slip Stitch
ST = Stitch
YO = Yarn Over
SK = Skip Stitch

Directions:
CH 31
Row 1: SC in the 2nd ch from the hook. SC across, then SC along the back of the chs and SL into the 1st sc, CH1
Row 2: SC around again, SL in first sc, CH1 (60 STS)
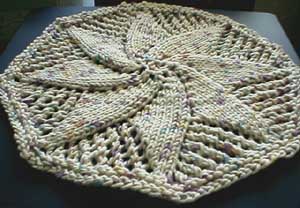
Row 3: Pull the loop on your hook to make it big, then insert your knitting needle into the loop, *insert your hook into the back loop of the next stitch and pull up a loop, then put that loop onto the needle, repeat from * in the next 28 STS, then, continue on the other side repeating from * to * but putting the loops on the other needle. You should have 30 loops on each of your needles and no loops on your hook. Turn.
Row 4: Carefully insert your hook into 3 loops on your needle, YO and pull through the 3 loops, CH1, holding the loops in place, SC3 in through the 3 loops, *carefully insert your hook into the next 3 loops on your needle, YO and pull through the 3 loops, holding the loops in place, SC3 through the 3 loops, repeat from * all around, SL into the first sc, CH1, turn
Rows 5-16: Repeat rows 3 and 4
Row 17: SC20 in the back loops only, CH30, SK 2sts, SC28 in the back loops only, CH4, SK 2sts, SC8, SL in first sc, CH1 (the skipped stitches should be in the center of the front and back of the bag)
Row 18: SC in both loops of each st all around, including in sc in the chs, SL into first st, fasten off (90 STS)
Kit's Crafts - Broomstick Bag, FREE pattern
6 Comments

Fancy Pants Cupcakes

8/27/2013

3 Comments

 
These cupcakes have been quite the labor of love. The inspiration came from Dorie Greenspan's White Chocolate Brownies, which is perhaps my favorite recipe of all time. They are comprised of subtle flavors that compliment each other so perfectly and the texture is fabulous! Anyway, so I set out to create a cupcake with these fabulous brownies in mind. I owe many thanks to my good friends Devin and Stephanie Davis who continually offered suggestions and "suffered" through taste tests. Anyway, the picture below features the cupcake, of course, which Devin frosted, and I added the candied orange peel (that Devin made, which takes a month!) and blueberry.
Kit's Crafts - Fancy Pants Cupcakes
To give you a sum up of this delightful cupcake, it contains almonds, orange zest and blueberries and then is covered with a decadent white chocolate butter frosting. Make them tonight, you will NOT regret it!

Makes 30 cupcakes

Cupcake Ingredients:
2 1/2 cups All Purpose Flour
1/2 teaspoon Baking Powder
1/2 teaspoon Salt
1/3 cup Toasted Sliced Almonds (or toasted almond flour)
1 cup butter at room temperature
1 cup Sugar
zest from 1 Orange
4 Egg Yolks at room temperature
1 tablespoon Vanilla
1 cup buttermilk at room temperature
4 Egg Whites at room temperature
1 cup Sugar
1 cup Blueberries or Raspberries (it may be tempting to put more in, but refrain, it will overpower the other flavors)

White Chocolate Frosting Ingredients:
2 cups White Chocolate Chips
2 cups Unsalted Butter slightly softened

Directions:
Center rack in oven. Preheat oven to 350F. Line two 12 cup muffin tins with cupcake liners. (Although you will probably need three) 

Sift together flour, baking powder and salt. Reserve about 1 tablespoon of the dry mixture and place in a small bowl. Set both dry mixtures aside.

Pour almonds into a Ziplock bag and zip shut, squeezing the air out as you go. Pound the almonds with a mallet or a rolling pin to crush them. You want tiny bits, nothing to really chew. Add almonds to a large bowl or the bowl of a stand mixer, along with the butter. Cream together for about 3 minutes on medium. Zest the orange over the first cup of sugar, then remove the zest and set aside to add later. Add the sugar to the butter mixture, blending until light and fluffy. Mix in the egg yolks one at a time, blending after each addition. Turn the mixer to low and add about 1/3 of the dry ingredients and mix until there are just streaks, then add about 1/3 of the buttermilk and mix until just blended. Continue alternating the dry ingredients and the buttermilk in this fashion, only mixing until streaks remain, being careful not to over blend. With the last addition of the buttermilk, also add the vanilla and zest still only mixing until streaks are left.

In a separate bowl, with clean a mixer, whip the egg whites with the remaining cup of sugar until they reach a medium stiff peak. Gently fold the whipped whites into the rest of the batter until just a few white streaks remain.

Rinse the berries and coat with the reserved dry mixture. Fold berries into batter.

Ladle batter into muffin cups, filling each cup 2/3 full. Bake for 18 - 20 minutes or until the edges are golden and a toothpick entered into the center comes out clean. Let cupcakes cool to room temperature.

For frosting, melt chocolate in a double boiler with 1/4 cup of the butter until smooth, stirring occasionally. Set aside and Let cool a bit while you whip the butter.

Place the remaining 1 3/4 cups butter in the bowl of a stand mixer or in a large mixing bowl. Whip the butter on medium high for about 1-2 minutes or until light and fluffy. In a slow stream, blend in the melted white chocolate. Keep mixing until well blended. Once the cupcakes are room temperature, either pipe or spatula frosting on top.

You can make the cupcakes at least 2-3 days ahead of time; keep at room temperature in an airtight container. The frosting should only be made the night before and kept in the fridge in an airtight container. Wait to frost cupcakes until, at most, an hour ahead of serving.

Okay people, now it's your turn. Do share, what is your most favorite recipe of all time?
Kit's Crafts - Fancy Pants Cupcakes

Picture
3 Comments

Liebster Award

8/26/2013

1 Comment

 
Yesterday, I was delighted to find that I had been nominated for the Liebster Award by Chaos with a Curve. Thanks so much to them for this awesome recognition! I have seen it a few times before and knew that it was basically to promote small blogs. I love this idea, working together to grow everyone's viewership, so great! I did a little research and came across the blog Lorraine Reguly's Life, which outlines a basic history on the Liebster Award and refines the rules a bit (which have changed A LOT). Anyway, below is all the info one needs to keep passing on the love.
Picture
The Rules:
1. Acknowledge the person who nominated you.
2.  Share 11 random facts about yourself.
3. Answer 11 Liebster questions given to you by the nominator.
4. Nominate 11 other bloggers who have under 1000 followers (I changed this as it was hard to find!), I must admit that I had trouble finding the number of followers, so I just relied on the number of likes each blog had on Facebook. I hope that doesn't stray too much from the goal...
5. Come up with 11 questions for your nominees.
6. Notify the bloggers whom you have nominated. (Note: You cannot nominate the person who nominated you.)

Random Facts:
1. I can touch my tongue to my nose.
2. I am the 2nd youngest of 5 immediate siblings, 3rd youngest including 4 step-siblings.
3. I have 16 nieces and nephews on my husband's side alone.
4. I hate having cold feet at night.
5. My favorite color is green.
6. If given the opportunity, I would leave tomorrow and move to Italy.
7. When planning my meals each week, at most, I only make 3 recipes I have tried before.
8. I know how to drive a stick shift car.
9. There was no sugar in my house until I was about 12 (we used honey).
10. If I could pull of jet black hair, I would.
11. At one point in my childhood, we moved 10 times in 9 years.

Liebster Questions from Chaos With a Curve:
1. What’s your favorite meal of the day — breakfast, lunch, or dinner?
          Who cares as long as the food is good!
2. What’s your favorite fruit?
          Brigham City Peaches for sure.
3.  When you were five, what did you want to be when you grew up?
          I truly don't remember, but I would guess, teacher.
4. What quality do you find most attractive in others? 
          Sincerity and humor.
5.  What’s your favorite sport?
          Uhh.... crafting? Does that count? I don't really do sports...
6. Gold or silver? 
          Silver, but sometimes gold.
7.  What’s your favorite candy?
          Swedish Fish.
8. What’s your favorite online shopping site?
          Amazon. It's got the best deals!
9.  What’s your pet peeve? 
          Parents who don't pay attention to their children on the playground (especially when said kid is being a nuisance...)
10.  Winter, spring, summer, or fall?
          It seems like I am always ready for the next one once it arrives. I love the different smells of all the seasons!
11.  How many pairs of shoes do you have?
          25. 9 Dress Shoes, 6 Flats, 3 Flipflops, 3 Sneakers, 2 Running, 2 Casual.


Questions for the Nominees:
1. What gets you up in the morning?
2. If you could only have 2 pairs of shoes, which would you choose?
3. What is your favorite thing to make/bake/create?
4. What hobby are you unable to live without?
5. In three words, describe yourself.
6. Where is the one place in the world you have never been but always wanted to go?
7. Are you a person that always needs a project or always looking to relax?
8. If you could live in any building in the world, where would you live?
9. Why did you start blogging?
10. What is your greatest motivator (chocolate cake, travel, clean home, etc.)?
11. If you could pick one phase of your life and live there forever (childhood, teenager, college,etc.), which would it be?

Nominees:

The Stitchin' Mommy
The Creative Princess
On a Wing and a Prayer
I Want Crazy
Joyful Healthy Eats
Leah Inspired
Real Life Notes
Love, Pasta and a Tool Belt
Architecture of a Mom
The Rookie Seamstress
Coffee With Us 3
1 Comment

Semi-Healthy Chocolate Cake

8/22/2013

11 Comments

 
I LOVE the harvest season! I don't have a garden, but my in-laws always grow way more veggies then they need, so I lovingly reap the rewards. Last week, I got a few zucchinis, so of course I had to make zucchini brownies. However, I thought I would try something new and replace the sugar with honey and the oil with yogurt. The yogurt makes the brownies more cakey and the honey makes them more moist, hence why this is a recipe for a cake. This recipe is loaded with chocolate (which makes it not so healthy) but I figured the zucchini, honey and yogurt make it somewhat healthy, hence the name. Anyway, share links to recipes you make every year during the harvest season in the comments!
Kit's Crafts - Semi-Healthy Chocolate Cake
Cake Ingredients:
2 cups All-Purpose Flour
1/2 cup Unsweetened Cocoa Powder
1 1/2 teaspoons Baking Soda
1 teaspoon Salt
1/3 cup Plain Yogurt or Greek Yogurt
1 1/3 cups Honey (preferably local)
2 teaspoons Vanilla Extract
2 cups Shredded Zucchini
2 cups Milk Chocolate Chips

Icing Ingredients:
1/4 cup Butter
6 tablespoons Unsweetened Cocoa Powder
2 cups Confectioners' Sugar
1/4 cup Milk
1/2 teaspoon Vanilla Extract

Directions:
Preheat oven to 325 F. Grease and flour a 9" x 13" baking pan.

In a medium bowl, combine flour, 1/2 cup cocoa powder, baking soda and salt. Set aside.

In a large bowl, mix together yogurt, honey and vanilla until well blended. Stir in the flour mixture. Fold in the zucchini and chocolate chips, then spread evenly into prepared pan.

Bake for 30 to 35 minutes or until the cake springs back when gently touched. Place on a cooling rake until room temperature.

While the cake is cooling, prepare the icing by first melting the butter in a small saucepan. Whisk in the remaining cocoa powder, then set aside. In a medium bowl, combine the confectioners' sugar, milk and vanilla until well blended. Stir in the butter mixture then spread over the cooled cake.

P.S. as a little tip, I usually get WAY more zucchini then our little family needs, so I send it through the grater on my food processor then freeze it in 2 cup increments so I can make stuff throughout the year!
Content in the Meantime
Picture
11 Comments

Magarn Ideas

8/20/2013

0 Comments

 
Last week, I posted a tutorial for how to make yarn from recycled magazines. I had a few people ask me what to make with this material. So, this post is purely to inspire some creativity with magarn. Obviously, since any exposure to moisture would compromise the strength of the magarn, it should probably only be used for decorative purposes, so all of my suggestions are with that in mind.
Kit's Crafts - Magarn Ideas
The most obvious use to me, and what I had in mind when I originally made this, is to knit or crochet it, so most of my ideas are using that method. The above picture is a sample of knitted magarn. I have a couple of suggestions for knitting and crocheting magarn, though, you will want to use large needles (size 10+) or a large hook (size N+). Also, you may want to invest $4 on a leather thimble from Joanns (in the sewing section) to protect your pointer finger from the coarseness of the paper. Now to some ideas.
Picture
Round Doily Dishcloth from Scraps & Heirlooms
Picture
Four Round Doily from Flushed with Rosy Colour
Picture
Yarn Basket from Pickles
Picture
Chunky Crocheted Basket Pattern from Crochet in Color
Picture
Amigurumi Elephant from Lion Brand
Picture
Dachshund Balloon Animal from Lion Brand
Picture
How to Weave a Wicker Basket from Jon's Bushcraft
Picture
Basic Weaves from Merriam-Webster Visual Dictionary Online
For the doilies at the top, you could display them on the wall or use them as a decorative plate or even a place mat. I put the amigurumi animals in because I thought it would be really cool to make one and display it like a sculpture either in the living room or high up in a kid's room. As for the weaving on the bottom right, you could weave up a quick table runner or place mats or be really ambitious and weave up a whole table cloth for decoration! Another thought I had was to make a sample of your favorite lace stitch to display on the wall. I hope these ideas get the wheels in your head spinning with ideas of what wonderful things you could make with this lovely material. I would love more ideas of what you all come up with and pictures would be even better! Comment with your ideas and email pictures to kitscrafts2012@gmail.com.
0 Comments

Caramel Puffed Wheat Squares

8/16/2013

0 Comments

 
In an effort to cut back on costs, I tried making my own granola bars, but they really weren't that great. For the recipe, I bought a bag of puffed wheat. Unfortunately, the puffed wheat sat in my cupboard for at least a month without being eaten. A couple Sundays ago I decided it was time to do something with this neglected cereal. Here is the recipe I made, which was adapted from a recipe I found at The Mother Huddle.
Kit's Crafts - Caramel Puffed Wheat Squares
Ingredients:
8 oz bag Puffed wheat
1/2 cup Butter
1 cup Brown Sugar
1/2 cup Light Corn Syrup
1 cup Sweetened Condensed Milk
12 oz bag Milk Chocolate Chips

Directions:
Grease a 9" x 13" pan. Pour puffed wheat into a large bowl and set aside.

In a medium saucepan, melt butter over medium low heat, but do not let boil. Add sugar and corn syrup, then turn up the heat and bring to a boil. Add sweetened condensed milk and return to a boil. Then, reduce heat to medium and, stirring constantly, cook to 240⁰ (soft ball stage), which takes about 10-15 minutes.

Pour caramel mixture over puffed wheat and mix thoroughly. Gently press into greased pan with the back of a wooden spoon.

In a small saucepan, melt the chocolate chips. Sporadically drop dollops of the melted chocolate on top of the caramel puffs, then spread into a semi even layer and let cool.

Once both layers are room temperature, cut into 16 rectangles. Store in an air tight container for up to a week.
Picture
0 Comments

Embroider Me Beanie

8/14/2013

4 Comments

 
Last week I was privileged enough to test a pattern for my lovely friend Heidi over at Hi-Diddle-Dee-Lee Crochet. This darling hat was such a quick and easy project so I thought I would give her some love and share a link to the pattern with all of you! Hope you check it out!
Embroider Me Beanie
4 Comments

Magarn (Magazine Yarn)

8/12/2013

0 Comments

 
As those of you who follow me may have noticed, I have been looking for alternatives to yarn in an effort to be more economical in my crafting. Well, a few months back, I came across a tutorial for Handspun Recycled Newspaper Yarn on Green Upgrader. I was greatly intrigued, but couldn't help but think of how incredibly dirty newspaper is, so what came to mind is the three shelves in my closet that are jam packed with out-dated interior design and architecture magazines that I have been hoping to upcycle. At first, I tried using the same method as the newspaper yarn? However, the problem here is that newspaper is thinner and more malleable than magazines. While contemplating this, I began to think about plying yarn, using multiple strands of a material and my AHA moment was revealed!
Kit's Crafts - #Magarn (Magazine Yarn)
Materials:
Magazine
Craft Knife
Self Healing Mat
Straight edge
Drop Spindle (I got mine on Ebay for around $12 and it came with a niddy noddy)
Scotch Tape or another clear tape
Masking Tape (optional)

Step 1:
Cut 1/4" strips of your magazine using your craft knife, straight edge, and self healing mat.
Kit's Crafts - #Magarn (Magazine Yarn)
Step 2:
Create a start to ply the #magarn. Take 3 magazine strips and stack them on top of each other, but staggered a bit as in the picture. Tape the strips to the drop spindle, then twist the strips between your fingers until you have enough to reach the hook.
Kit's Crafts - #Magarn (Magazine Yarn)
Step 3:
Roll the spindle on your leg as you would do for wool or newspaper yarn, leaving about 2" - 3". While pinching the first rolled strips, pick up 3 more strips and stack them as you did the first, then use them to overlap the previous strips. Tape all 6 strips together with a piece of scotch tape, then manually roll the section of scotch tape. Repeat this step until you have as much magarn as you need.
Kit's Crafts - #Magarn (Magazine Yarn)
If you are looking for some ideas of how to use this lovely stuff, I composed a post to inspire some ideas.
0 Comments

Wreaths for Every Occasion

8/8/2013

0 Comments

 
A couple weeks ago, I shared my favorite flower tutorials, this week, I am sharing my favorite DIY wreaths. I hope this inspires you to pretty up the front door or maybe a mantle or perhaps a picture wall! Enjoy!
Yarn Wrapped Wreath - Hands on as We Grow
From Hands on as We Grow
Felt Flower Wreath - Little Things Bring Smiles
From Little Things Bring Smiles
Winter Button Wreath - Leigh-Ann
From Leigh-Ann
Ruffly Felt Rosette Wreath - Domestifluff
From Domestifluff
Sheet Music Wreath - Frugal Girls
From Frugal Girls
Ruffle Wreath - Kit's Crafts
From Kit's Crafts
0 Comments

Strawberry Bars

8/6/2013

0 Comments

 
I found the recipe for these phenomenal Strawberry Bars through Yummly and let me tell you, this recipe deserves a serious shout out. It is so good, I made it twice in one week and I didn't even share it with my neighbors! It is one of those desserts that you think, "oh, I will just have a small piece", but don't kid yourself, you will definitely be going back for seconds and thirds. It is a perfect combination of pie and bar cookie with a light and decadent strawberry layer on top of a crust that is reminiscent of a buttery short bread. Seriously, make this tonight. Your will not regret it!  
Strawberry Bars
0 Comments
<<Previous
    Kit's Crafts
    Hey there! I'm Kristin, aka Kit. Here is just a peek into my crafting mind. I hope you find something to spur your creativity!
    Instagram

    Kit's Crafts Shop

    Popular Posts

    Picture
    Picture
    Picture
    Picture
    Picture
    Picture

    RSS Feed

    Picture
    Kit's Crafts
    Picture
    The Yarn Box

    Featured Here

    Picture
    Moogly
    Picture

    Categories

    All
    About
    Baby
    Baking
    Bio
    Caramel
    Child
    Chocolate
    Christmas
    Cooking
    Crochet
    Decor
    Dessert
    Dress
    Free Knit/crochet Pattern
    Free Sewing Pattern
    Interior Design
    Knitting
    Link Party
    Materials
    Pattern
    Quiet Book
    Quiet Book
    Recipe
    Selling Handmade Goods
    Sewing
    Spats
    T Shirt
    Tutorial

    Archives

    January 2020
    July 2019
    November 2018
    September 2018
    August 2018
    July 2018
    May 2018
    April 2018
    February 2018
    January 2018
    April 2016
    September 2015
    March 2015
    February 2015
    November 2014
    October 2014
    September 2014
    August 2014
    July 2014
    June 2014
    May 2014
    April 2014
    March 2014
    February 2014
    January 2014
    December 2013
    November 2013
    October 2013
    September 2013
    August 2013
    July 2013
    June 2013
    May 2013
    April 2013
    March 2013
    February 2013
    January 2013
    December 2012
    November 2012
    October 2012

Powered by Create your own unique website with customizable templates.