
A few years back, a friend gave me her small stash of yarn as sh didn't figure she would use it. Within the skeins was this fuzzy black yarn that I didn't really care for. It has been kicking around the bottom of my large plastic tote this whole time without an evident purpose. Well, at the beginning of this month I saw it and thought, "What the heck, I will make a quick bonnet from this and hope for the best." When I finish it, I actually really liked the little hat, so I thought I would add it to my list of free knit patterns. Enjoy!
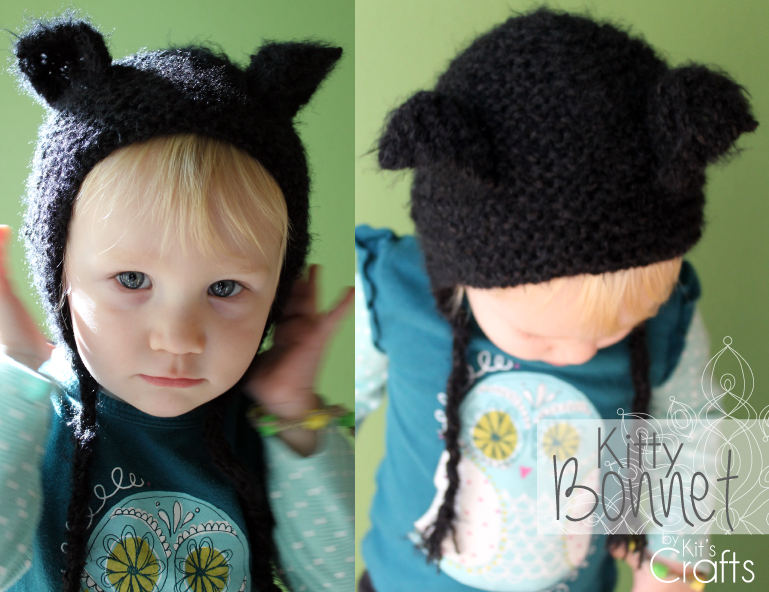
I only did one size for this bonnet, however, it is REALLY stretchy and could probably fit anywhere from a 1-year-old up to a small 3-year-old. It is knit flat from the front to the back then folded in half and sewn together on one side. It is a VERY easy pattern and I would recommend it for beginners.
Gauge: 2" = 14 rows x 8 stitches in Garter Stitch
Materials:
Size 10 knitting needles
100 yards fuzzy worsted weight yarn
2 stitch markers
Yarn needle
Abbreviations:
CO = Cast On
K = Knit
STS = Stitches
PM = Place Marker
SSK = Slip, Slip, Knit
K2Tog = Knit 2 Together
Pattern:
CO 60 using long tail cast on method
Knit every row until piece measures 3.5"
K30, PM, K30
K1, SSK, K to 2sts before marker, SSK, SL marker, K2tog, K to 3sts before end, K2tog, K1
K across
repeat previous 2 rows 8X
Bind off leaving a long enough tail to sew the two sides together. Your piece should measure approximately 14" x 5 1/2"
Ears (make 2):
CO 20 using long tail cast on method
Row 1: K1, SSK, K14, K2tog, PM, K1 (18 STS)
Rows 2, 4, & 6: K across
Rows 3, 5 & 7: K1, SSK, K to 2 before the marker, K2tog, slip the marker, K1 (16 STS) (14 STS) (12 STS)
Row 8: K7, PM, K7
Row 9: K to 2 before the marker, SSK, slip the marker, K2tog, K to end (10 STS)
Row 10: K across
Repeat Rows 9 and 10 until there are only 4 STS left. For the next row, SSK, K2tog, turn K2tog
Bind off, leaving a long enough tail to sew the ear to the hat.
Finishing:
Fold your hat in half so that the shorter ends are together and sew along the bind off side.
Position and attach each ear.
Cut 6 pieces of yarn twice the length you would like the braids to be. Fold three of the pieces in half. Pull the loop at the half of these three strands through one corner of the hat, then pull the loose ends of these same three pieces through the loop and pull tight. Braid the three (now six) strands and tie a knot at the bottom. Repeat on the other corner with the remaining three lengths of yarn.
Weave in any loose ends.
You might also like
 |  |  |  |


 RSS Feed


