
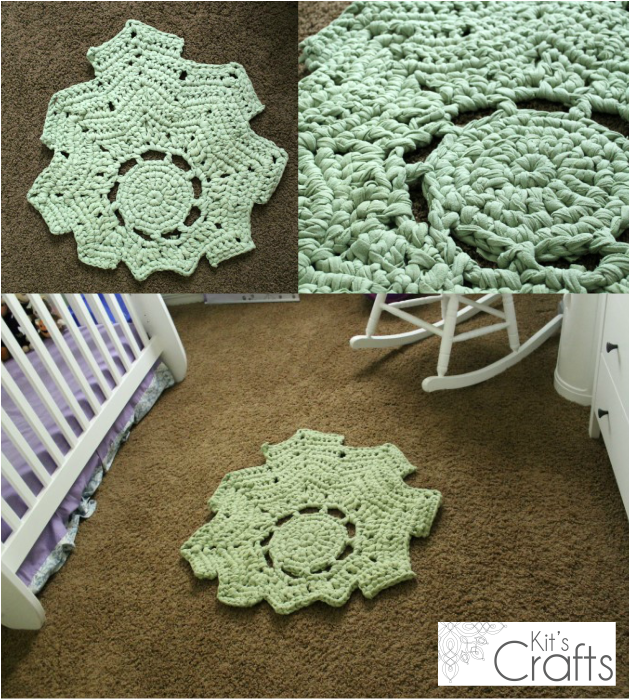
Some time ago, while perusing Pinterest, I came across a crochet chart for a modern doily that I loved. I knew it had to be a rug for my daughter's room, but was stuck on what to make it out of. I put it to the back of my mind and started working on some Spats patterns, but that doily kept creeping into my mind and ended up inspiring me to create the Chevron Fancy Spats. Once that was complete, I kept thinking of this doily becoming a rug. So I started to research materials that I could use/afford to make it with, when I came across a rug made of old sheets. I have seen rag rugs before and not thought much of them, but this one wasn't braided, it was crocheted. A light bulb went off, I packed my little one into the car and headed for the thrift store. I bought a set of pale green, jersey, king sized sheets and began cutting/ripping 2" strips. Below is the end product.
Materials:
Q (15.75 mm) Crochet Hook
Old Sheet, a king size set was sufficient for this one, but it is on the smaller side
Doily pattern of your choice (simpler patterns would be easier)
Tips:
1. I pretty much followed the chart for this pattern, however, instead of doing DCS for every row, I did SCS for one row, then DCS for the next row because I was concerned about running out of yarn.
1. I did not test different strip width sizes, I just started tearing at about 2" wide, then tried to make sure that all of the strips were approximately the same width.
2. When picking a pattern, you can try one with fancy stitches that involve yarn overs, just bear in mind that you will have to be conscious of where the knots are falling, so you may need to untie and retie some of them as you go. Also bear in mind that this is pretty thick on it's own, so if you pick a pattern that layers stitches (FPDC/BPDC) it could be a hazard...
3. A note about the fabric, keep in mind that the back of the fabric will show up too. The sheets I used (and most sheets) were the same on the back and the front which is how I was able to get a solid colored rug.
4. Plan on taking brakes. My right arm would get pretty tired.
5. Some of the sites I looked at for tutorials have you cutting a slit in one strip then pulling the next strip through to connect them, but I just tied my strips together and wound them into a HUGE ball. While I was crocheting, I made a point of pushing the knots to the back side so that I wouldn't have to weave them in.
6. When I finished the rug, it didn't lay completely flat so I took the tops off my storage ottomans and placed them on it so it would flatten out, which worked great. This seemed to be a typical problem on most of the blogs that I read about using sheets for a rug. I would suggest at least putting books or something on top or, if you can, block the final product.
 |  |


 RSS Feed


