
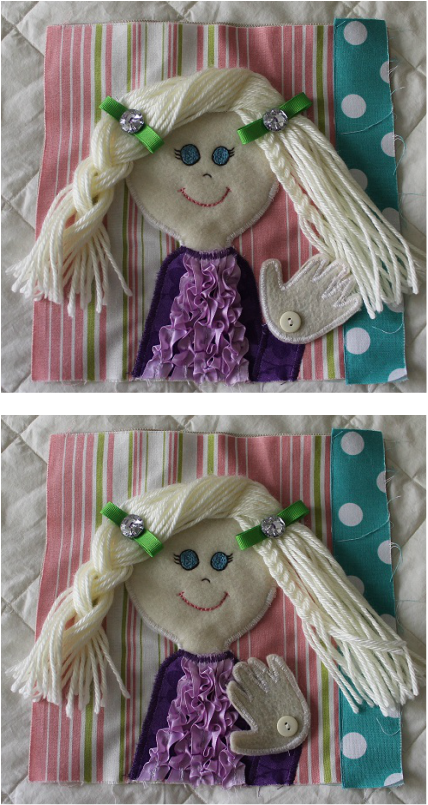
The inspiration for this page is a collaboration of two pages. The face and hair came from Craftalicious, but the waving hand came from a pirate page at Orange Crafts. I'm pretty pleased with the outcome.

For this page, beyond the basics, you will need:
* The template to lay out the page
* Pattern for this page (remember, when printing patterns UNCHECK THE FIT TO PAGE BOX)
* Ribbon for the shirt and for the hair
* Embroidery thread
* Two buttons, one matching the flesh colored felt and another to anchor it from behind
* Eyelet
* Yarn
So to start with, cut the head out of flesh colored felt. If it is see through, cut out a second one. Then embroider the face onto the felt. Here is a tutorial for how to embroider onto felt. I used a back stitch to create the face and filled the eyes with a chain stitch in a spiral.
The next thing is to decorate the shirt. If I had to do it over, I might have made a pocket on the shirt for hairties, but I'm not sure that is necessary. Anyway, I created the tuxedo shirt by first doing a basting stitch down the center of the ribbon, then pulling one of the strings to ruffle the ribbon. Then, I pinned and sewed each ribbon, one at a time.
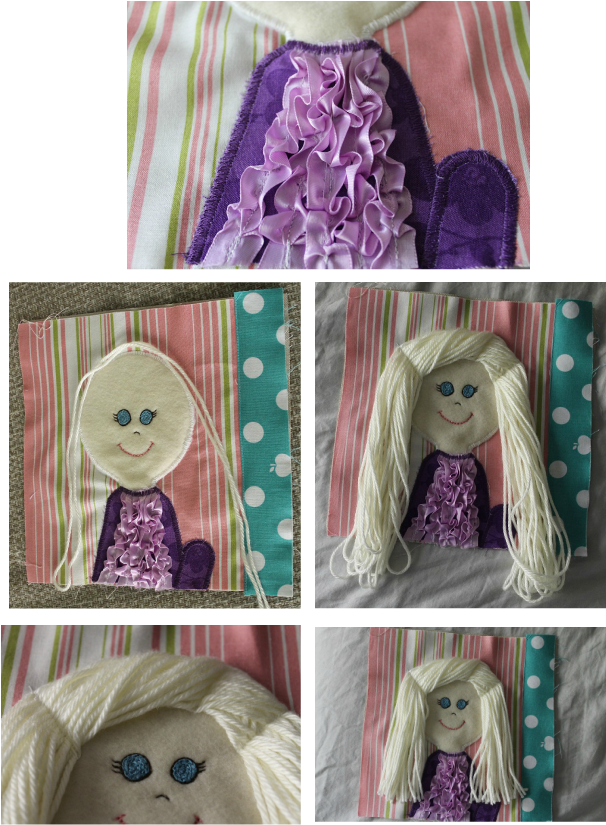
The next step is to sew the face, shirt, and arm to the page. I added the binding strip (a 3"x9" piece of fabric ironed in half) at this time so I would remember which side it was on.
Next you will attach the hair.
* Measure how long you want the hair (over shoot it).
* Then just make it as thick as you like.
* To sew it on, I twisted it a couple times then placed it where I wanted the hair to lie, then sewed it on.
* Then give the girl a trim and add some barrettes (mine are just ribbons sewn on with a button)
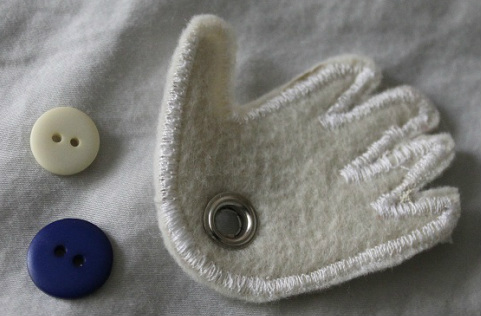
Now to the hand.
* Cut one hand from felt and one from the reinforcement material
* Sew the cut hands to another piece of felt
* Install an eyelet in the lower middle of the palm
* Attach the hand to the page by sewing the two buttons together through the eyelet
* Cut one hand from felt and one from the reinforcement material
* Sew the cut hands to another piece of felt
* Install an eyelet in the lower middle of the palm
* Attach the hand to the page by sewing the two buttons together through the eyelet


 RSS Feed


