Materials:
* 16" of fabric with a 45" width
* Iron and Ironing board
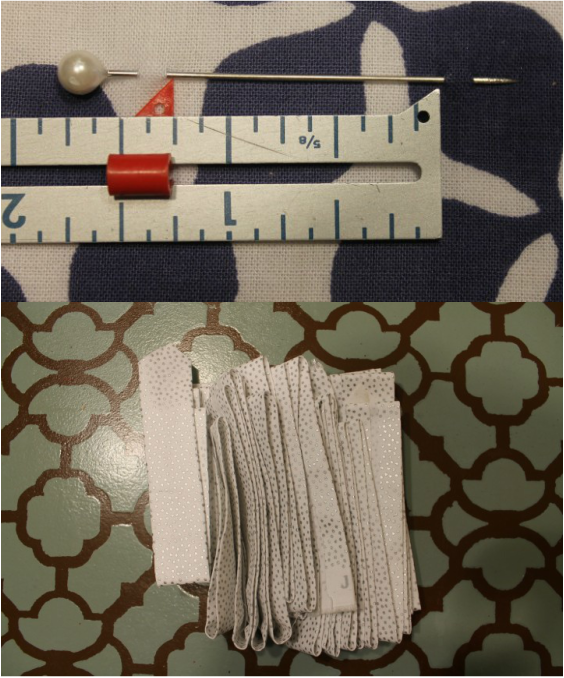
* Long pin or needle
* Eyelet punch, setter and anvil
* Metal eyelets
Creating the Bias Tape:
* Cut 7 strips of fabric, 2 1/4" wide by 45" long
So, there are quite a few ways of doing this. Of course, there are the bias tape makers, some of which will even iron it for you after folding, but I am cheap. So I searched the web and I found some pretty interesting methods, The Scientific Seamstress has a great print out for a bias tape maker out of cardstock and, talk about creative, Meijo's Joy has a bias tape maker created from a craft cutter! However, neither of these were the right size and I wanted something that I could do specific to this project. I found the answer at Creative Little Daisy. Please go to her website for instructions, but when you put the pin in your ironing board, make the width 1 1/4". Your bias tape should fold over 1/2" on either side with 1/4" between the edges of the fabric. Please email me with any questions at [email protected].
Remove all removeable pieces and be careful not to catch the moving pieces when you are sewing.
For this step, I went back to the web to find a great solution for doing this, because when I have done blanket bindings before, I always miss the edge on the bottom in places. I found the BEST method on Honey Bear Lane, but rather than redirect you, I posted what I did as it would be easier than trying to describe the specifics.
* Match up what pages you would like to go together then, with wrong sides together, baste along the outside about 1/4" from the edges
* Unfold one of your bias tapes and line up the edge of the bias tape with the edge of the page (I started on the binding edge because I figure the seam would be more hidden that way)
* Starting about 1/4 of the page away and sew along the fold until about 1/4" from the end, back stitch and cut the thread
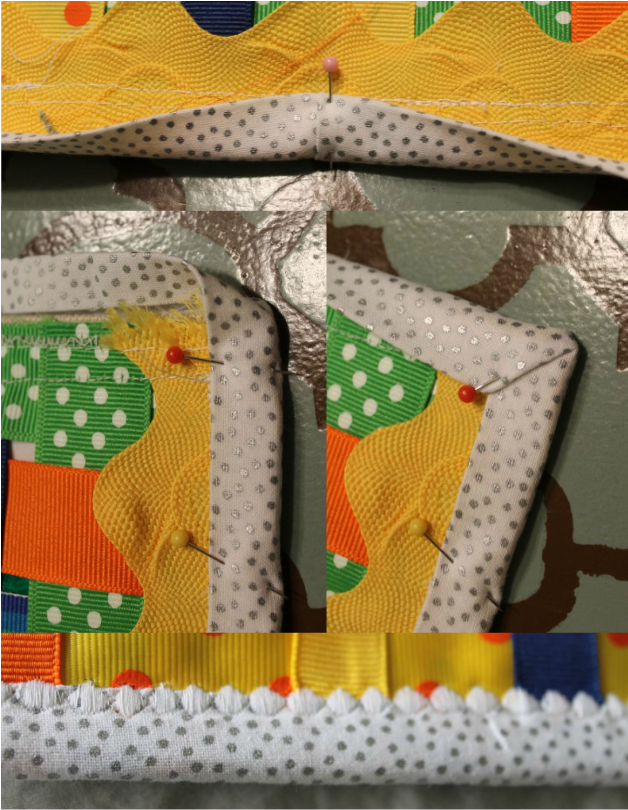
* For the corner, hold the bias tape straight out in front, then fold the tape at a 90 degree angle away from the page, then fold back, lining the fold with the edge just sewn and the tape edge with the edge of the page, pin along this side
* Start at the edge and sew along the fold line of the bias tape and over the corner folds you just made until a 1/4" from the next edge, backstitch and clip thread
* Repeat the last two steps for all corners DO NOT CLOSE UP THE OPENING ON THE BEGINNING SIDE
* Line up the edge of the bias tape along the side you began on, fold back so the fold is at the halfway point, 4 1/2", then cut the remaining off so there is about 1/2" fold over, pin
* Line up the remaining bias tape with the page edge and overlap the fold about 1 to 1 1/2", then cut the remaining tape and pin
* Sew along the remaining edge to close the gap, removing the pins as you go
* Line up the fold of the bias tape with the seam created from sewing the other side (this ensures that you catch both sides), pinning as you go
* For the corners, continue folding the tape over the edge as if the page keeps going and there will be a 45 degree angle, turn 90 degrees and continue folding over the next edge, pinning as you go
* You have a few options at this point, you can do a straight stitch about 1/8" in from the edge or you can satin stitch around the edges, or you can get fancy and pick a frilly stitch (I went with fancy) to secure the remaining side of the bias tape
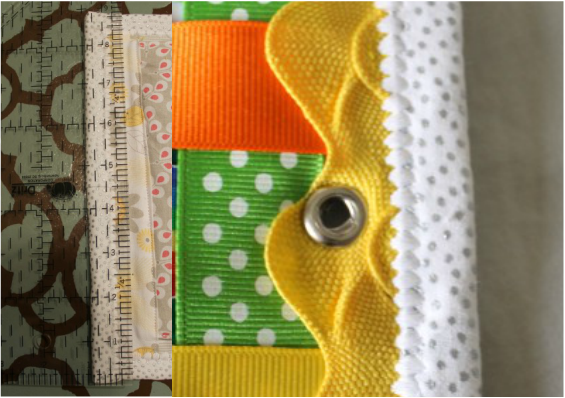
* On the binding side, mark for your eyelets, I put them 1 1/2" from the edge of the page and at 2 1/2" and 6 1/4" from the bottom
* Punch a hole at each of those marks with your eyelet punch
* Set the eyelet (If you have questions about the eyelets, refer to the monster page or email me)


 RSS Feed


