
If you remember from my last post, I redid my "getting ready" corner, as evidenced below.
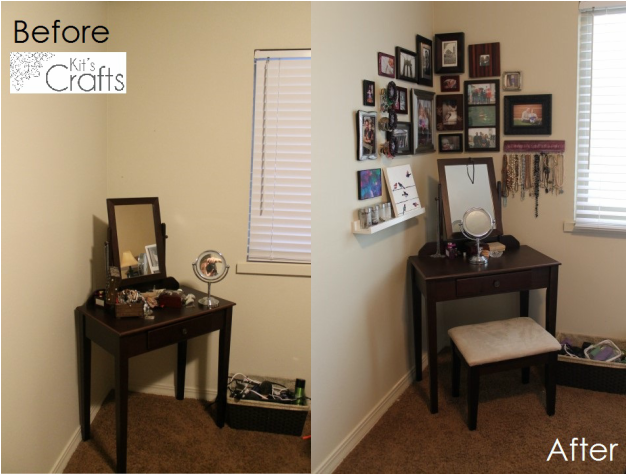
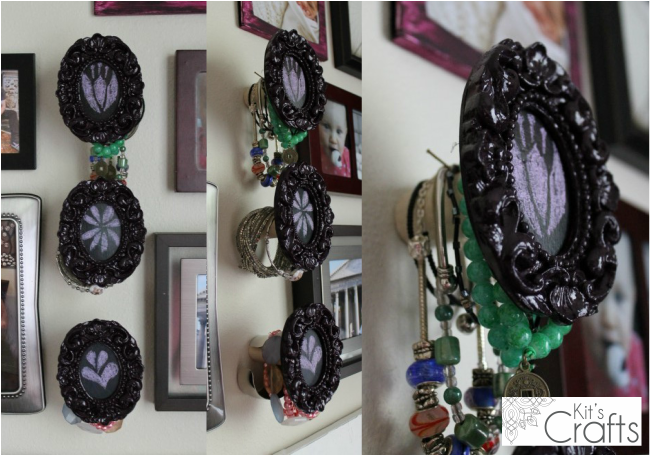
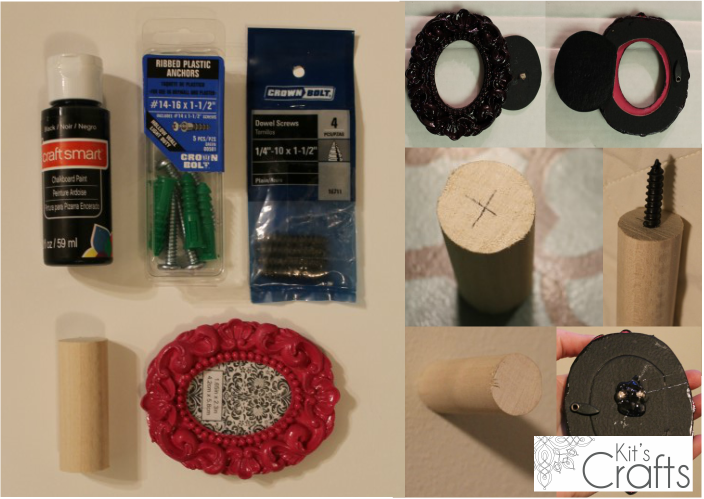
After finishing my Necklace Hooks, I realized I needed somewhere to put my bracelets and my hair things. Originally, I was planning on keeping these things in the jewelry box I already had, but it was still just a jumbled mess, so again, I looked to the internet for inspiration and came across some DIY wall pegs for a child's room from Dot Coms For Moms. I used the basic construction, but I wanted to cap it with something clever. After racking my brain for a couple weeks and remaining stumped, I was standing in line at Michael's and looked down at the dollar bin to find some really cute, intricate little frames in neon hues. I grabbed a few and some chalkboard paint and headed home. (The tutorial for this is at the bottom)
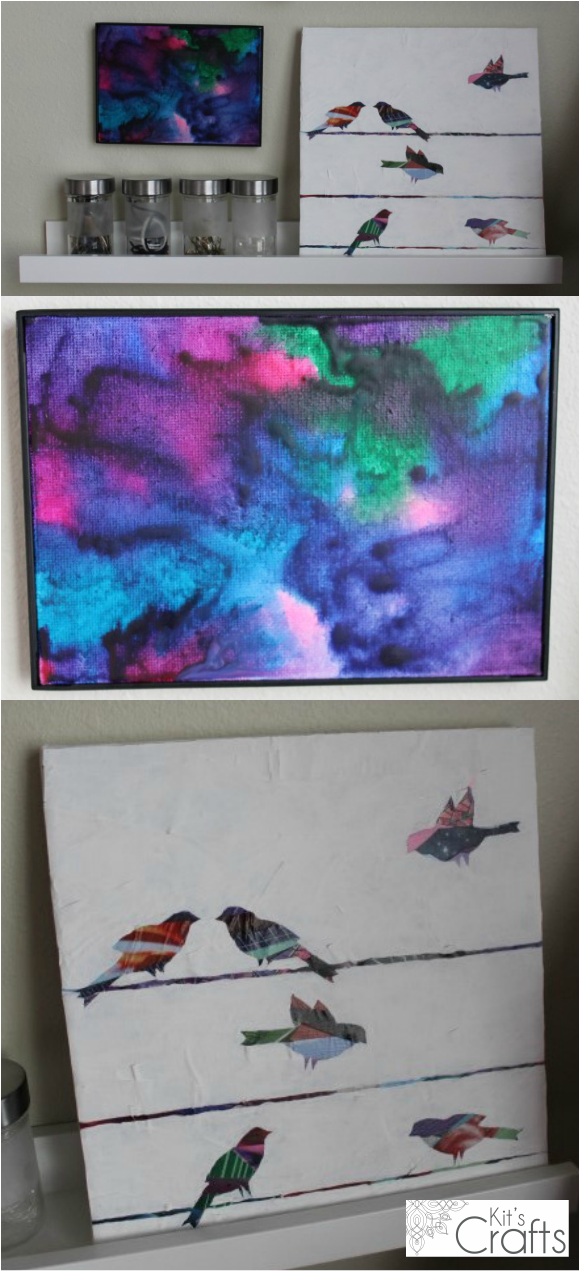
So, the only issue remaining for this make-over was what to do with my hair ties and bobby pins. I figured that I could solve this through some finds at Ikea so off I went. In the kitchen section, I was lured by the Droppar Spice jars, but was unsuccessful in finding something cheap to attach them to the wall, until I hit the As-Is section. It was there that I discovered the Ribba Picture ledge, which worked out beautifully! I added a couple projects I found online (Crayon Melting from Her Campus and Mod Podge Silhouette from Tatertots and Jello) to complete the look and the make-over was done!
Bracelet Pegs Materials:
* 3 Small frames (about 3")
* Craft Knife
* Chalkboard Paint
* Foam Brush
* Chalk
* 1" Dowl cut into 3 2" sections (you can have this done at Home Depot)
* Drill
* (3) 1/4" Dowl Screws
* Pliers
* (3) #14 Plastic anchors
* Glue Gun and Glue Sticks
Start by opening up the frame and carefully cutting out the plastic with the craft knife and paint the frame if you so choose. Then paint the cardboard back with the chalkboard paint. (Make sure to shake the bottle really well, if it comes out watery, shake it up more. It should be similar to acrylic paint in consistency.) Draw pictures in the frames with chalk.
Next, if needed, sand the edges of the dowels, then find the center and mark. Drill a hole here, then with pliers, turn the dowel screws into each hole. Mark on the wall where you want the pegs to go, then drill a hole. Hammer in plastic anchors then screw each dowel into wall.
Put a large dollop of hot glue on the back of each frame and push onto the end of each dowel; holding for about a minute to set.


 RSS Feed


