
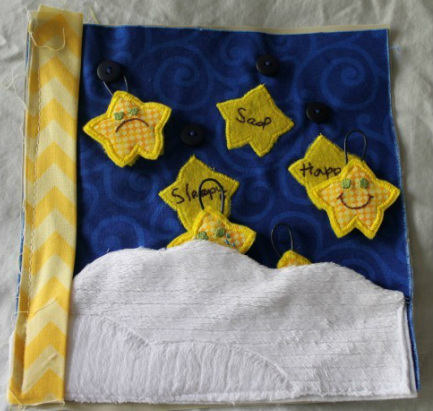
When deciding what I wanted in my daughter's quiet book, I had determined that I wanted a page displaying emotions. I wasn't very successful in finding something that would work, however, I did find a clown page, but I'm not really a fan of clowns.... So, I came up with this super cute little star page.
Materials Needed:
* Fabric (remember to prewash all fabrics)
* Fuzzy material for cloud pocket
* Felt for the stars on the page, back of the pocket and back of the stars
* Embroidery floss and needle
* 4 buttons (that match your background) with a 3/4" diameter
* Blue mini rope (I found mine in the dollar bin at Walmart in the sewing section)
* Duct tape
* Reinforcement material for the middle of the stars
* Steam a Seam
* 9"x9" square of reinforcement for the back of the page
* Pattern
Pocket:
* Cut big Cloud from felt and fuzzy material and small cloud from the fuzzy material and steam a seam (Keep in mind what side you want the binding to be on)
* Position small cloud on large cloud and iron in place (you may need to iron from the back side if fabric is really fuzzy
* Satin stitch along the top of the small cloud to attach
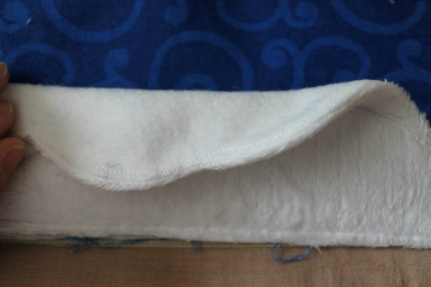
* Position the large fuzzy cloud face down on the large felt cloud and sew along the top
* Understitch the felt side of the pocket, flip right side out and iron
* Line up the pocket with the bottom of the page and baste along the sides and bottom
* Cut big Cloud from felt and fuzzy material and small cloud from the fuzzy material and steam a seam (Keep in mind what side you want the binding to be on)
* Position small cloud on large cloud and iron in place (you may need to iron from the back side if fabric is really fuzzy
* Satin stitch along the top of the small cloud to attach
* Position the large fuzzy cloud face down on the large felt cloud and sew along the top
* Understitch the felt side of the pocket, flip right side out and iron
* Line up the pocket with the bottom of the page and baste along the sides and bottom
Stars:
(This is done in the same fashion as the cupcake tops, just with mini rope loops instead of snaps)
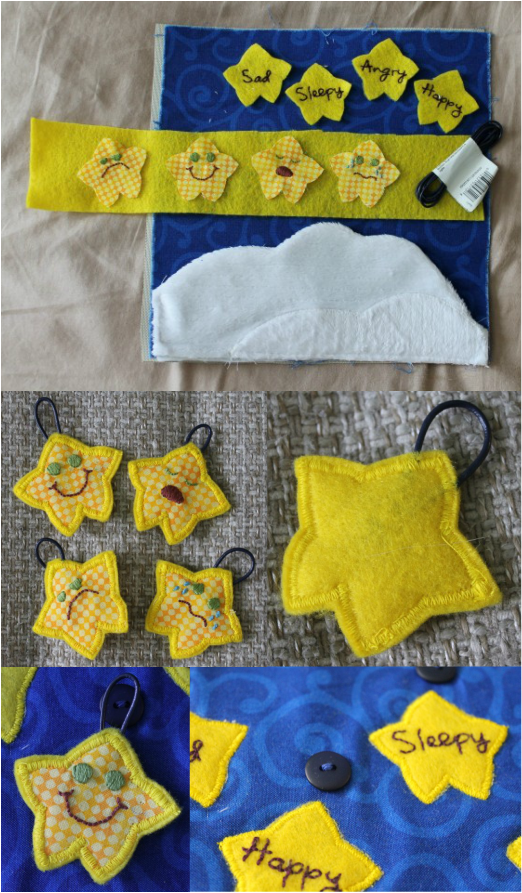
* Cut 4 stars from felt and fabric
* Cut 8 stars from the steam a seam
* Cut 4 strips of the mini rope 3 1/2" long
* Print the words using your choice of font
* Using one of the techniques from this website, transfer the faces and the words to the appropriate stars
* Embroider words and faces (I used a back stitch for the words and any lines, and an embroidery satin stitch for anything that needed to be filled in)
* Using the template, position the word stars and iron to page
* One at a time, iron a fabric star to a strip of felt and satin stitch around the edge then cut the star from the strip
* Fold each mini rope in half and attach to a scrape of reinforcement with duct tape
* Using a zigzag stitch with the length very close together, zigzag through the mini rope loop to attach (the same method used for the clasp on the door of the Dress Up page)
* Cut the scrap of reinforcement around the mini rope loop, being careful not to cut the loop
* Place the mini rope loop on a strip of felt, then place and pin the fabric star over the top
* Straight stitch on the inside of the satin stitch, making sure to sew through the loop
* Cut star from felt being careful not to cut the loop
* Position each face star on the matching word star and place a button where it would need to be for the loop to catch it and the face star to cover the word star, then sew the button in place
Add a 1 1/2" binding to the appropriate side.
(This is done in the same fashion as the cupcake tops, just with mini rope loops instead of snaps)
* Cut 4 stars from felt and fabric
* Cut 8 stars from the steam a seam
* Cut 4 strips of the mini rope 3 1/2" long
* Print the words using your choice of font
* Using one of the techniques from this website, transfer the faces and the words to the appropriate stars
* Embroider words and faces (I used a back stitch for the words and any lines, and an embroidery satin stitch for anything that needed to be filled in)
* Using the template, position the word stars and iron to page
* One at a time, iron a fabric star to a strip of felt and satin stitch around the edge then cut the star from the strip
* Fold each mini rope in half and attach to a scrape of reinforcement with duct tape
* Using a zigzag stitch with the length very close together, zigzag through the mini rope loop to attach (the same method used for the clasp on the door of the Dress Up page)
* Cut the scrap of reinforcement around the mini rope loop, being careful not to cut the loop
* Place the mini rope loop on a strip of felt, then place and pin the fabric star over the top
* Straight stitch on the inside of the satin stitch, making sure to sew through the loop
* Cut star from felt being careful not to cut the loop
* Position each face star on the matching word star and place a button where it would need to be for the loop to catch it and the face star to cover the word star, then sew the button in place
Add a 1 1/2" binding to the appropriate side.


 RSS Feed


