Sizes:
Newborn roughly 3” around the ankle (Toddler roughly 4 ½”) (Child roughly 6”)
Materials:
30 – 40 yards (15 – 25 meters) Caron Simply Soft or a lightweight worsted yarn
D (3.25 mm) Hook
Yarn Needle
(2) half inch (1.3 cm) buttons
Only $3.50
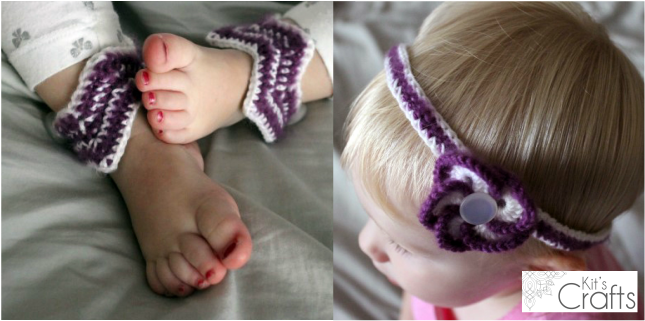
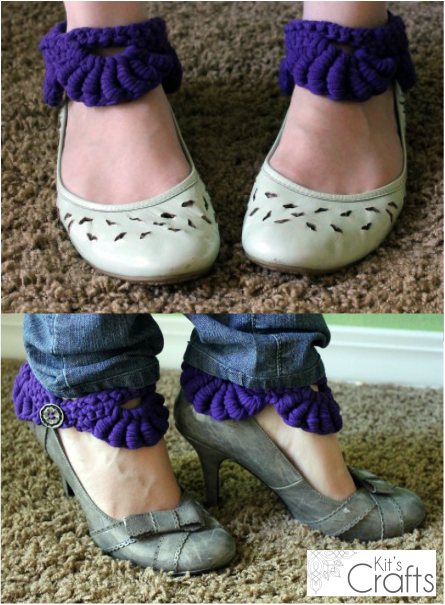
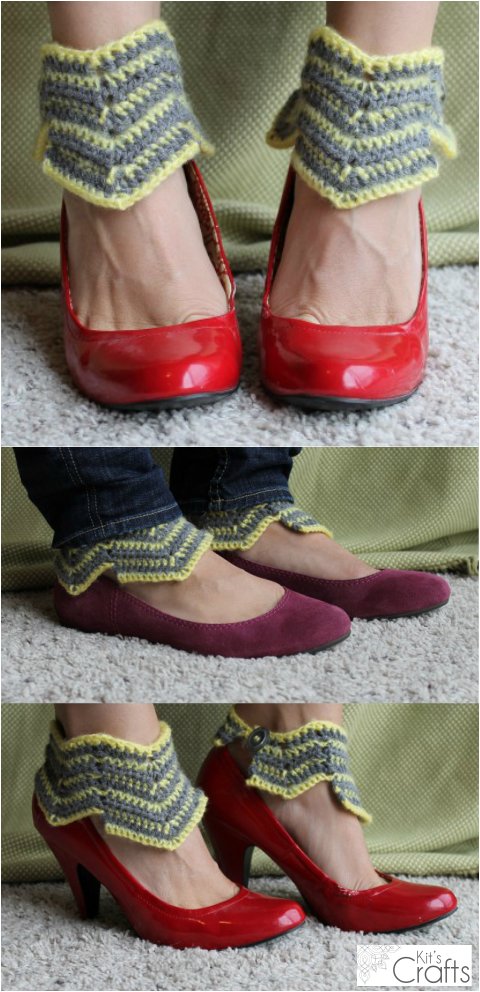
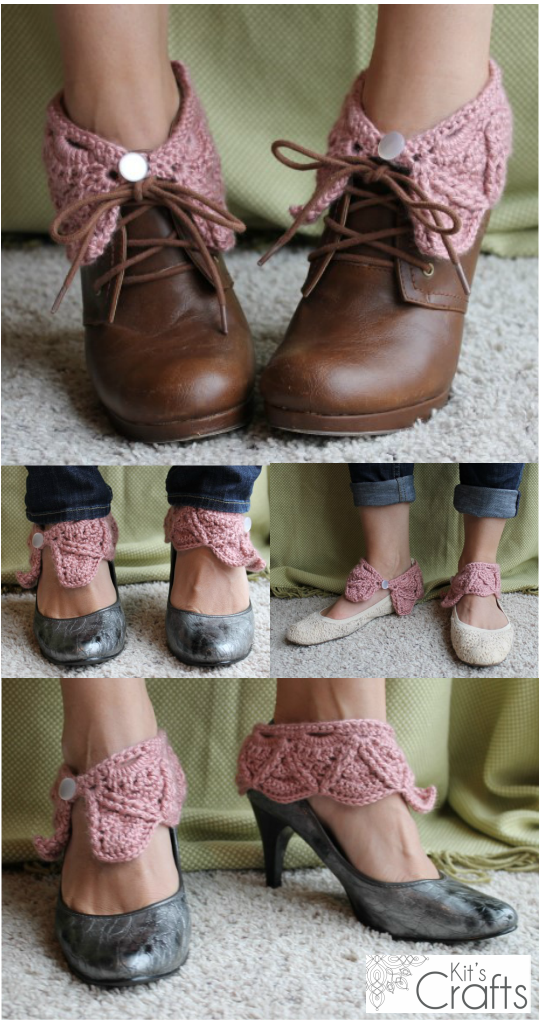
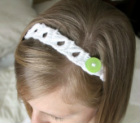
Last week, I posted about my pattern for the Chevron Tiny Spats. Here is another #TinySpats pattern. You may recall the Fancy Spats version of this pattern that I posted in June, well here is the baby/child adaptation with a sweet matching headband. Enjoy! This pattern is a fairly easy project and can be crocheted up rather quickly. It is written using US standards and worked flat from the top down. Due to the front and back post stitches, I would consider it to be an advanced beginner pattern. You may have noticed that the sizes have a bit of space between them; this is due to the way the main stitch sequence works. The math didn’t work to create in between sizes. However, if you need a size that isn’t listed, change the size of your hook and/or the weight of yarn. Sizes: Newborn roughly 3” around the ankle (Toddler roughly 4 ½”) (Child roughly 6”) Materials: 30 – 40 yards (15 – 25 meters) Caron Simply Soft or a lightweight worsted yarn D (3.25 mm) Hook Yarn Needle (2) half inch (1.3 cm) buttons Only $3.50
0 Comments
After releasing a few of the spats patterns, I had some requests for child and baby sizes. This got the wheels in my head spinning and this is one of the patterns I created. I also decided that the Tiny Spats patterns needed to have a matching headband. So, here you are; a lovely little spats pattern with a cute matching headband! Materials: 30 – 40 yards (15 – 25 meters) Caron Simply Soft or a lightweight worsted yarn D (3.25 mm) Hook Yarn Needle (2) half inch (1.3 cm) buttons Only $3.50 Some time ago, while perusing Pinterest, I came across a crochet chart for a modern doily that I loved. I knew it had to be a rug for my daughter's room, but was stuck on what to make it out of. I put it to the back of my mind and started working on some Spats patterns, but that doily kept creeping into my mind and ended up inspiring me to create the Chevron Fancy Spats. Once that was complete, I kept thinking of this doily becoming a rug. So I started to research materials that I could use/afford to make it with, when I came across a rug made of old sheets. I have seen rag rugs before and not thought much of them, but this one wasn't braided, it was crocheted. A light bulb went off, I packed my little one into the car and headed for the thrift store. I bought a set of pale green, jersey, king sized sheets and began cutting/ripping 2" strips. Below is the end product. Materials: Q (15.75 mm) Crochet Hook Old Sheet, a king size set was sufficient for this one, but it is on the smaller side Doily pattern of your choice (simpler patterns would be easier) Tips: 1. I pretty much followed the chart for this pattern, however, instead of doing DCS for every row, I did SCS for one row, then DCS for the next row because I was concerned about running out of yarn. 1. I did not test different strip width sizes, I just started tearing at about 2" wide, then tried to make sure that all of the strips were approximately the same width. 2. When picking a pattern, you can try one with fancy stitches that involve yarn overs, just bear in mind that you will have to be conscious of where the knots are falling, so you may need to untie and retie some of them as you go. Also bear in mind that this is pretty thick on it's own, so if you pick a pattern that layers stitches (FPDC/BPDC) it could be a hazard... 3. A note about the fabric, keep in mind that the back of the fabric will show up too. The sheets I used (and most sheets) were the same on the back and the front which is how I was able to get a solid colored rug. 4. Plan on taking brakes. My right arm would get pretty tired. 5. Some of the sites I looked at for tutorials have you cutting a slit in one strip then pulling the next strip through to connect them, but I just tied my strips together and wound them into a HUGE ball. While I was crocheting, I made a point of pushing the knots to the back side so that I wouldn't have to weave them in. 6. When I finished the rug, it didn't lay completely flat so I took the tops off my storage ottomans and placed them on it so it would flatten out, which worked great. This seemed to be a typical problem on most of the blogs that I read about using sheets for a rug. I would suggest at least putting books or something on top or, if you can, block the final product. I love the #broomsticklace stitch. It is so easy and quick to do, furthermore, with this pattern, it couldn't be simpler. Basically, this headband just stacks the stitches, so you can make it whatever length you like. There isn't a gauge so you can use whatever size hook you want and whatever size stick to create the stitch. Please enjoy! Oh, and don't forget to enter the #Giveaway, only 3 days left until it ends! The name of the broomstick lace stitch comes from the fact that originally it was created using a broomstick. Basically all you need to create this stitch is a stick of some sort, however, most often, people employ a large knitting needle. When I have used a smaller crochet hook for the single crochets, I have used the end of a large crochet hook. Anything around the house will do (a tutorial on Repiny uses a Popsicle stick), just try out one stitch and see how you feel about the proportions. If you would like a video for this stitch, there is a great one by Sandra Roarty. Print the pattern Materials: 10 - 20 yards Yarn of your choice Hook recommended by yarn manufacturer Hook/Knitting Needle/Stick with a diameter at least 2X the diameter of your hook, preferably larger Button that will fit through one of the stitches Abbreviations: CH = Chain SC = Single Crochet ST = Stitch YO = Yarn Over Pattern: Row 1: CH6, SC in the 2nd ch from the hook, SC in remaining 4sts Row 2: Pull the loop on your hook to make it big, then insert your stick into the loop, *insert your hook into the next stitch and pull up a loop, then put that loop onto the stitck, repeat from * with remaining 3sts. You should have 5 loops on your stick and no loops on your hook. Row 3: Carefully insert your hook into the 5 loops on your stick, YO and pull through the 5 loops, CH1, holding the loops in place, SC5 in through the 5 loops Repeat rows 2 and 3 until you reach your desired length and bind off. Keep in mind that your yarn will probably stretch at least a little bit, so ending 1 or 2 stitches early wouldn't be the worst idea. Sew on button and weave in loose ends. I shared this post on the Friday Follow Along over at Leah Inspired. Those of you with blogs, link up and follow along and if you don't have a blog, just go check out the other great blogs linked up over there. I have been intrigued with the bullion stitch ever since I happened upon it on Pinterest. I kept trying to incorporate it into patterns without much luck. However, about a month ago I was at my in-laws with just a ball of tarn and a G hook and this spats pattern was the outcome. The yarn for these spats is made from a T-Shirt (tarn) cut into one continuous ½” strip. Here is a tutorial on how to make tarn. With most tarn projects, you can hide the seams of the T-Shirt, but that is not so with this pattern due to the use of the bullion stitch. To bypass this, either find a shirt that does not have side seams, purchase your tarn or use a bulky weight yarn. Just a couple of notes about tarn; not all tarns are made equal and the type of T-Shirt you use can greatly affect the outcome of your spats. Generally, I have found that the pure cotton tarn (which is what I used here) stretch and will give you a greater quantity, but are also harder to work with. A synthetic blend will still be quite stretchy and easier on your hands, but you won’t necessarily get the large quantity or the sturdier outcome. One medium women’s adult size shirt is likely to create enough tarn for these spats. About the bullion stitch; this is a tricky stitch and takes some getting used to. The best tutorial I have found on the web is a video by Margaret Hubert, which is accompanied by written tips. Just remember to keep your wraps loose. This pattern was written using US standards and worked flat from the top down. Due to the bullion stitches and working with tarn, I would consider it to be an intermediate pattern. Sizes: One Size, approximately 11 ½” around the ankle and 2” from FSC to highest point of bullion shell. There is a lot of give with these, but if you would like a larger size, use a larger hook, if you would like a smaller size, cut your tarn ¼” thick and use a smaller size hook. Materials: 40 – 50 yards (35 – 45 meters) Tarn G (4.0 mm) Hook Yarn Needle 2 half inch (1.3 cm) buttons Only $3.00 for a PDF download. Although, I still have many more spats patterns that I am working on, testing for the Chevron Fancy Spats finished early! I had thought that the official release of this pattern wouldn't happen for at least a few days, but here it is, hot off the press and ready to be crocheted up! This pattern is a fairly easy project and can be crocheted up rather quickly. It is written using US standards and worked flat from the top down. Due to the color work, I would consider it to be an advanced beginner pattern. This pattern is set up such that every other time you change color instead of turning, you go back to the beginning and pull up a loop with the new color. It sounds tricky, but I will have pictures to better display this technique. Sizes: Small approximately 9 ½” around the ankle (Large approximately 12 ½” around the ankle) Materials: (C1) 30 – 40 yards (25 – 35 meters) light worsted weight yarn (C2) 30 – 40 yards (25 – 35 meters) worsted weight yarn G (4.25 mm) Hook Yarn Needle 2 half inch (1.3 cm) buttons Only $4.00 for a PDF download. Here is the launch of a series of patterns I have in the works for spats. Basically these are collars for your shoes that can stand on their own or peek out from under jeans. They are incredibly versatile as you can wear them with boots, flats, heels or booties. If you are wondering about the name, it comes from an accessory popular at the turn of the 20th Century, according to Wikipedia. Anyway, I have at least 3 other patterns, one of which I am currently testing in Ravelry and the other two I am still finalizing. If you are interested in buying this as a completed product, send me an email at kitscrafts@gmail.com and we can work something out. If I get enough interest, I will add these to my Etsy Shop. Enjoy! This pattern is a fairly easy project and can be crocheted up rather quickly. It is written using US standards and worked flat from the top down. Due to the front and back post stitches, I would consider it to be an advanced beginner pattern. If you want these to fit over boots/booties, go with a larger size. Sizes: Small roughly 11” around the ankle (Medium roughly 13”) (Large roughly 15”) Materials: 40 – 50 yards (25 – 35 meters) Caron Simply Soft or a lightweight worsted yarn D (3.25 mm) Hook Yarn Needle 2 half inch (1.3 cm) buttons Only $5.00 for a PDF download Here is another lovely crochet bracelet made from T-shirt yarn. The pattern is available on Ravelry. If you need some T-Shirt yarn/tarn, head over to my tutorial on how to make some. This bracelet is written using US standards. The yarn for this bracelet is made from a T-Shirt cut into one long continuous ½” strip. Just a couple of notes about tarn; not all tarns are made equal and the type of T-Shirt you use can greatly affect the outcome of your bracelet. I originally made this using a thinner shirt that was 60% cotton and 40% synthetic. Generally, I have found that the pure cotton tarns stretch and will give you a greater quantity, but are also harder to work with. That being said, if you are using a typical, run of the mill, 100% cotton T-Shirt, go down a bracelet size and use a G hook. This may still be tough, if you go up another size hook, go down another size for the bracelet. Also, practice a bit to get the hang of the tarn if you have never used it before. Sizes: X-Small (Small) (Medium) (Large) Materials: 10-15 Yards (10-13 meters) T-Shirt Yarn (WPI = 7) D (3.25 mm) or G (4.0 mm) Hook Yarn Needle 1 Button at 1/2” (1.3 cm) diameter Only $3.00 for a PDF download. You might also like: Hey there! As I stated last week, I have a few projects in the works, but I am still having them tested. However, in an effort to continue posting, I figure I will highlight some great tutorials that I have found on the web. This first highlight post is a shout out to Future Girl or Alice. I learned of the foundation single crochet (FSC) a few weeks ago on Pinterest and it blew my mind. Basically, it combines the chain row with the single crochet row! No more trying to cram the hook into a tight row of chains! Anyway, when I Googled it, I found Alice and her incredibly thorough tutorial on the FSC. She has really done a great job showing exactly where the hook needs to go and has even linked a video. Seriously, if you are unfamiliar with the FSC, check it out, it will change your life. Here is another quick project to add to the collection. It is a bracelet made from t shirt yarn or tarn. I have a tutorial on how to make this yarn. The pattern is for sell on Ravelry. Gauge: In single crochet, including foundation single crochet, 2” = 9 rows x 10 Stitches Sizes: The size for this bracelet is adjustable. Each circle is approximately 1” in diameter, add more for longer bracelets and less for shorter bracelets. Materials: 10 – 15 Yards T-Shirt Yarn (WPI = 7) D Hook Yarn Needle Tapestry Needle 1 Button at 1/2” diameter Only $3.00 for a PDF download. |
Hey there! I'm Kristin, aka Kit. Here is just a peek into my crafting mind. I hope you find something to spur your creativity!
Kit's Crafts ShopPopular Posts![]() Featured HereCategories
All
Archives
July 2020
|