
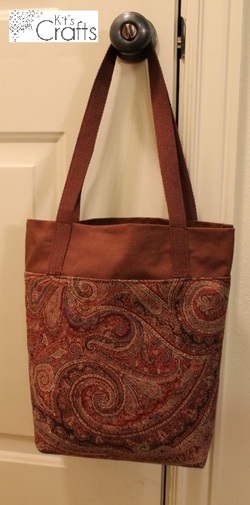
As I have mentioned before, my crafting desires come in ebbs and flows. Generally I will knit/crochet like crazy for a couple months then I will sew like crazy for a couple months, then go back to knit/crochet. When I am in full knit/crochet mode, I like to take my projects with me, however, I haven't had a great bag to do this. Usually I end up using a large purse to carry everything and my hooks/needles get lost among diapers, snacks and other basic purse worthy items. I thought of this large tote to solve this problem months ago, but didn't get around to making it until now. Below is the tutorial.
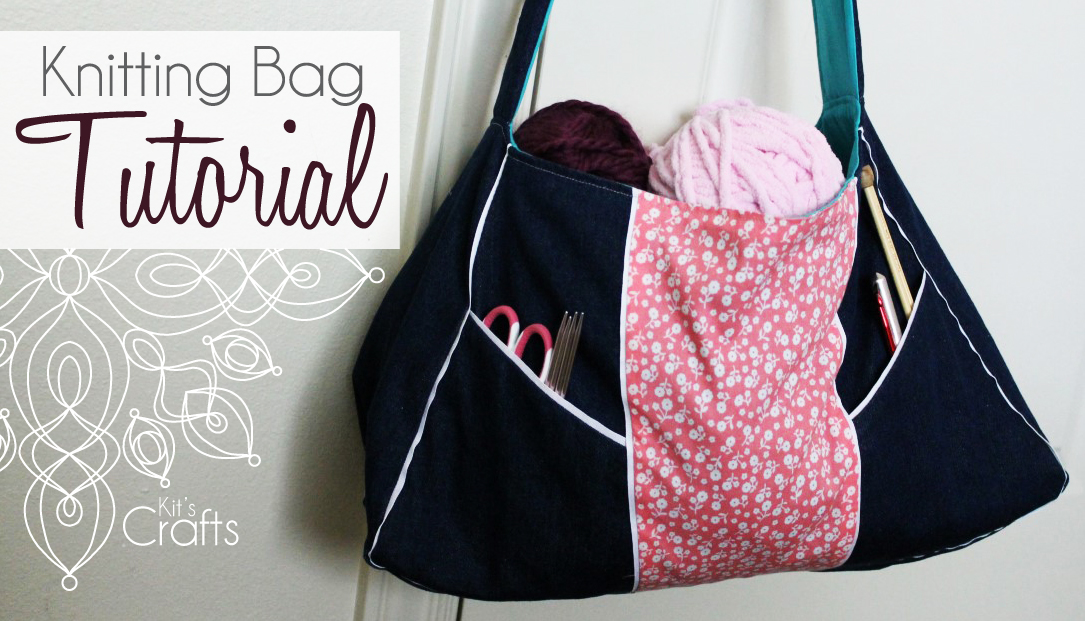
The inspiration for this bag came from the adorable Chalk Lines Skirt by One Avian Daemon. I changed up quite a few things, perhaps one of the more minor changes is that instead of piping, I used 5/8" ribbon to create the "chalk lines". I won't be shy, I really like how this bag turned out.
Materials:
Large paper or multiple pieces taped together
Pattern Guide
1 yard heavy-weight fabric for the exterior
12" of accent fabric for the front (I used a cotton, but a heavy-weight would work too)
1 yard cotton fabric for the lining
2 1/2 to 3 yards 5/8" wide grosgrain ribbon
Padding for the shoulder strap (I used a felted sweater)
Sewing Machine/Thread/Scissors
Directions:
1. Begin by creating your pattern. Download the Pattern Guide. Things are going to get a bit technical, so if you have questions, don't be shy, please email me at [email protected] and I will try to get back to you within a day or two. Draw one of the red boxes on your large paper, then use the guides/measurements to create the angles. The accent panel and pockets are the purple lines on the the piece labeled "Front Angled Pieces". Replicate the Front Angled Pieces, add the seam allowances, then trace each accent piece onto another sheet of paper. THE SEAM ALLOWANCES ARE NOT INCLUDED IN MY MEASUREMENTS, YOU WILL NEED TO ADD THAT BEFORE CUTTING. I did my seam allowances at 3/8".
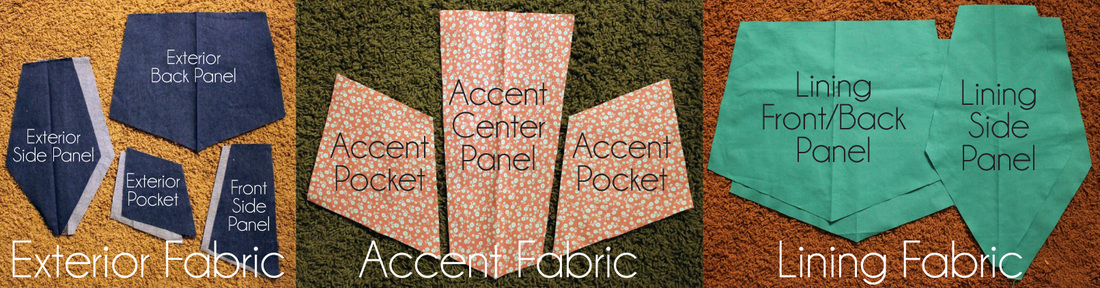
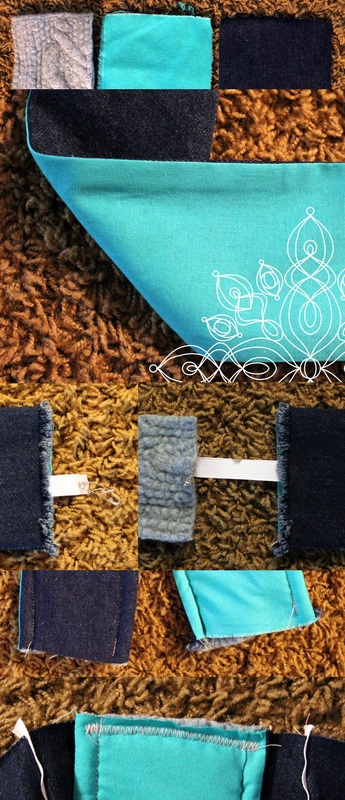
2. Now cut your fabric. The picture below shows what to cut from each fabric. I cut the strap later, so you will also need a rectangle of both the lining and exterior fabric measuring about 4" x 35". you will also need a couple of rectangles from the exterior fabric to go inside the pockets. Don't worry, though, you should be able to get this from your left over fabric. (By the way, those pictures were all taken in the same light on the same carpet. Its amazing how different colors on the same background change the color of the background...)
Materials:
Large paper or multiple pieces taped together
Pattern Guide
1 yard heavy-weight fabric for the exterior
12" of accent fabric for the front (I used a cotton, but a heavy-weight would work too)
1 yard cotton fabric for the lining
2 1/2 to 3 yards 5/8" wide grosgrain ribbon
Padding for the shoulder strap (I used a felted sweater)
Sewing Machine/Thread/Scissors
Directions:
1. Begin by creating your pattern. Download the Pattern Guide. Things are going to get a bit technical, so if you have questions, don't be shy, please email me at [email protected] and I will try to get back to you within a day or two. Draw one of the red boxes on your large paper, then use the guides/measurements to create the angles. The accent panel and pockets are the purple lines on the the piece labeled "Front Angled Pieces". Replicate the Front Angled Pieces, add the seam allowances, then trace each accent piece onto another sheet of paper. THE SEAM ALLOWANCES ARE NOT INCLUDED IN MY MEASUREMENTS, YOU WILL NEED TO ADD THAT BEFORE CUTTING. I did my seam allowances at 3/8".
2. Now cut your fabric. The picture below shows what to cut from each fabric. I cut the strap later, so you will also need a rectangle of both the lining and exterior fabric measuring about 4" x 35". you will also need a couple of rectangles from the exterior fabric to go inside the pockets. Don't worry, though, you should be able to get this from your left over fabric. (By the way, those pictures were all taken in the same light on the same carpet. Its amazing how different colors on the same background change the color of the background...)
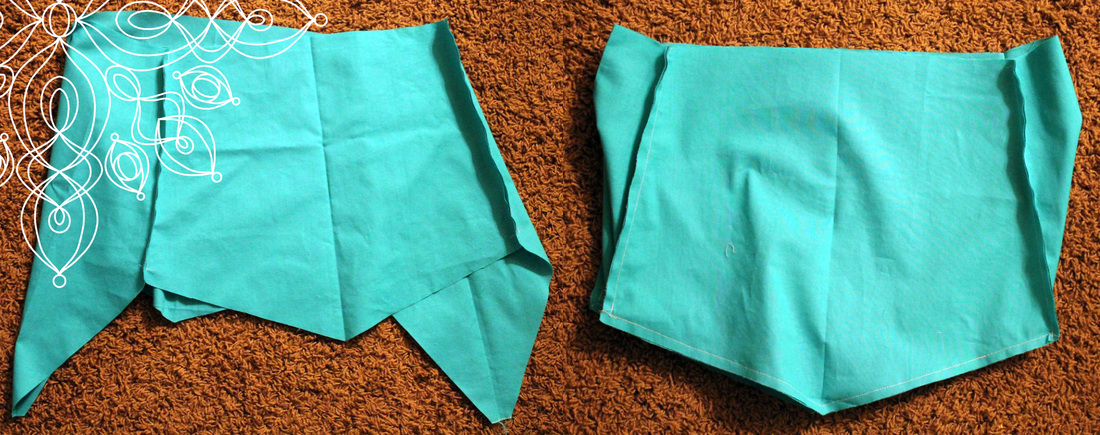
3. Sew the lining. Match up and pin one of the front/back panels with a side panel and sew just the sides. Repeat with the remaining side panel then do the same for the remaining front/back panel. Once you have all of the sides sewn, match up and pin the bottom of one of the front/back panels with the bottom of both side panels and sew, then repeat for the remaining front/back panel leaving about 4" - 5" unsewn.
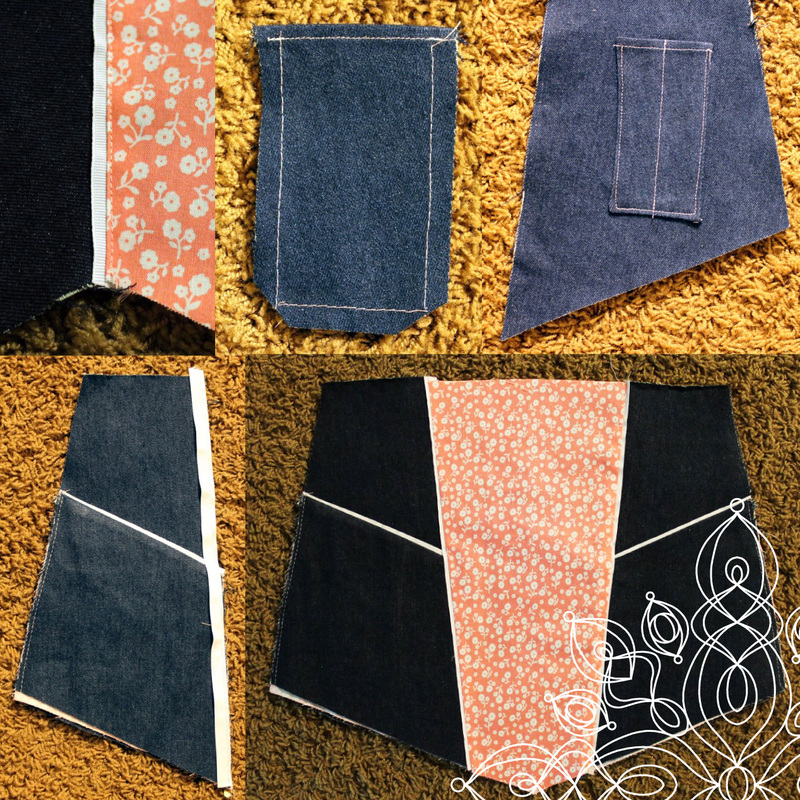
4. Assemble the front exterior of the bag. Start with the pockets. Sew a length of ribbon along the top edge of your exterior fabric pocket piece, then pin an accent pocket piece to the exterior pocket piece with right sides together and sew just along the top edge. Turn right side out and top stitch the seam to the accent fabric only (shown in the first picture below), then iron the pocket. Repeat for the other pocket.
5. Cut a rectangle of your exterior fabric to go inside the pockets. (I forgot to include this in my pattern guides and I don't have exact measurements, mostly because I just winged it. I used a crochet hook to see how wide/long I would want it then cut away). Create a rolled hem along the top edge, then baste around the remaining sides about 3/8" from the edge and clip the corners. Fold along the basted stitch and iron. Place on one of the side panels being careful to make sure it doesn't poke above the pocket. sew in place. Sew down the center of the little pocket. Place the larger pocket on top of the front side panel and baste around the edges. Sew a length of ribbon along the long edge of the front side panel. Repeat this step for the other front side panel.
6. Line up the center front panel of the accent fabric with one of the front side panels and sew. Repeat for the remaining front side panel.
7. Assemble the exterior using the same method as you did for the lining without leaving any opening.
8. Now to the strap. The "stuffing" piece is totally optional, but I like the structure it gives. I used an old wool sweater I found at a thrift store that I had felted for some stockings last Christmas. You will cut this to a 3" x 35" rectangle.
9. Pin right sides together of the exterior and lining strap pieces and sew the sides. Turn right side out and iron along the seams. Attach a safety pin to the end of some ribbon, then thread the ribbon through the strap pieces. Attach the ribbon to the stuffing piece and gently pull through the strap pieces, taking care not to twist the stuffing. Top stitch along the sides to hold the stuffing piece in place.
10. Match up one end of the strap with the top edge of one of the exterior side panels with exterior sides together and the strap falling toward the bag, then sew along the top with a zig-zag stitch. Repeat for the other side of the strap/side panel.
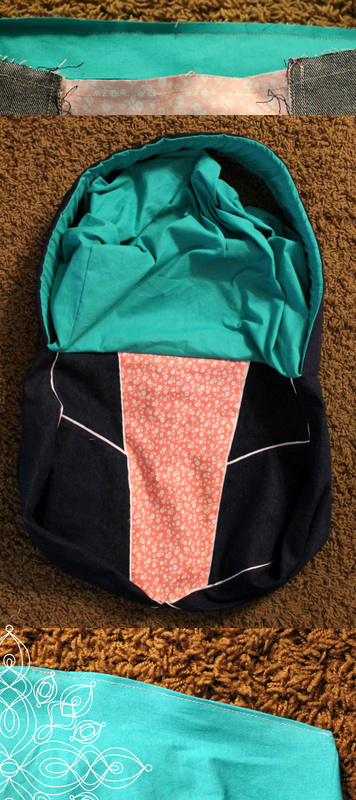
11. Turn the exterior inside out, then match up the top edges of the lining and the exterior. Pin and sew along the edge. Turn the bag right side out pulling the bag through the opening in the lining. Fold the edges of the opening inward, iron, then sew. (You could hand sew this shut to give it more of a finished look, but since this is just for me, I ran it through the machine.) Push the lining into the bag and iron the top seam. Top stitch around the bag opening to keep the lining in place when you wash the tote.
You might also like:
 |  |  |  |


 RSS Feed


