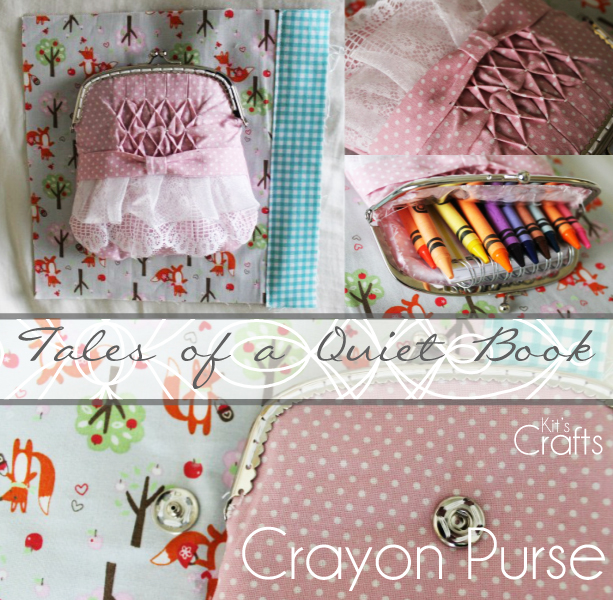
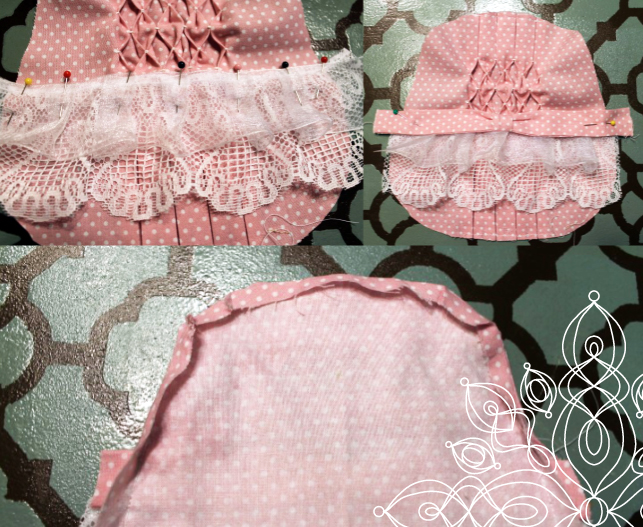
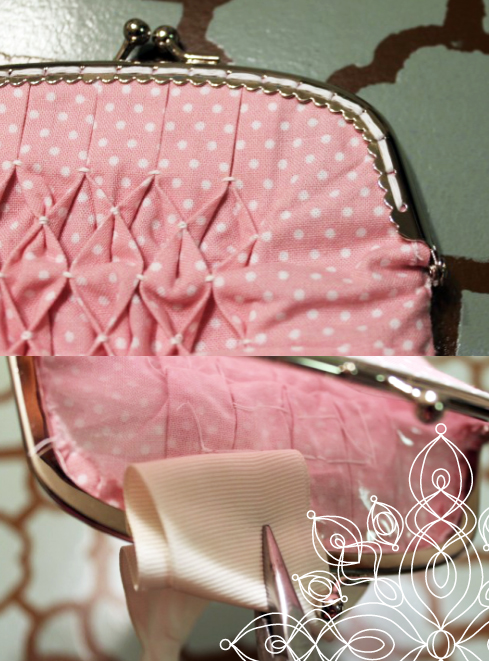
I went a little crazy on embellishing with this purse. I found this great tutorial for honeycomb smocking by Tumbling Blocks that I really want to use on a dress for my little one, but I wanted something to practice on so I chose this project. If you decide to do this, smock your fabric first then cut your pattern out. Also, just as an FYI, I used a strip of cardboard 1/2" wide (when you go to the site, you will know what I mean). I am not going to go into detail about the other embellishments, so if you have questions, please email me or leave a comment on the blog.
**Update: Since writing this post, I have made several other purses and streamlined the process a bit. To check that out, go to my Kiss Clasp Purse Tutorial. Also, in the tutorial for this quiet book page, I suggest using vinyl as the lining, which worked great for a while and would have continued to work great, if I hadn't of sewn the large snap on the back of the purse through the plastic. I would suggest using a small piece of the reinforcement material on the back side of your outside fabric and sew the snap on before assembling the purse.
For more pages and some tips visit my Quiet Book page.
Materials:
* Fabric
* Vinyl, or any plastic to line the inside of the purse (laminated cotton would also be a good choice)
* Lace, ribbon or any desired embellishments
* Purse Frame between 6" and 6.5" wide
* Needle and thread
* Pliers
* Large sew on snap
* Crayons and small notebook
Purse:
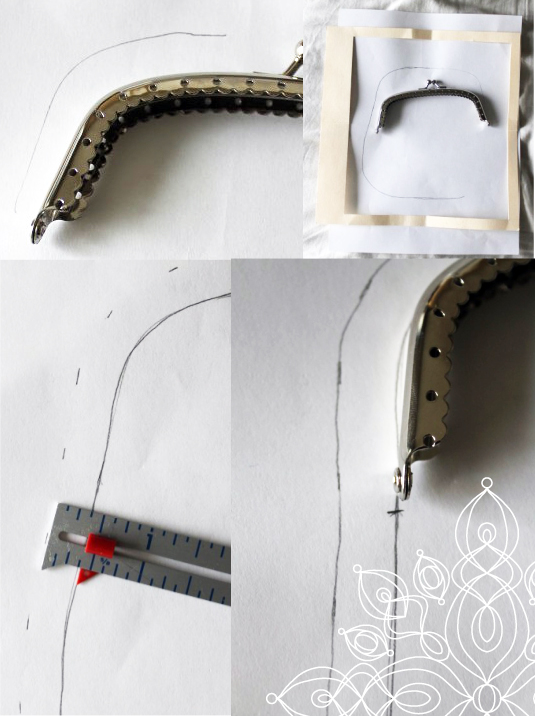
* Place your purse frame on paper and trace around the outside edge
* Place the page you just drew on under the template, then draw what shape you want your purse to be, keeping in mind that it will bulge out in front, back and pull in the sides
* Using a sewing gauge, make dashes every 1/2" or so at a 3/8" distance from your outline for the seam allowance then connect your marks
* Line up your purse frame and mark where the hinges meet
* Cut out the pattern from the paper then from your fabric for both the front and back and transfer the marks for the hinges to the fabric
* With right sides together, and starting at one hinge mark sew around the purse stopping and back stitching at the other hinge mark, then change to a basting stitch and, without backstitching, sew to the first hinge mark, completely closing up the purse
* Make cuts in the seam allowance around the curves
* Iron the top seam allowance around the basting toward the purse to create a fold
* Unpick the basting, then turn the purse right side out and iron the seams
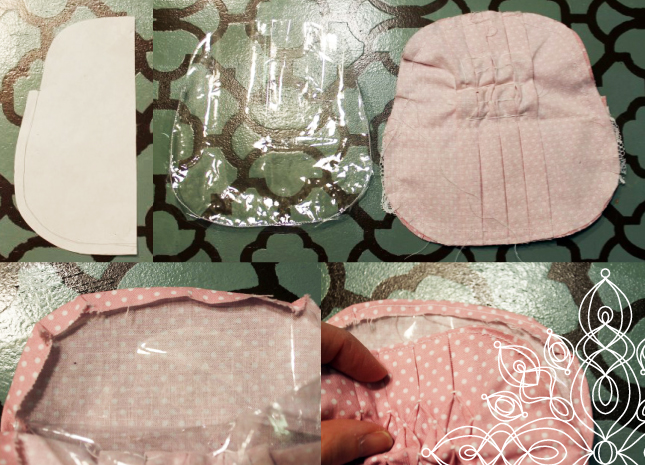
* Trim 1/8" off the outside of your pattern, then make a straight cut at the hinge marks to the inside purse line and cut around the top (you will not be sewing around the top of the purse for the liner)
* Cut two liners from the pattern
* Sew around the bottom of the liner with a 1/4" seam allowance
* Make cuts at the curves and finger-fold the seam allowance in toward the purse
* WITHOUT turning right-side out, place the liner inside the fabric purse
* Fit the top of the liner inside of the basting fold and use a bobby pin to hold, then sew shut
* Open the purse frame and fit the top of the purse inside the frame
* Hand sew the purse to the frame
* If you have a little bit of a hole where the purse meets the hinges, just hand sew it shut
* With a piece of fabric folded over the frame, use pliers to pinch the frame closed
* Using the template, place the purse on the page to locate where the male side of the snap will go, then sew to the page going through the reinforcement layer
* Add a 1 1/2" border to the binding side of the page
For more pages and some tips visit my Quiet Book page.



 RSS Feed


