
Part one of this fun little project was all about drafting a pattern. In part two, you will get to see everything come together, which is always exciting!
After reading many kiss clasp purse tutorials online and trying out a lot of methods, I have come up with a different assembly pattern than most blogs. The reason I switched things up was because I found that this method provided the most professional looking results.
Materials:
About 1/2 yard of fabric, however this project is ideal for scraps or fabric remnants
Iron on stabilizer, if using a light weight fabric
Sewing Machine/Thread/Scissors/Pins
Embroidery Needle/Thread
Pattern created in Part One
Metal Kiss Clasp Purse Frame
Pliers
Directions:
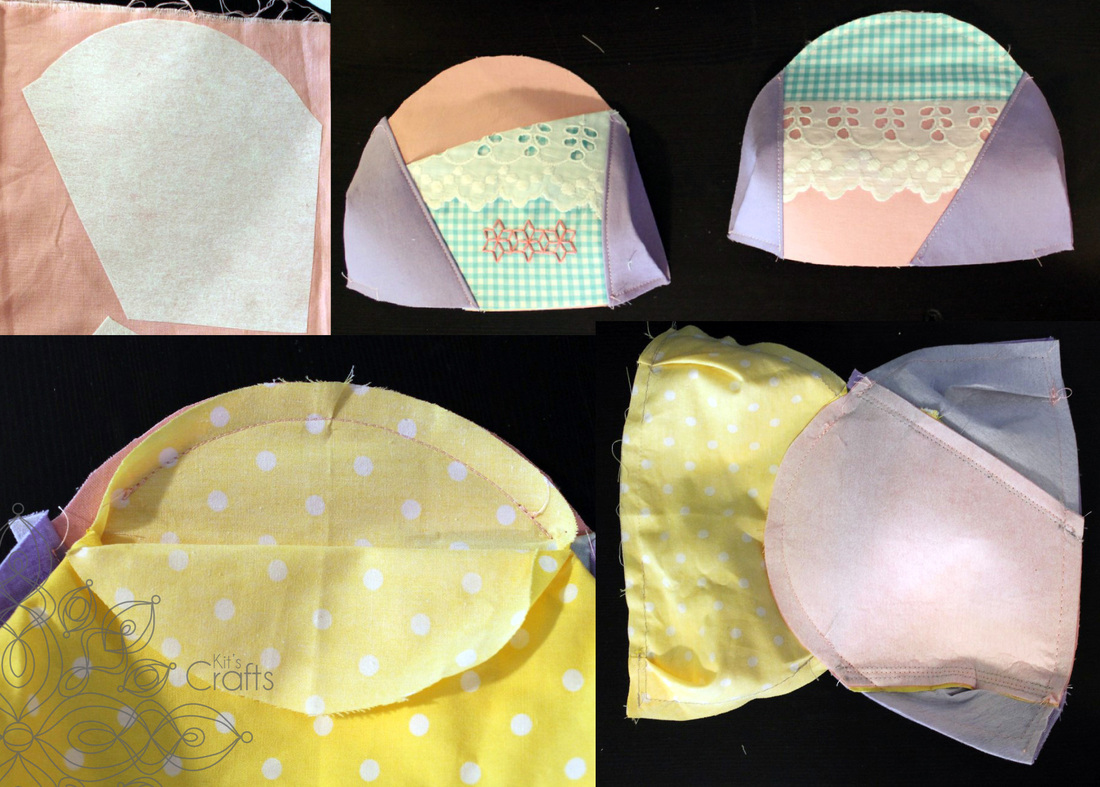
Cut the pieces for the lining. (I use bobby pins to preserve my patterns on small items.) Sew any pleats and/or pockets in place on each side, then, with right sides facing, sew around the bottom of the purse, leaving about a 3" opening in the bottom. Turn the lining right-side out and place the purse frame on top to make sure that you like the way things are coming together. Make any changes you see fit to the pattern at this point, before cutting your outside fabric.
Materials:
About 1/2 yard of fabric, however this project is ideal for scraps or fabric remnants
Iron on stabilizer, if using a light weight fabric
Sewing Machine/Thread/Scissors/Pins
Embroidery Needle/Thread
Pattern created in Part One
Metal Kiss Clasp Purse Frame
Pliers
Directions:
Cut the pieces for the lining. (I use bobby pins to preserve my patterns on small items.) Sew any pleats and/or pockets in place on each side, then, with right sides facing, sew around the bottom of the purse, leaving about a 3" opening in the bottom. Turn the lining right-side out and place the purse frame on top to make sure that you like the way things are coming together. Make any changes you see fit to the pattern at this point, before cutting your outside fabric.

Next up, we are going to assemble the exterior. If you are using a light weight material, cut your pattern from the stabilizer, then iron the pieces to the wrong side of the fabric. Cut the fabric and assemble each side, including pleats, pockets and any embellishments. With right sides together, match up the top of one exterior piece with one lining side and sew around the top. Repeat the previous step with the remaining outside piece. Pull the lining out of the way, then pin and sew around the bottom of the exterior pieces, taking care not to catch the lining. Turn everything right side out through the 3" opening in the lining. Finger press the top seam.
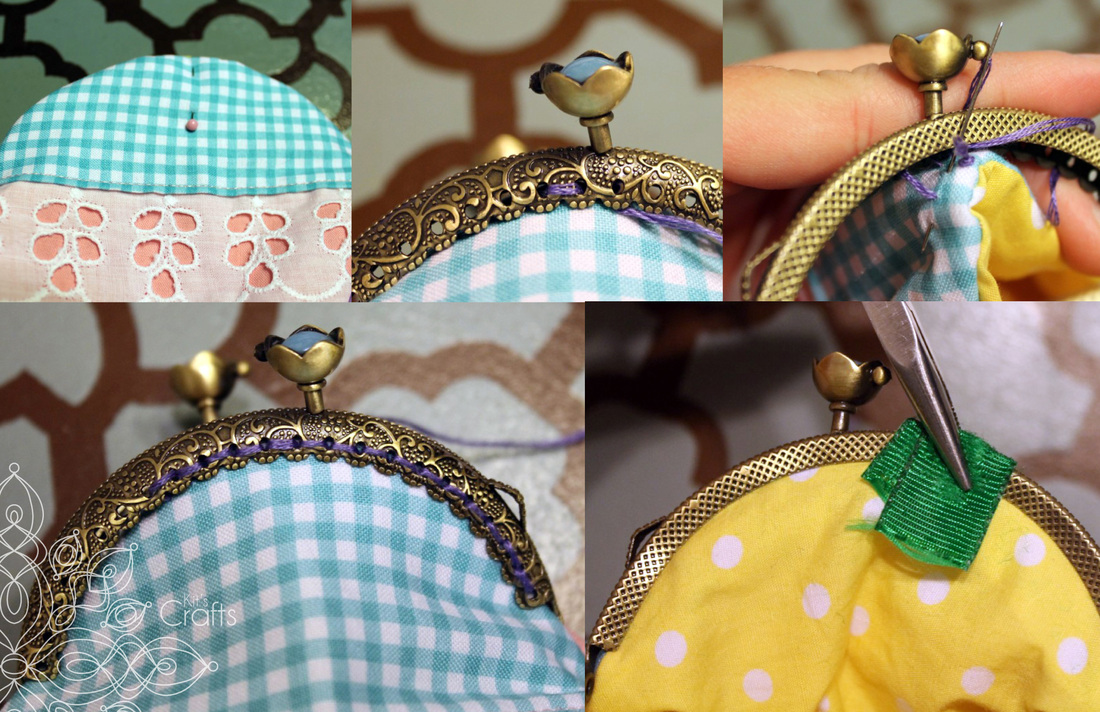
Now, its time to attach the kiss clasp frame. Find the center on each side of the purse opening and mark it with a pin. Using embroidery thread, start in the center and work your way to one side. Tie a knot, then start in the center again and work to the other side. Repeat for the other side of the frame. Using your fingernail or a tiny flat head screwdriver, push the lining up into the frame. Use a scrap of fabric to protect the frame and clamp the frame with the pliers.
You might also like:
 |  |  |  |


 RSS Feed


