Kit's Crafts
  • Home
  • About
    • Selling Handmade Goods
  • Knitting
  • Crochet
  • Sewing
  • Crafting
    • Just for Fun
    • Wall Decor
    • Christmas Fun
    • Party On
  • From the Kitchen
    • Chocolate
    • Sweet
    • Savory
  • Quiet Book
  • The Shop

Unique Knit and Crochet Ideas

3/18/2014

0 Comments

 
A couple days ago, I found out that one of my friends knits. In talking to her about it, she said she had just learned, but didn't think you could knit much beyond hats, scarves and blankets. I honestly didn't answer right away because my mind was buzzing with so many ideas of things you could make with your needles. Finally, I said, "When you knit you are making a fabric, so basically anything you could make with fabric you could knit". Of course, this is true for crochet, too. A wonderful thing these days is that you can find many knit and crochet doilies and tablecloths at thrift stores, so even if you don't have the skill, you can still partake in the fun by upcycling a secondhand find.

Anyway, as I was deciding what to post about today, I thought I would share some ideas, many of which contain patterns/tutorials for you to re create the inspiration. Click on the picture to go to the link. Enjoy!
A-Frame Tent with Crochet Beadspread
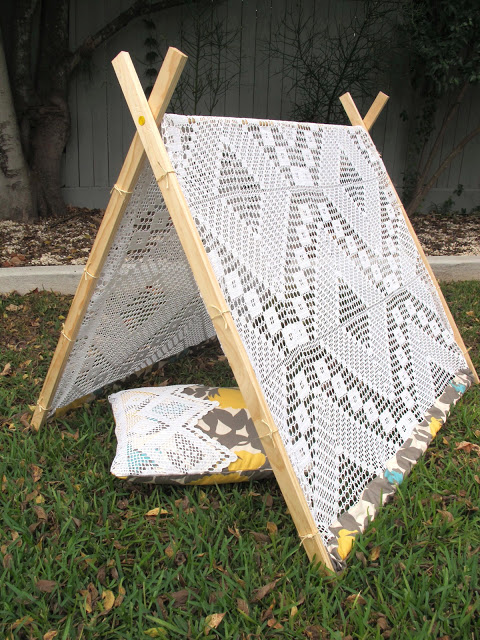
Do you remember the A-Frame Play Tent I posted in January? This is the same concept, just use a crocheted bedspread instead of a sheet.
Knit Swatch Bracelet
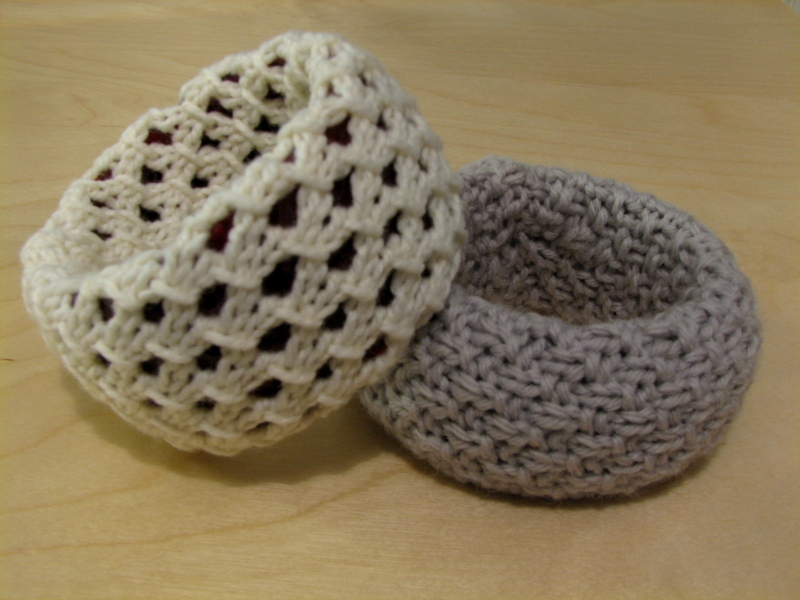
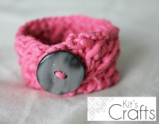
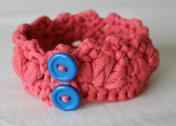
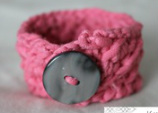
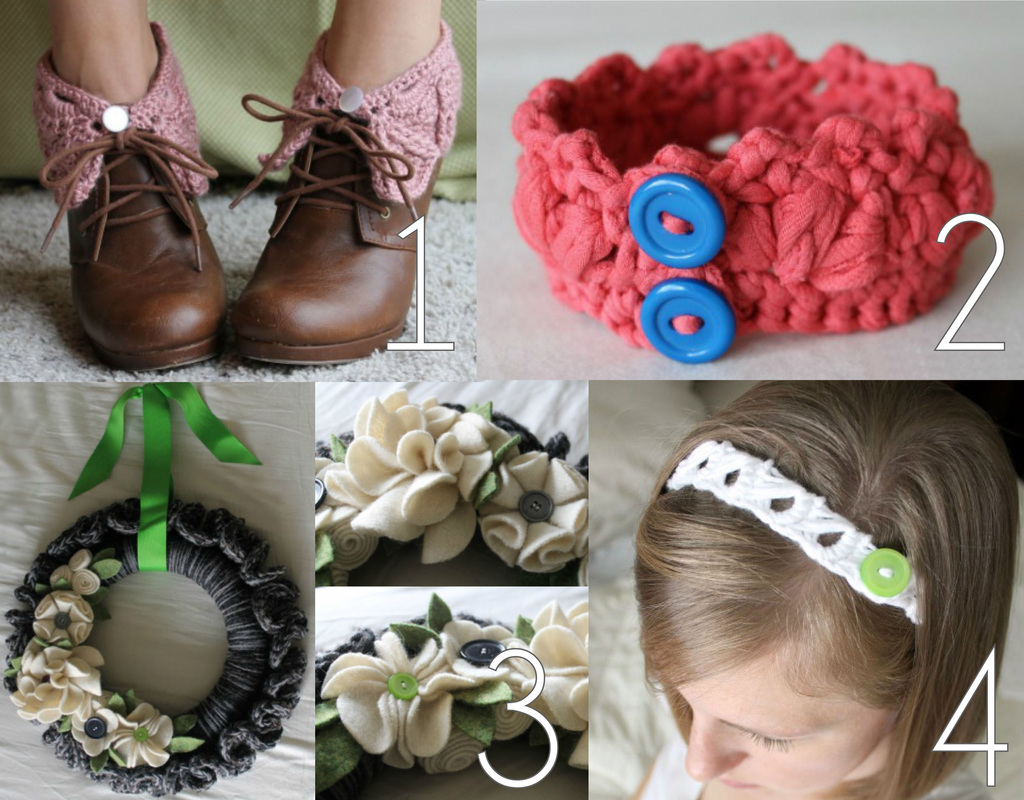
You will find a tutorial at the link for these bangles.
Crochet Bicycle Guard
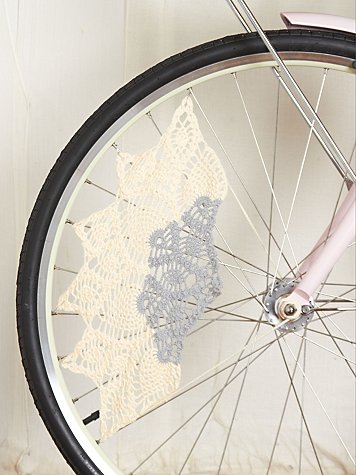
Here is a fun way to personalize your bike. This item is for purchase.
Knit Swatch Wall Hangings
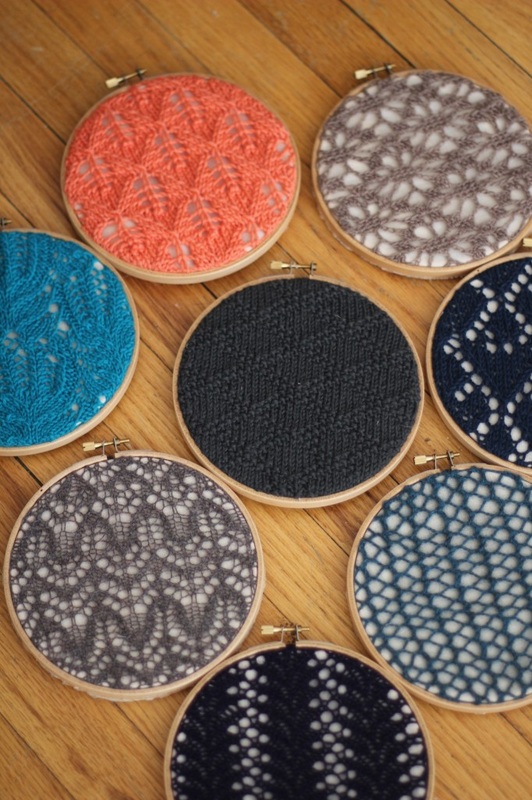
The link here provides a basic guideline. I have also seen this done by stretching the swatch over a canvas and attaching it to the back.
Crochet Shoes
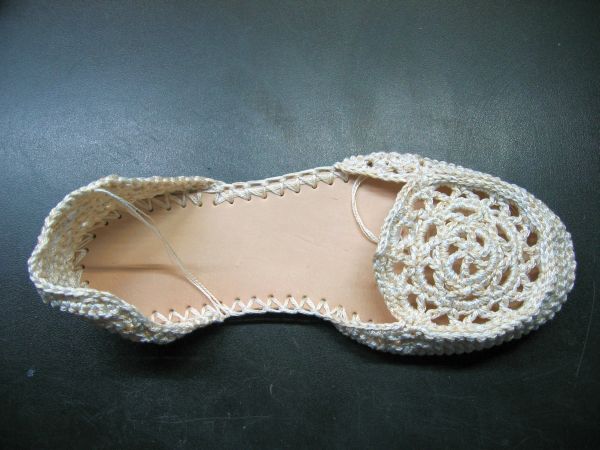
You will find a tutorial for this, however, the website is in Spanish, but google translate helps.
Knit Floor Pouf
These little ottomans are hand knitted by Christien Meindertsma.
Crochet Stool Cover
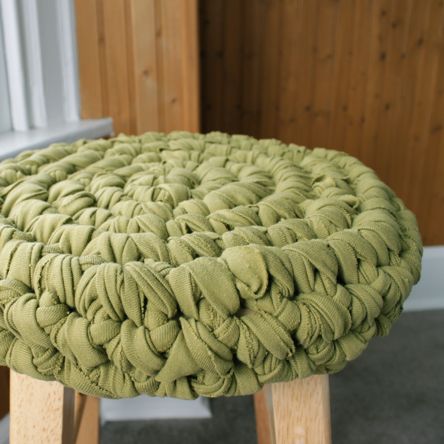
A wonderful tutorial is provided at the link.
Crochet Frames
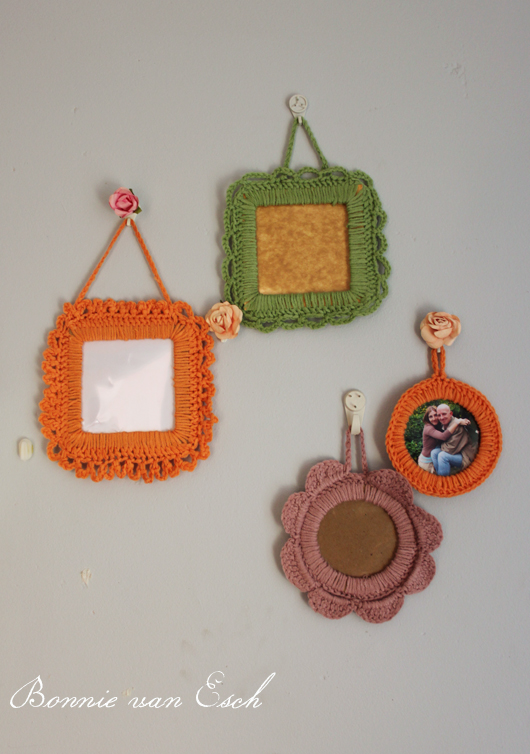
A guideline is provided at this link for how to make these little frames.
Crochet Pendant Lampshades
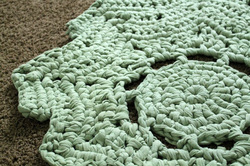
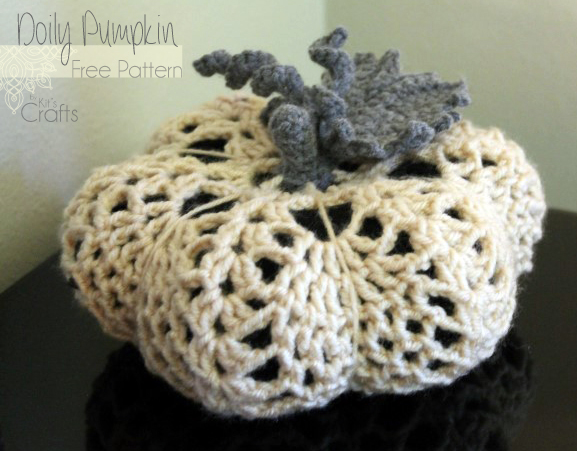
This picture is the inspiration for the tutorial found at this link. If you don't know how to crochet, buy up some doilies and connect them for a similar effect.
Crochet Chair Cover
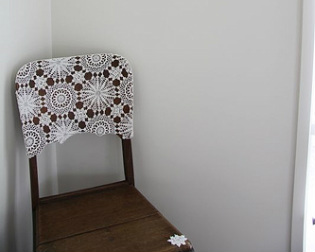
This lovely chair cover was created with a glue gun and a tablecloth. There is no tutorial, but I am sure it wouldn't be hard to figure out.

You might also like:

Picture
Picture
Picture
Picture
0 Comments

Shells Pixie Bonnet

2/11/2014

4 Comments

 
One of my most favorite crochet stitches is the shell stitch. I am not sure what it is about that stitch, but I find myself reverting back to the shell when designing patterns, whether it is the small one featured here or the large shell I used in the Shell Dress from last May, I just can't help myself! It is just such a beautiful stitch! Anyway, if you have been wanting to learn how to do the shell stitch, here is the perfect pattern to start with. Like the Seeds Pixie Bonnet from last month, the basic design is a rectangle that is folded in half and sewed up the back. Give it a spin, let me know what you think!
Kit's Crafts - Shells Pixie Bonnet
I would consider this an advanced beginner pattern as it combines basic stitches. It is pretty easy, though, you will catch the rhythm soon enough and be shelling along without thinking. I made this in just one size, but you can go up or down by adjusting your hook/yarn.

Print the pattern.

Gauge:
2” = 9 stitches x 10 rows in single crochet

Size:
Newborn – 3 months

Materials:
60 – 70 yards (55 – 65 meters) worsted weight yarn
H/8 (5.00 mm) Hook
Yarn Needle

Abbreviations:
CH = Chain
ST = Stitch
SC = Single Crochet
YO = Yarn Over

Pattern:
Row 1: With a tail 12” long, CH 50, SC in the 2nd ch from the hook, *SK 2ch, 5DC in the next ch, SK 2ch, SC in the next ch, repeat from * 7 more times (8 shells)
Row 2: CH3 (counts as the 1st dc), 2DC in the 1st sc, SK 2dc, SC in the next st, *SK 2dc, 5DC in the next st, SK 2dc, SC in the next st, repeat from * 6 more times, SK 2DC, 3Dc in the next st
Row 3: CH 1, SC in the 1st st, *SK 2dc, 5 DC in the next st, SK 2dc, SC in the next st, repeat from * 7 more times
Rows 4 – 15: Repeat rows 2 & 3
Finishing: Fold the bonnet in half so the short sides meet and seam up the chain side with the 12” tail, fasten off and weave in ends. To make the ties, CH 40, SC in one of the corners of the hat, then SC along the bottom of the hat, CH 41, turn, SC in the 2nd ch from the hook, then across the remaining chs, SC along the bottom of the hat, SC along the original chs, fasten off. Weave in ends.
Kit's Crafts - Shells Pixie Bonnet

You might also like:

Picture
Picture
Picture
Picture
4 Comments

Seeds Pixie Bonnet

1/28/2014

10 Comments

 
One of my most favorite things to knit or crochet is a pixie bonnet. The simplicity of the little hat is so enticing and just begs for personalization with cables or lace. All you do is knit/crochet up a rectangle, fold it in half and sew along the cast on edge. I wrote this particular pattern with a beginner in mind and kept it simple. This is a great one for learning because you practice stockinette, moss/seed, ribbing and there is a buttonhole involved, which are great techniques for a beginner project!
Kit's Crafts - Seeds Pixie Bonnet
Perfect for beginners, this pattern is quick and easy to make. Essentially you are creating a large stockinette swatch that is punctuated by rows of moss/seed stitch to break up the monotony. Finish off with a few ribbing rows, then sew up the cast on edge to create a lovely pixie bonnet.  It is written using US standards and worked flat. The finished product (after being folded and sewn) is approximately 6 ¾” high and 6 ½” wide. I wrote this for a toddler size, but you could make it bigger or smaller by adjusting your needles and/or yarn or if you want to use it for a smaller child, leave off the extension strap and button one corner to the other.

Print the Pattern.

Gauge:
1” = 5 stitches x 6 rows in stockinette stitch

Size:
Toddler

Materials:
90 – 100 yards (80 – 90 meters) worsted weight yarn
Size 6 (4.25mm) knitting needles
Yarn Needle

Abbreviations:
K = Knit
P = Purl
SL = Slip Stitch
ST = Stitch
Button Hole {refer to pictures} = SL1{A}, bring yarn to the front {B}, SL1 {C}, *slip first sl st over second sl st {D}**, SL1, repeat * to **, SL1, repeat * to **, 3 sts should be bound off {E}, SL first st on right needle back to left needle {F}, turn work.

Bring yarn to wrong side of work {G}, *P into the first st on the left needle without dropping the stitch {H}, slip stitch from right needle to left needle {I}, repeat from * until 4 stitches have been created {J} (one more than was bound off), turn work.

The front side should be facing you {K}, SL first st from left needle to the right needle {L}, pass the second stitch on the right needle over the slipped stitch {M} (getting rid of the extra stitch), SL 1 st from right needle to left needle {N} and K that stitch {O}.
Kit's Crafts - Seeds Pixie Bonnet
Pattern:
Using long tail cast on, with a 30” – 35” tail, CO 60 sts
Row 1: K to end
Row 2: K2, P to last 2 sts, K2
Rows 3 – 10: Repeat rows 1 & 2
Row 11: K2, (P1, K1) to last 2 sts, K2
Row 12: K2, (K1, P1) to last 2 sts, K2
Rows 13 & 14: Repeat rows 11 & 12
Rows 15 – 28: Repeat rows 1 – 14
Rows 29 – 38: Repeat rows 1 – 10
Row 39: K2, (P2, K2) to last 2 sts, K2
Row 40: K2, (K2, P2) to last 2 sts, K2
Row 41: K2, button hole, (P2, K2) to last 2 sts, K2
Row 42: K2, (K2, P2) to last 2 sts, K2
Bind off. Weave in ends. Use tail to sew up the back of the bonnet, then position and attach button.

Extension Strap Pattern:
CO 28 sts
Rows 1& 2: (K2, P2) to the end
Row 3: K2, button hole, (P2, K2) to last 2 sts, P2
Row 4: (K2, P2) to the end
Bind off. Weave in ends. 
Kit's Crafts - Seeds Pixie Bonnet

You might also like:

Picture
Picture
Picture
Picture
10 Comments

Handmade Christmas Ideas

11/19/2013

0 Comments

 
Lets get real, the holiday season is upon us and Christmas isn't really that far away. If you have high hopes for a handmade Christmas, now is the time to get started on those one of a kind gifts. The great news is that there are a LOT of gift ideas out there that really don't take much time. Today, I am going to highlight some from this very website to get you jump-started.
Kit's Crafts - #HandmadeChristmas Knitting
This first group is for all of the knitters out there.
1. T-Shirt Yarn Star Bracelet - The great thing about this gift is that you don't even have to make a trip to the craft store, just make your own tarn from your closet!
2. Fancy Spats - Liana - Use some left over yarn from your stash for this adorable fashion statement.
3. Baby Bear Hat - Made with chunky yarn and few embellishments, this darling hat is incredibly quick and easy to make.
4. Tractor Hat - This is a great hat for the boys in your life. Plus, it is a great base for an earflap hat, just swap out the chart.
Kit's Crafts - #HandmadeChristmas Crochet
Now to some lovely crochet projects.
1. Fancy Spats - Cathedral - These little shoe collars are the perfect gift for that person with a unique style.
2. T-Shirt Yarn Cluster Bracelet - If you are low on cash, then this is the item to give to your friends. Not only is it adorable, but you can make it from t-shirts in your closet.
3. Ruffle Wreath - Perhaps you would like to add to your decor stash or maybe you just aren't sure what to buy for someone on your list. This gorgeous wreath is easy to make and fairly inexpensive too. (You can make the flowers from old sweaters!)
4. Broomstick Lace Headband - Really, does it get any easier?! Make these as stocking stuffers and use up some of your left over yarn or even make some tarn to create this headband with.
Kit's Crafts - #HandmadeChristmas Sewing
Ok Sewers, here are some ideas for you. 
1. Poinsettia Stocking - So, the stocking itself is pretty cool, but you could use the same technique for a pillow, which would also be adorable.
2. DIY Library Bag - This bag is so easy and doesn't take much material. It would make a great gift for friends and family. You could make it on a smaller scale and fill it with homemade soaps and scrubs.
3. Custom Stuffie - Here is an outline for how to make your own custom little stuffed animal for the little cutie in your life.
4. Men's Dress Shirt to Baby Dress - This would be awesome out of a great red or green plaid shirt!
Kit's Crafts - #HandmadeChristmas
Here are some random crafts that don't necessarily fall under a specific category.
1. Pallet Growth Chart - This would be a great gift for someone with growing children or grand children
2. DIY Bath Crayons - Can we say stocking stuffers?
3. Olliblocks - So fun, so quick, so easy.
4. Nativity Puppets - Switch up the telling of Jesus' birth with some simple felt puppets

If you are not so much into making things, but want the look of handmade, check out my Etsy Shop.

You might also like:

Picture
Picture
Picture
Picture
Gina's Craft Corner
0 Comments

Kitty Bonnet

10/22/2013

0 Comments

 
A few years back, a friend gave me her small stash of yarn as sh didn't figure she would use it. Within the skeins was this fuzzy black yarn that I didn't really care for. It has been kicking around the bottom of my large plastic tote this whole time without an evident purpose. Well, at the beginning of this month I saw it and thought, "What the heck, I will make a quick bonnet from this and hope for the best." When I finish it, I actually really liked the little hat, so I thought I would add it to my list of free knit patterns. Enjoy!
Kit's Crafts - Kitty Bonnet #FreePattern
I only did one size for this bonnet, however, it is REALLY stretchy and could probably fit anywhere from a 1-year-old up to a small 3-year-old. It is knit flat from the front to the back then folded in half and sewn together on one side. It is a VERY easy pattern and I would recommend it for beginners.

Gauge: 2" = 14 rows x 8 stitches in Garter Stitch

Materials:
Size 10 knitting needles
100 yards fuzzy worsted weight yarn
2 stitch markers
Yarn needle

Abbreviations:
CO = Cast On
K = Knit
STS = Stitches
PM = Place Marker
SSK = Slip, Slip, Knit
K2Tog = Knit 2 Together

Pattern:
CO 60 using long tail cast on method
Knit every row until piece measures 3.5"
K30, PM, K30
K1, SSK, K to 2sts before marker, SSK, SL marker, K2tog, K to 3sts before end, K2tog, K1
K across
repeat previous 2 rows 8X
Bind off leaving a long enough tail to sew the two sides together. Your piece should measure approximately 14" x 5 1/2"

Ears (make 2):
CO 20 using long tail cast on method

Row 1: K1, SSK, K14, K2tog, PM, K1 (18 STS) 
Rows 2, 4, & 6: K across
Rows 3, 5 & 7: K1, SSK, K to 2 before the marker, K2tog, slip the marker, K1 (16 STS) (14 STS) (12 STS)
Row 8: K7, PM, K7
Row 9: K to 2 before the marker, SSK, slip the marker, K2tog, K to end (10 STS)
Row 10: K across
Repeat Rows 9 and 10 until there are only 4 STS left. For the next row, SSK, K2tog, turn K2tog
Bind off, leaving a long enough tail to sew the ear to the hat. 

Finishing:
Fold your hat in half so that the shorter ends are together and sew along the bind off side. 

Position and attach each ear. 

Cut 6 pieces of yarn twice the length you would like the braids to be. Fold three of the pieces in half. Pull the loop at the half of these three strands through one corner of the hat, then pull the loose ends of these same three pieces through the loop and pull tight. Braid the three (now six) strands and tie a knot at the bottom. Repeat on the other corner with the remaining three lengths of yarn.

Weave in any loose ends.

You might also like

Picture
Picture
Picture
Picture
0 Comments

Doily Pumpkin

9/24/2013

20 Comments

 
A couple weeks ago, I posted a Lacy Halloween Wreath tutorial in an effort to class up Halloween. Here is another little decor item that I came up with. Granted, it could really be more of a fall item then specifically Halloween, but if you were to use orange yarn and black filling or vice versa, then it would be more Halloween. Especially if you added some great spider webs or some creepy crawlies.
Kit's Crafts - Doily Pumpkin, #FreeCrochetPattern
So, the inspiration for this little ditty, came from a doily pattern I found using the pineapple stitch. I had to modify the pattern quite a bit to make the shape I was looking for, but it was totally worth it. This pumpkin is crocheted in the round, starting with the stem. I haven't had a chance to test the pattern, so if you find mistakes, please let me know via email at kitscrafts2012@gmail.com. Also, I would love to show off your finished product as well as provide links to your website/blog. Email me with your photos/info and I will gladly post them!

Print Pattern

Materials:
80-90 yards Worsted Weight Yarn (pumpkin)
2-3 yards Worsted Weight Yarn (stem, leaf, curly cues)
Yarn needle
Crochet Hook of your choice (I used a G)
Your choice of filling, I used tulle, but fabric would work or colorful hay or basic fiber fill

Abbreviations:
CH = Chain
SL = Slip Stitch
ST = Stitch
SC = Single Crochet
DC = Double Crochet
MC = Main Color (pumpkin)
CC = Contrasting Color (stem, leaf, curly cues)

Pattern:
Using CC, create a magic loop, CH1, SC6 in loop, SC around until stem measures about 1.5", SC2 in each st, switch to MC (12 STS)

Round 1: CH6, (SK 1st, DC in next st, CH3) 5X, SL in the 3rd ch of the original ch6
Round 2: CH1, SC in same st as sl of previous round, ch2, (DC2 in ch3 sp, CH2, DC2 in the same ch3 sp, CH2, SC in next dc, CH2) 6X, SL in original sc of round, ch2, dc2, and ch2 sp)

*At this point, tie your loose ends together, trim them a bit, then stuff them into the stem

Round 3: SL in ch2, SL in dc2 and SL into ch2sp, CH3, DC in ch2 sp, CH2, DC2 in same ch2 sp, CH5, (DC2 in ch2 sp, CH2, DC2 in same ch2 sp, CH5) 5X, SL in 3rd ch of original ch3
Round 4: SL into ch2 sp, CH3, DC in ch2 sp, CH2, DC2 in same ch2 sp, *CH1, (DC, CH1)5X in ch5 sp, Ch1, DC2 in ch2 sp, CH2, DC2 in ch2 sp, repeat from * 5X, (DC, CH1)5X in ch5 sp, SL in 3rd ch of original ch3
Round 5: SL into ch2 sp, CH3, DC in ch2 sp, CH2, DC2 in same ch2 sp, *CH1, SK Ch1, (DC1 in next ch1 sp, CH1, DC1 in same ch1 sp, CH1) 4X, CH1, DC2 in ch2 sp, CH2, DC2 in same ch2 sp, repeat from * 5X, CH1, SK ch1, (DC1, in ch1 sp, CH1, DC1, in same ch1 sp, CH1) 4X,  SL in 3rd ch of original ch3
Round 6: SL into ch2 sp, CH3, DC in ch2 sp, CH2, DC2 in same ch2 sp, *CH1, SK ch1, (SC1 in next ch1 sp, CH3) 6X, SC1 in next ch1 sp, CH1, DC2 in ch2 sp, CH2, DC2 in same ch2 sp, repeat from * 5X, CH1, SK ch1, (SC1 in next ch1 sp, CH3) 6X, SC1 in next ch1 sp, CH1, SL in 3rd ch of original ch3
Round 7: SL into ch2 sp, CH3, DC in ch2 sp, CH2, DC2 in same ch2 sp, *CH1, (SC1 in next ch3 sp, CH3) 5X, SC1 in next ch3 sp, CH1, DC2 in ch2 sp, CH2, DC2 in same ch2 sp, repeat from * 5X, CH1, (SC1 in next ch3 sp, CH3) 5X, SC1 in next ch3 sp, CH1, SL in 3rd ch of original ch3
Round 8: SL into ch2 sp, CH3, DC in ch2 sp, CH2, DC2 in same ch2 sp, *CH1, (SC1 in next ch3 sp, CH3) 4X, SC1 in next ch3 sp, CH1, DC2 in ch2 sp, CH2, DC2 in same ch2 sp, repeat from * 5X, CH1, (SC1 in next ch3 sp, CH3) 4X, SC1 in next ch3 sp, CH1, SL in 3rd ch of original ch3
Round 9: SL into ch2 sp, CH3, DC in ch2 sp, CH2, DC2 in same ch2 sp, *CH1, (SC1 in next ch3 sp, CH3) 3X, SC1 in next ch3 sp, CH1, DC2 in ch2 sp, CH2, DC2 in same ch2 sp, repeat from * 5X, CH1, (SC1 in next ch3 sp, CH3) 3X, SC1 in next ch3 sp, CH1, SL in 3rd ch of original ch3
Round 10: SL into ch2 sp, CH3, DC in ch2 sp, CH2, DC2 in same ch2 sp, *CH1, (SC1 in next ch3 sp, CH3) 2X, SC1 in next ch3 sp, CH1, DC2 in ch2 sp, CH2, DC2 in same ch2 sp, repeat from * 5X, CH1, (SC1 in next ch3 sp, CH3) 2X, SC1 in next ch3 sp, CH1, SL in 3rd ch of original ch3
Round 11: SL into ch2 sp, CH3, DC in ch2 sp, CH2, DC2 in same ch2 sp, *CH1, SC1 in next ch3 sp, CH3, SC1 in next ch3 sp, CH1, DC2 in ch2 sp, CH2, DC2 in same ch2 sp, repeat from * 5X, CH1, SC1 in next ch3 sp, CH3, SC1 in next ch1 sp, CH1, SL in 3rd ch of original ch3
Round 12: SL into ch2 sp, CH3, DC in ch2 sp, CH2, DC2 in same ch2 sp, *CH1, SC1 in next ch3 sp, CH1, DC2 in ch2 sp, CH2, DC2 in same ch2 sp, repeat from * 5X, CH1, SC1 in next ch3 sp, CH3, SC1 in next ch3 sp, CH1, SL in 3rd ch of original ch3
Round 13: SL into ch2 sp, CH3, DC in ch2 sp, CH2, DC2 in same ch2 sp, *CH1, DC2 in next ch2 sp, CH2 DC2 in same ch2 sp, repeat from * 5X, SL in 3rd ch of original ch3

*Stuff your pumpkin at this point. I used some black tulle, but you could use basic fiber fil or fabric scraps or whatever, just keep in mind that you will be able to see the filling.

Round 14: CH5, *SK(dc, ch2, dc2) DC in next dc, CH2, repeat from * 4X, SL in 3rd ch of original ch5, fasten off leaving about a 3 foot tail.

Thread the yarn needle with the 3' tail, then push the needle up through the middle of the pumpkin and then around one of the sides and back into the pumpkin. This exaggerates the pumpkin shape. Continue doing this until all of the indents are created, there should be 6. 
Kit's Crafts - Doily Pumpkin Chart
Curly Cues (make 2):
CH to desired length, SC2 in the 2nd ch from the hook, *SC3 in the next ch, SC2 in the next ch, repeat from * until you reach the end of the ch, fasten off, leaving a tail long enough to sew to pumpkin.

Leaf:
For the leaf, I modified a pattern I found on Pinterest. The original seemed a little large and was in another language, but the method is good. The picture below is from that same source and, although it is of the bigger leaf, the picture illustrates how you will crochet the leaf.

Row 1: CH7, SC in the 2nd ch from the hook, SC in remaining 5 chs, CH3, SC5 along the back of the original ch7, CH2, turn
Row 2: SC in the next 5 scs, SC5 in ch3 sp, SC in the next 3scs, CH2, turn
Row 3: SC in next 5 scs, SC3 in next sc, SC in next 6 scs, CH4, turn
Row 4: SC in third and fourth ch from hook, SC in the next 3 scs, CH1, turn
Row 5: SK the first sc, SC in the next 4 scs, CH2, turn
Row 6: SC in the next 4 scs, SC3 in the ch1 sp, SC in the next sc, CH1, turn
Row 7: SK the first sc, SC in the next 6 scs, CH2, turn
Row 8: SC in the next 6 scs, SC2 in the ch1 sp, SC in the next sc, SK1 sc, SC in the next 6 scs, CH4, turn
Row 9: SC in third and fourth ch from hook, SC in the next 3 scs, CH1, turn
Row 10: SK the first sc, SC in the next 4 scs, CH2, turn
Row 11: SC in the next 4 scs, SC3 in the ch1 sp, SC in the next sc, CH1, turn
Row 12: SK the first sc, SC in the next 6 scs, CH2, turn
Row 13: SC in the next 6 scs, SC2 in the ch1 sp, SC in the next sc, SK1 sc, SC in the next 6 scs, CH4, turn
Row 14: SC in third and fourth ch from hook, SC in the next 3 scs, CH1, turn
Row 15: SK the first sc, SC in the next 4 scs, CH2, turn
Row 16: SC in the next 4 scs, SC2 in the ch1 sp, SC in the next sc, SK1 sc, SC in the next 6 scs, CH4, turn
Row 17: SC in third and fourth ch from hook, SC in the next 3 scs, CH1, turn
Row 8: SK the first sc, SC in the next 4 scs, CH2, turn
Row 19: SC in the next 4 scs, SC2 in the ch1 sp, SC in the next sc, SL in the next sc and fasten off leaving a long enough tail to sew the leaf to the pumpkin.

****I wrote the leaf pattern after I had made it, instead of while I was making it and haven't had a chance to really test the leaf, so if you see issues PLEASE email me at kitscrafts2012@gmail.com. THANK YOU!!!
Doily Pumpkin Leaf - Kit's Crafts

You might also like:

Picture
Picture
Picture
Picture

Where I partied:

Photobucket
 photo TGIF_zps40a588c0.png
20 Comments

Broomstick Bag

8/29/2013

6 Comments

 
Over the summer, I have gone swimming quite a bit with my little one. Once I am at the pool, I always think, "Shoot, I should have brought some toys!" A few weeks back I thought, "I should really get a mesh bag to take those toys in..." Then I thought, "Why buy one when I can make one?!" And thus, the broomstick bag was created!
Kit's Crafts - Broomstick Bag, #FreeCrochetPattern
I made my bag with plarn (yarn from plastic bags), but you could just use a chunky yarn. Here is a great tutorial on how to make plarn from Plastic Bag Crafts. The handle is based on the handle used for the Cluster Stitch Recycled Gift Bag.

Materials:

15 - 20 Plastic Grocery Bags made into plarn
N (10 mm) Hook
Size 13 (9.0 mm) Knitting Needles

Abbreviations:
CH = Chain
SC = Single Crochet
SL = Slip Stitch
ST = Stitch
YO = Yarn Over
SK = Skip Stitch

Directions:
CH 31
Row 1: SC in the 2nd ch from the hook. SC across, then SC along the back of the chs and SL into the 1st sc, CH1
Row 2: SC around again, SL in first sc, CH1 (60 STS)
Row 3: Pull the loop on your hook to make it big, then insert your knitting needle into the loop, *insert your hook into the back loop of the next stitch and pull up a loop, then put that loop onto the needle, repeat from * in the next 28 STS, then, continue on the other side repeating from * to * but putting the loops on the other needle. You should have 30 loops on each of your needles and no loops on your hook. Turn.
Row 4: Carefully insert your hook into 3 loops on your needle, YO and pull through the 3 loops, CH1, holding the loops in place, SC3 in through the 3 loops, *carefully insert your hook into the next 3 loops on your needle, YO and pull through the 3 loops, holding the loops in place, SC3 through the 3 loops, repeat from * all around, SL into the first sc, CH1, turn
Rows 5-16: Repeat rows 3 and 4
Row 17: SC20 in the back loops only, CH30, SK 2sts, SC28 in the back loops only, CH4, SK 2sts, SC8, SL in first sc, CH1 (the skipped stitches should be in the center of the front and back of the bag)
Row 18: SC in both loops of each st all around, including in sc in the chs, SL into first st, fasten off (90 STS)
Kit's Crafts - Broomstick Bag, FREE pattern
6 Comments

Broomstick Lace Headband

7/10/2013

4 Comments

 
I love the #broomsticklace stitch. It is so easy and quick to do, furthermore, with this pattern, it couldn't be simpler. Basically, this headband just stacks the stitches, so you can make it whatever length you like. There isn't a gauge so you can use whatever size hook you want and whatever size stick to create the stitch. Please enjoy! Oh, and don't forget to enter the #Giveaway, only 3 days left until it ends!
Kit's Crafts - Broomstick Lace Headband #FreeCrochetPattern
The name of the broomstick lace stitch comes from the fact that originally it was created using a broomstick. Basically all you need to create this stitch is a stick of some sort, however, most often, people employ a large knitting needle. When I have used a smaller crochet hook for the single crochets, I have used the end of a large crochet hook. Anything around the house will do (a tutorial on Repiny uses a Popsicle stick), just try out one stitch and see how you feel about the proportions. If you would like a video for this stitch, there is a great one by Sandra Roarty. 

Print the pattern

Materials:
10 - 20 yards Yarn of your choice
Hook recommended by yarn manufacturer
Hook/Knitting Needle/Stick with a diameter at least 2X the diameter of your hook, preferably larger
Button that will fit through one of the stitches

Abbreviations:
CH = Chain
SC = Single Crochet
ST = Stitch
YO = Yarn Over

Pattern:
Row 1: CH6, SC in the 2nd ch from the hook, SC in remaining 4sts 
Row 2: Pull the loop on your hook to make it big, then insert your stick into the loop, *insert your hook into the next stitch and pull up a loop, then put that loop onto the stitck, repeat from * with remaining 3sts. You should have 5 loops on your stick and no loops on your hook.
Row 3: Carefully insert your hook into the 5 loops on your stick, YO and pull through the 5 loops, CH1, holding the loops in place, SC5 in through the 5 loops

Repeat rows 2 and 3 until you reach your desired length and bind off. Keep in mind that your yarn will probably stretch at least a little bit, so ending 1 or 2 stitches early wouldn't be the worst idea. Sew on button and weave in loose ends.
Kit's Crafts - Broomstick Lace Crochet
I shared this post on the Friday Follow Along over at Leah Inspired. Those of you with blogs, link up and follow along and if you don't have a blog, just go check out the other great blogs linked up over there.
 photo TGIF_featured_zpsbe37ee90.png“ />
4 Comments

Shell Dress

5/1/2013

2 Comments

 
A couple months ago I was at Hancock Fabrics and came across the cutest toile fabric in the remnant bin. I couldn't resist despite there only being 1/4 of a yard, but that lovely fabric sat for at least a month before I was able to designate a cute enough project for it. So, here you go. It is a crochet dress with a fabric skirt. Essentially, I treated this pattern like I would treat a fabric dress, so I don't have an exact pattern, but rather a method. I'm not going to lie, there is a lot of measuring and math involved, but nothing too complicated.
Kit's Crafts - Shell Dress #FreeCrochetPattern
Materials:
1 Skein Loops & Threads Impeccable yarn in Chocolate
G Hook
1/4 Yard desired fabric (pre wash and iron)
3/8 Yard matching lace (pre wash and iron)
Fray Check
Sewing machine, thread, pins
Needle for hand sewing

Method:
To start with, I found a crochet chart for the pretty shell stitch at My Picot and I crocheted up the whole chart to determine how wide a repeat would be. Then I measured my daughter at her waist, chest and hips and used the largest measurement as a gauge for the circumference of the bodice. Ok, at this point I have the measurement/gauge of the chart (6.5") and I have the circumference/length that I need to make the bodice so it fits (19.5"). So, to determine how many repeats to make, I divided the bodice by the stitch (19.5"/6.5"=3). I was lucky that it came out to a whole number. If yours doesn't, round up. So, the chart requires 25 chains per repeat of the whole chart and I need 3 repeats of that chart to get my desired width, which means I need 25x3=75. And there you go, that is the base, 75 chains. I know this sounds like a lot of work, but it really is easy, just take your time. (P.S. this is crocheted from the bottom up)

Now it is time to consider armholes. I went back to my daughter and measured from where I wanted the bodice to end to where I wanted the armhole to start (7") and just continued in the chart pattern until I reached that point. Then, I put the two sides together to form a circle and centered them and marked where I wanted the arm holes to start and end based on the chart repeats. I continued the chart until I reached a marker and turned back. After a full vertical repeat, I continued only half of the width to create the neck hole. Then, I picked up at the next marker and continued in this fashion to create the shape in the picture.

To connect the shoulders, overlap the front and back shoulder of each side then slip stitch with your hook through both layers. Weave in all loose ends.

I did go back and exaggerate the shells along the bottom by basically doing the shell pattern in the chart along the bottom.

To make the sleeves, I kind of winged it, but here is what I wrote down, let me know if you need clarification:

SC = Single Crochet
DC = Double Crochet
SK = Skip
STS = Stitches
FPDC = Front Post Double Crochet

Starting with the left sleeve, pull up a loop 4 stitches to the right of the seam, SC, 5 DC around 2 stitches to the left of the seam, SK 2 stitches to the left of the seam, SC in next 2 STS, CH 1 turn
Row 1: (FPDC, DC in the same DC)4X, FPDC, SK SC, SC in next 2 on the bodice, CH1, turn
Row 2: (FPDC, DC in the same DC, DC in next ST) 4X, FPDC, SK 2 SC, SC in next 2 on the  bodice, CH1, turn
Row 3: (FPDC, DC in next 2 STS) 4X, FPDC, SK 2 SC, SC in next 2 on the  bodice, CH1, turn
Row 4: (FPDC, DC in the same DC, DC in next 2 ST) 4X, FPDC, SK 2 SC, SC in next 2 on the  bodice, CH1, turn
Row 5 &6: (FPDC, DC in next 3 STS) 4X, FPDC, SK 2 SC, SC in next 2 on the  bodice, CH1, turn
Row 7: (FPDC, DC in the same DC, DC in next 3 ST) 4X, FPDC, SK 2 SC, SC in next 2 on the  bodice, CH1, turn
Row 8: (FPDC, DC in next 4 STS) 4X, FPDC, SK 2 SC, SC in next 2 on the  bodice, CH1, turn
Row 9: SC, (SK 2 STS, 5 DC in next STS, SK 2 STS, SC in next ST) across
Bind Off. Repeat for the right sleeve switching the right and left directions. Weave in ends

For the buttons, SC along the side you would like to overlap. Then, determine how many you would like (I did 5) then divide the length of the side by that number. Place markers on the overlapping side at the length you just got. SC until 1 ST before each marker, CH 3, SK 3 STS, then SC until 1 before the next marker and repeat. When you reach the end, CH 1 and turn. (SC, SK 2 STS, 5 DC in the next ST, SK 2 STS) across, you may need to fudge the last shell. Bind off and weave in ends.

Sew buttons to the appropriate side, matching them up with the button holes.
Kit's Crafts - Shell Dress
Now for the skirt. Start by hemming both top and bottom of your fabric. Then, measure the width of your bodice (mine is 19.5") and minus this number from the width of your fabric (45" - 19.5" = 25.5") then minus 1" for the seam allowance. This is the amount of fabric that needs to be gathered. Now, divide the number you just got (24.5) by the number of places you want to gather your fabric or each of the valleys in between the shells (24.5/7 = 3.5). With right sides together, sew the two sides of your fabric together using a 1/2" seam allowance. Measure and mark, along the top of the skirt, the width of a shell (2.5")then the last number you calculated (3.5"). Baste the gathering widths about 1/4" from the edge, leaving long tails. Gather each of the basted areas.

For the lace, cut 2 strips, perpendicular to the salvage edge, 8" wide and one that is 9". Go along one long edge with your fray check and let dry. Sew the 2 8" strips together along one of the short ends. baste along the side that is not fray checked and gather it until it is the same width as the 9" strip. Pin the gathered strip to the 9" strip, 1/2" down from the side that is not fray checked and sew. With right sides together, pin the side short sides of the 9" strip and the 8" strip together and sew with a 1/2" seam allowance. Find the middle of the 9" strip and mark with a pin. Baste along the top of the 9" strip from the seam to the pin, then cut the thread leaving a long tail then baste from the pin back to the seam.  With the 8" lace layer facing the inside of the fabric skirt, gather the lace and fit it into the fabric skirt, matching up the pin with the center of the fabric skirt, and pin in place. Sew the lace to the skirt about 1/4" from the top.

Button up the bodice, then fit the skirt into the bodice. You may need to adjust your gathers so they match up with the valleys in between the shells. Pin in place, then hand sew the skirt to the bodice being careful not to go all the way through the bodice.
Kit's Crafts - Shell Dress, fabric skirt process
Picture
I entered this project in the All Free Crochet Stitch and Share.
2 Comments

Fox Hat

4/16/2013

4 Comments

 
In general, I don't really like eyelash yarn, but I was perusing the yarn isle at Joanns and this purple stuff was on close out for only 97¢, which I couldn't pass up. I figured I could make a little bear or something from it. When I got home, I remembered that I was planning on making character hats for my daughter to play dress up with, so I thought I would make a purple fox. I went through my stash and I didn't have a purple yarn that would match to double up the eyelash, but I did have a full skein of Caron Simply Soft in a peacock blue color. I figured you wouldn't be able to really see the blue, so I got started. After creating the base hat, I thought, this really looks like it should be a peacock, so I looked to Facebook and Google+ for a weigh in. After a few days, it was close, but the fox won out by 2 votes. So, here is a fox hat. (I have enough yarn, I may go back and make a peacock too!)
Kits Crafts - Crochet Fox Hat #FreeCrochetPattern
The sizing is a bit big for a child. It fits my head and kind of drowns my toddler, but you can adjust the sizing by using a smaller hook, or take out a row of increases and one of the rows on the length. Or you could skip more stitches when you are adding the band at the bottom.

Gauge: 2 1/2 rows x 6 stitches = 2" in double crochet of A & B
Size: Small Adult or teen

Materials:
Sizes I and G Hook
(A) 1/2 Skein (or less) Caron Simply Soft in Ocean (I think... It was a peacock blue)
(B) 1 1/4 Skein Lion Brand Fun Fur in Dark Violet
Fuzzy white worsted weight yarn and basic black worsted weight black for the face and ears
Yarn Needle
Long Pins
Safety Pins

Abbreviations:
CH = Chain
SC = Single Crochet
DC = Double Crochet
ST = Stitch
SK = Skip Stitch
SL = Slip Stitch
DC2tog = Double Crochet 2 stitches together
SC2tog = Single Crochet 2 stitches together

Hat:
Using the I hook and a strand of A and B, create a magic loop using 2 fingers, CH 2, 11 DC in loop, close loop and place a marker
Row 1: 2 DC in second CH, 2DC around
Row 2: (2 DC next DC, DC in next DC) around (36 STS)
Row 3: (2 DC next DC, DC in next 2 DC) around (48 STS)
Row 4: DC around
Row 5: (2 DC next DC, DC in next 3 DC) around (60 STS)
Leave marker in the next row to make counting rows easier, DC around for 7 rows, then do one row of SC, SL, Bind off and remove marker.

Now for the band, like I said previously, if you want it to be a bigger size, then catch every SC on the hat, or you could make it smaller by skipping more SCs on the hat.
Using the G Hook and only yarn A, pick up a loop through one of the SC in the last row, CH 5, SC in second CH from the hook, SC 3x
Rows: *SK the next SC on the hat, SL in the next SC on the hat, turn with the yarn in back (DON'T CH 1), SC in back loops only, CH 1, SC in back loops only, repeat from * around the hat and bind off, leaving a long enough tail to whip stitch the two ends together.

Weave in loose ends.

Outer Ear:
Using the I hook and a strand of A and B, CH 16, DC in third CH from hook, DC across, CH 2, turn
Rows: *SK first ST, DC in next, DC to last two STS, DC2tog, CH2, turn, repeat from * until only three STS remain, SK first ST, DC2tog and bind off
Repeat for second ear.

Inner Ear:
Using the I hook and the fuzzy white yarn, CH 12, DC in third CH from hook, DC across, CH 2, turn
Rows: *SK first ST, DC in next, DC to last two STS, DC2tog, CH2, turn, repeat from * until only three STS remain, SK first ST, DC2tog and bind off
Repeat for second ear.

Face:
*As a side note, I tried to leave enough of a tail when I started and at each of the bind offs to sew the face to the hat
Using the I hook and the fuzzy white yarn, CH20, 2 SC in second CH from hook, SC to last CH, 2 SC, CH 1, turn
Rows 1 - 5: 2 Sc in first SC, SC to last ST, 2 SC in last ST, CH 1, turn (28STS)
Row 6: 2 SC in first ST, SC in next 12 STS, CH 1, turn
Row 7: SC across, CH 1, turn
Rows 8, 10, & 12: 2 SC in first ST, SC in next 13 STS, CH 1, turn
Rows 9, 11, & 13: SK first ST, SC across, CH 1, turn
Rows 14 - 16: SC in next 14 STS, CH 1, turn
Rows 17, 19, 21, 23, & 25: SK first ST, SC to last 2 STS, SC2tog, CH 1, turn
Row 18: SC in next 12 STS, CH 1, turn
Row 20: SC in next 10 STS, CH 1, turn
Row 22: SC in next 8 STS, CH 1, turn
Row 24: SC in next 6 STS, CH 1, turn
Row 26: SC in next 4 STS,  Bind off

Pull a loop one SC from the peak just made, SC to last ST, 2SC in last ST, CH 1, turn
Row 7: SC across, CH 1, turn
Rows 8, 10, & 12: SC in next 13 STS, 2 SC in last ST, CH 1, turn
Rows 9, 11, & 13: SC in next 11 STS, SC2tog, CH 1, turn
Rows 14 - 16: SC in next 14 STS, CH 1, turn
Rows 17, 19, 21, 23, & 25: SK first ST, SC to last 2 STS, SC2tog, CH 1, turn
Row 18, 20, 22, 24: SC across, CH 1, turn
Row 26: SC across,  Bind off

Eyes:
Using the G hook and the black yarn, CH 10, SC in second CH from the hook, SC across, CH 1, turn
Rows 1 - 3: SK first ST, SC to last 2 STS, SC2tog, CH 1, turn
Rows 4: SK first ST, SC2tog, bind off, leaving a tail long enough to sew eyes to face
Repeat for the second eye

Nose:
Using the G hook and the black yarn, create a magic loop, 8 SC in the loop, close loop, SL to join
Row 1: CH 1, 2 SC around, SL into CH to join, bind off leaving a long enough tail to sew to hat

Assemble:
Start by placing the face on the hat where you would like it, then pin it to the hat using long pins. Begin at the bottom of the face with the tail from your original chains and begin to whip stitch around the hat. I tied my yarn when I reach a bind off or cast on, then continued with that tail. 

Place and pin the eyes and nose to the face, then whip stitch in place.

Line up the bottom of each inner ear with each outer ear and use the tail of the inner ear to attach, taking care not to go completely through the outer ear.

Place the ears about 1" from the side of the face, with one corner following the angle of the eyes and the other corner lined up with the corner of each peak of the face. You will need to curve the ear a bit, which gives it more of a natural look, then safety pins to attach each ear to the hat and use the tail to whip stitch the ears on, making long stitches to prevent the ears from flopping around.

Weave in any loose ends.
4 Comments
<<Previous
    Kit's Crafts
    Hey there! I'm Kristin, aka Kit. Here is just a peek into my crafting mind. I hope you find something to spur your creativity!
    Instagram

    Kit's Crafts Shop

    Popular Posts

    Picture
    Picture
    Picture
    Picture
    Picture
    Picture

    RSS Feed

    Picture
    Kit's Crafts
    Picture
    The Yarn Box

    Featured Here

    Picture
    Moogly
    Picture

    Categories

    All
    About
    Baby
    Baking
    Bio
    Caramel
    Child
    Chocolate
    Christmas
    Cooking
    Crochet
    Decor
    Dessert
    Dress
    Free Knit/crochet Pattern
    Free Sewing Pattern
    Interior Design
    Knitting
    Link Party
    Materials
    Pattern
    Quiet Book
    Quiet Book
    Recipe
    Selling Handmade Goods
    Sewing
    Spats
    T Shirt
    Tutorial

    Archives

    January 2020
    July 2019
    November 2018
    September 2018
    August 2018
    July 2018
    May 2018
    April 2018
    February 2018
    January 2018
    April 2016
    September 2015
    March 2015
    February 2015
    November 2014
    October 2014
    September 2014
    August 2014
    July 2014
    June 2014
    May 2014
    April 2014
    March 2014
    February 2014
    January 2014
    December 2013
    November 2013
    October 2013
    September 2013
    August 2013
    July 2013
    June 2013
    May 2013
    April 2013
    March 2013
    February 2013
    January 2013
    December 2012
    November 2012
    October 2012

Powered by Create your own unique website with customizable templates.